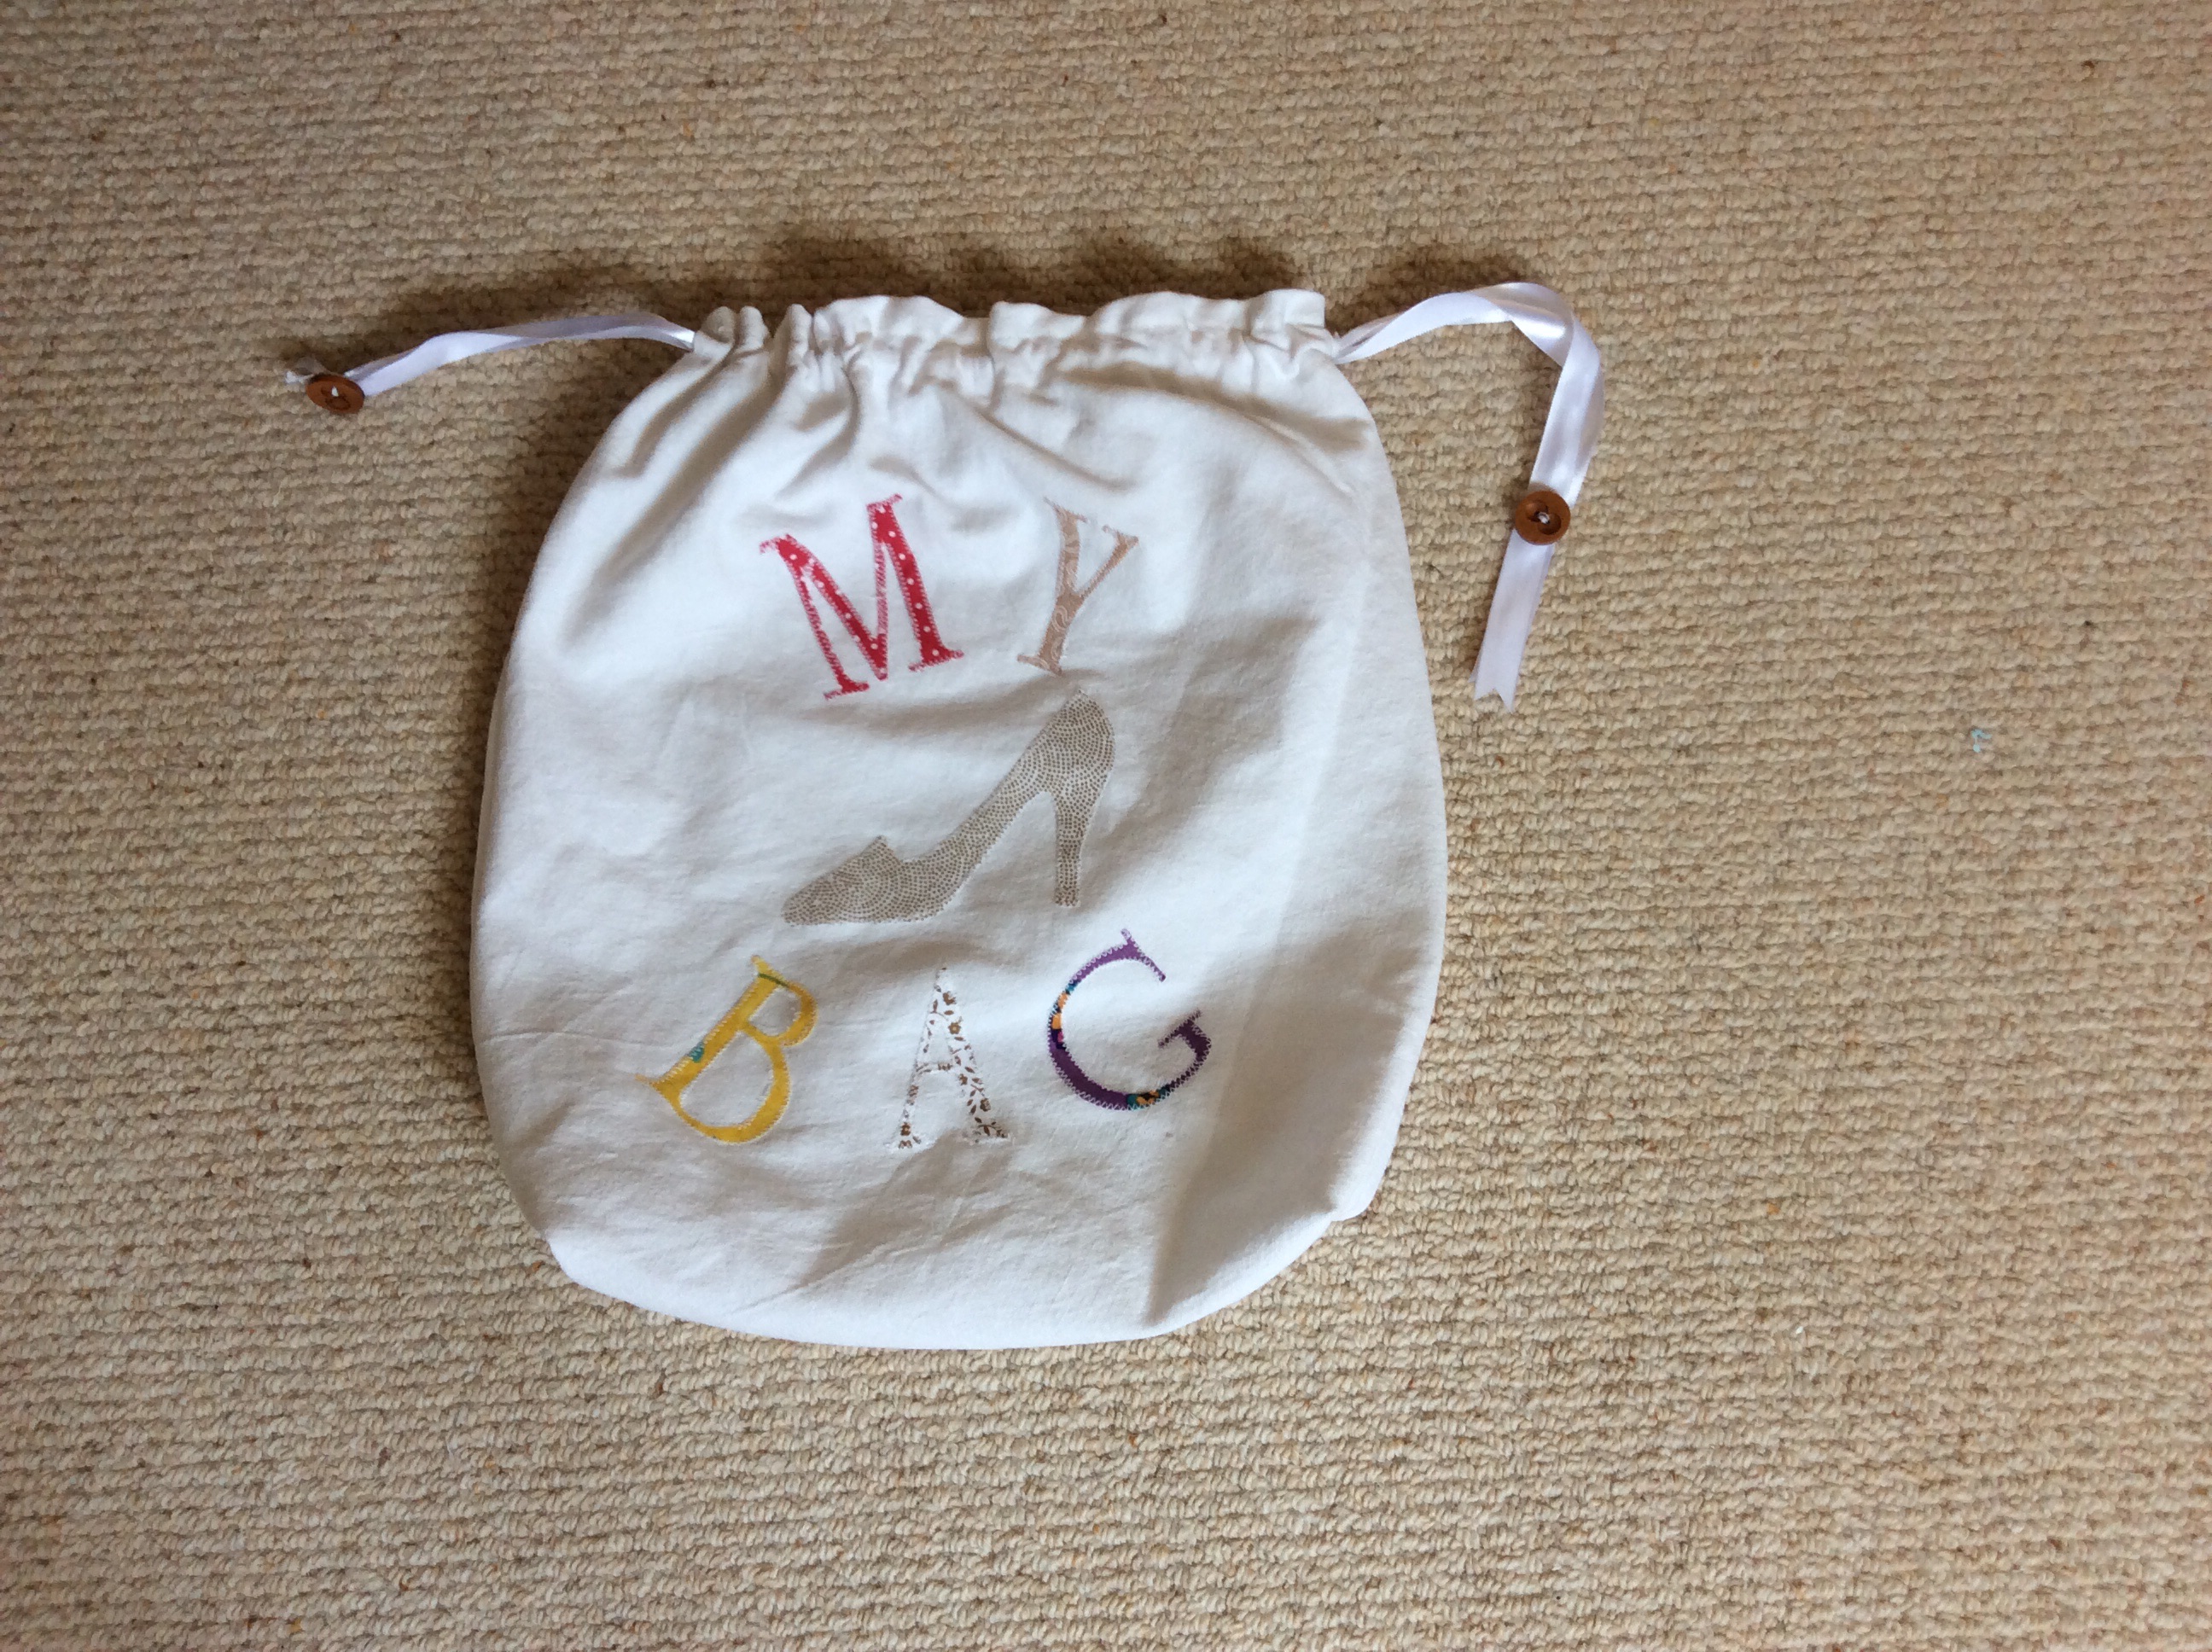
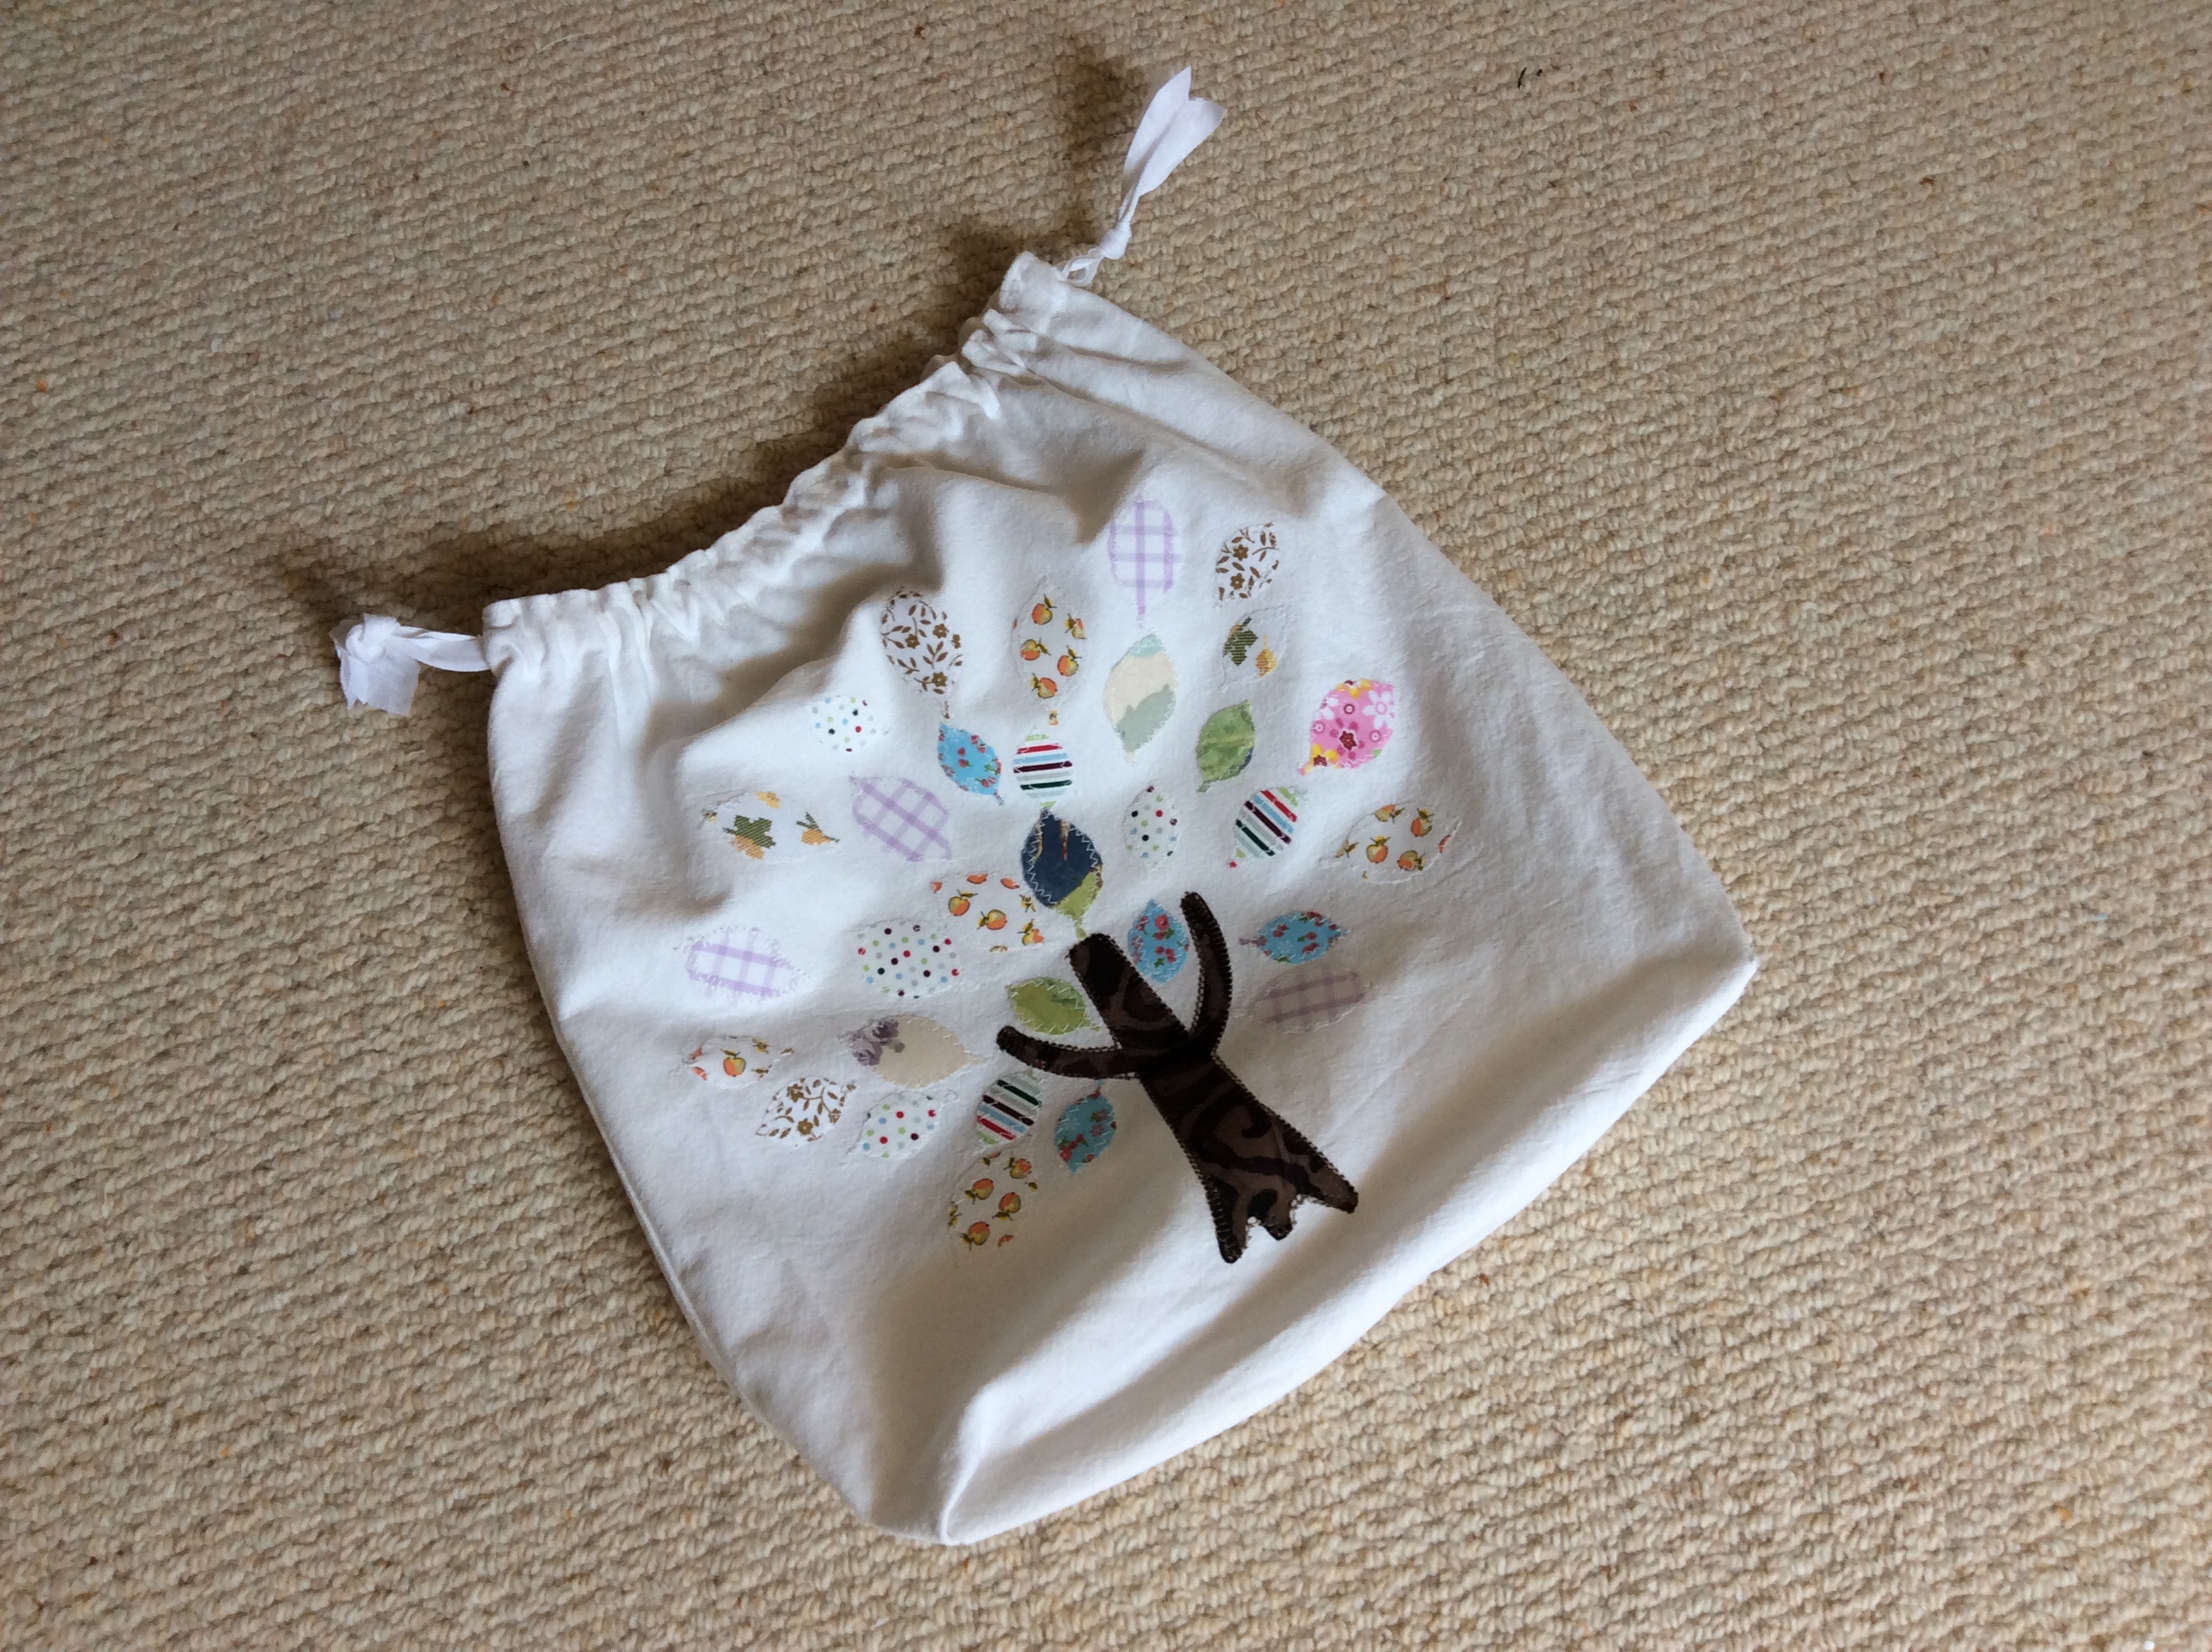
An old tablecloth up cycled into a shoe bag and a something else drawstring bag with appliqué decoration.
i used my new ScanNCut to transform scraps into appliqué shapes. Heat and bond lite gives lightweight cotton enough support for the machine to cut fine lines.
after ironing the shapes into position on the bag front panels I used zig zag to stitch them down.
Then I cut a matching back panel and pinned the panels top sides facing. I marked a gap for the drawstring channel between 2 and 5 cm from the top of each side and sewed around the rest of the sides and bottom. I boxed the corners to give a bit more shape to the bag as well.
rather than lining this heavy fabric I just ironed a 0.5 hem at the top and used a length of 4 cm bias binding to form the drawstring casing as well as fix the hem down. I zig zagged each side of the bias binding in place to make sure it was firmly attached.
I folded two more lengths of the same binding for each bag as I didn’t have any ribbon long enough for the drawstrings. These were pinned to a safety pin and threaded through the gaps in the seams and around the casing, one from each side seam. Finally each length of binding was knotted to secure it, on one I sewed some buttons to make the knot even firmer.