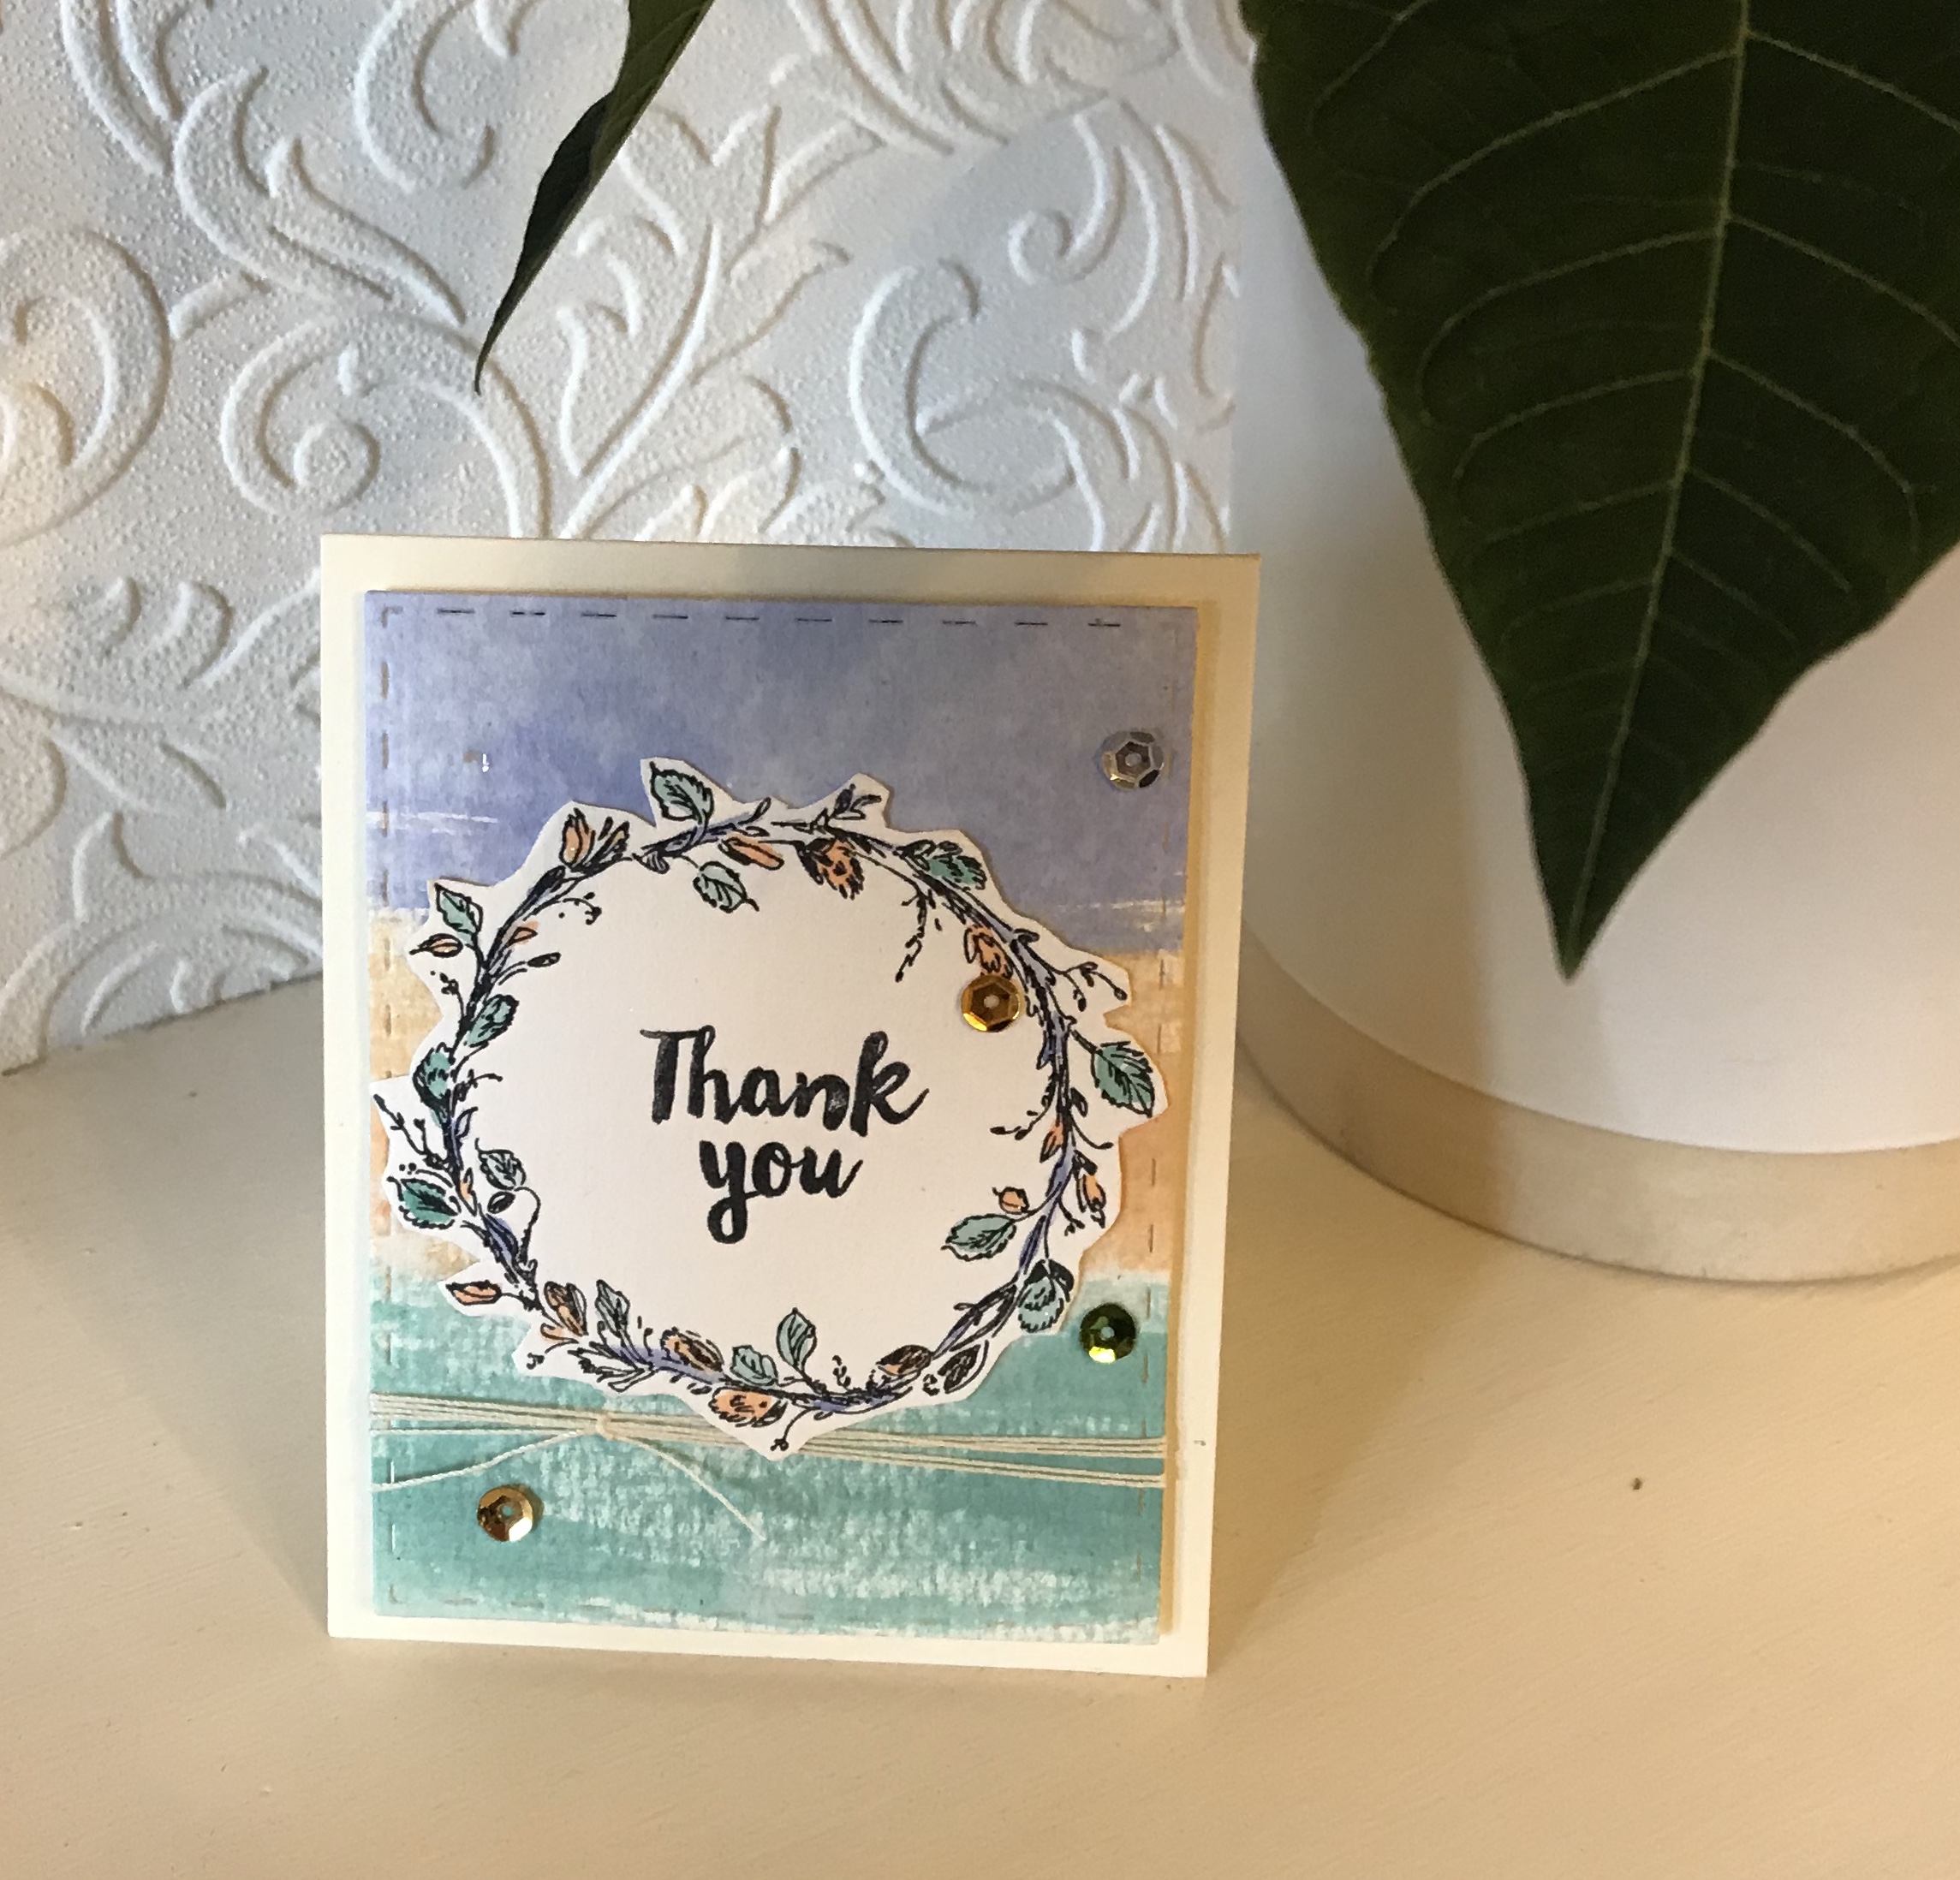
 First steps in watercolour folloing a Crafts Beautiful outline
  determined to expand my techniques so used the freebies and copied a layout from the march issue …
I stamped the wreath and greeting with stazon on watercolour paper then cut an A2 panel of the same watercolour paper. I dug out three colour of distress inks and tapped each on an acrylic block to use as a palette) . I misted the paper and the block with water then brushed bands of ink across the paper using the largest brush I had in the craft room. I then cut the panel with one of my stitched rectangle dies, tied some jute coloured thread around, mounted it in fun foam and stuck that to an A2 card base.
I fussy cut the wreath, water coloured the design using the same three distress inks ( I don’t have a water brush so used an ancient wink of Stella to pick up the ink remnants from the acrylic block) . I stuck that on the panel and added a few sequins in the same colour range for finish
inside the card is blank