
From a gifted Fat Face kit, my first needlefelt make.
I did need the guidance of a master in the art but feel absurdly proud of Pete the Penguin.
Sufficient wool in the kit to make a brother…oh no, another craft to clutter up the house.

From a gifted Fat Face kit, my first needlefelt make.
I did need the guidance of a master in the art but feel absurdly proud of Pete the Penguin.
Sufficient wool in the kit to make a brother…oh no, another craft to clutter up the house.
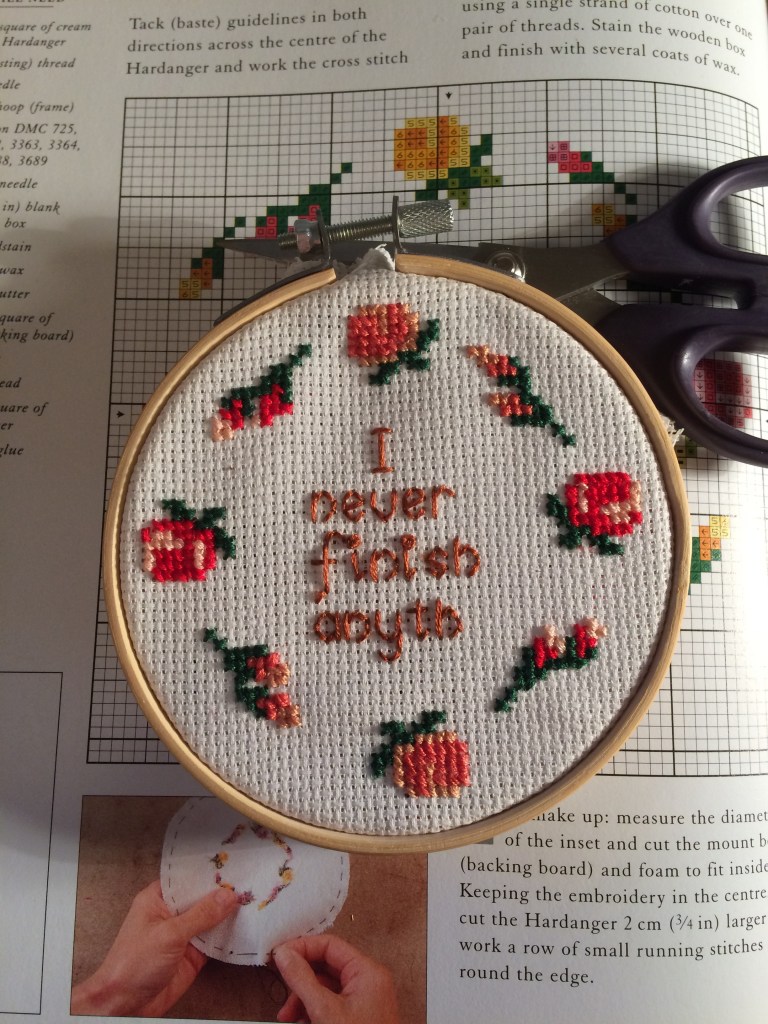
Really enjoying picking up the threads of my cross stitch past. This time I am following in the footsteps of judy dench and other embroiderers who like to subvert expectations by stitching in unexpected words or sayings. This is the only polite one I have done so far.
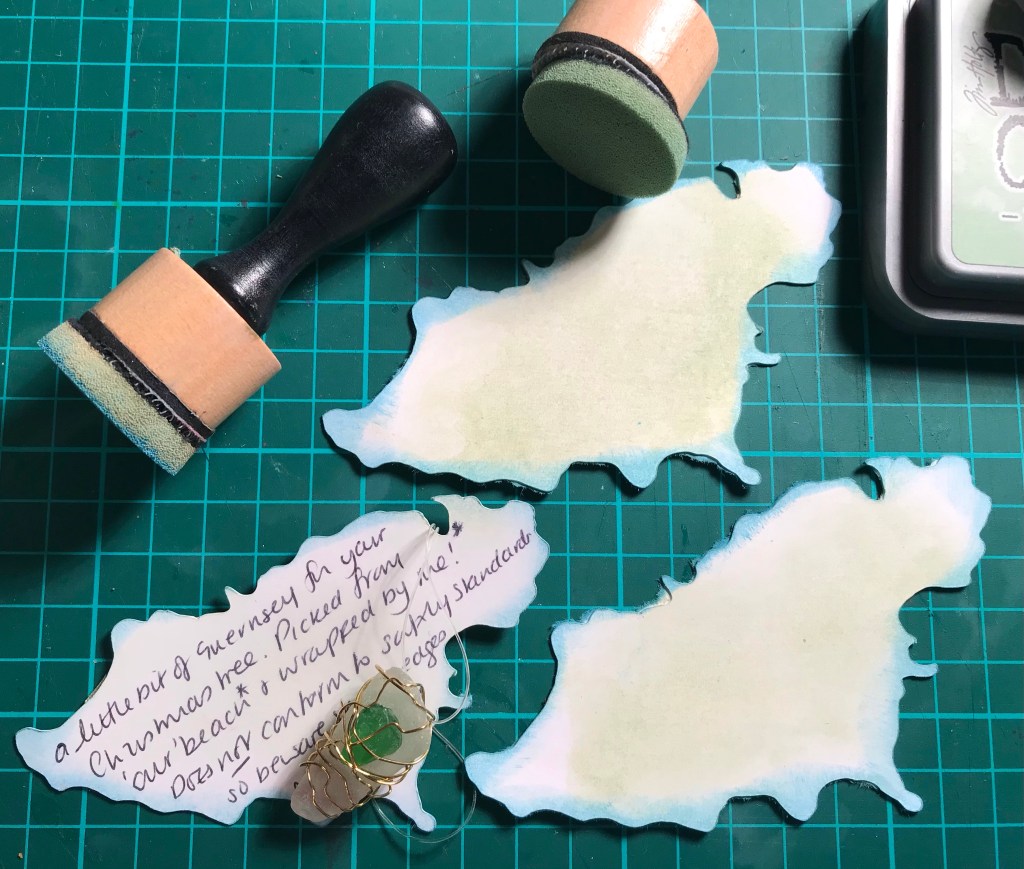
I have been wire wrapping sea glass found on a nearby beach and wanted to present them nicely, so turned to the scan n cut.
I drew an outline of where we live and scanned it in to the machine’s memory. I then resized it to hold some of my decorations and cut out just enough from sturdy white card. Before writing my message, I inked up the coastline in blue and faintly inked the land in green.
I can, in the future do tiny versions or go up to 12” wide versions for any home made crafts. It has taken me three years of playing with this machine to do what I should have thought of on day one!
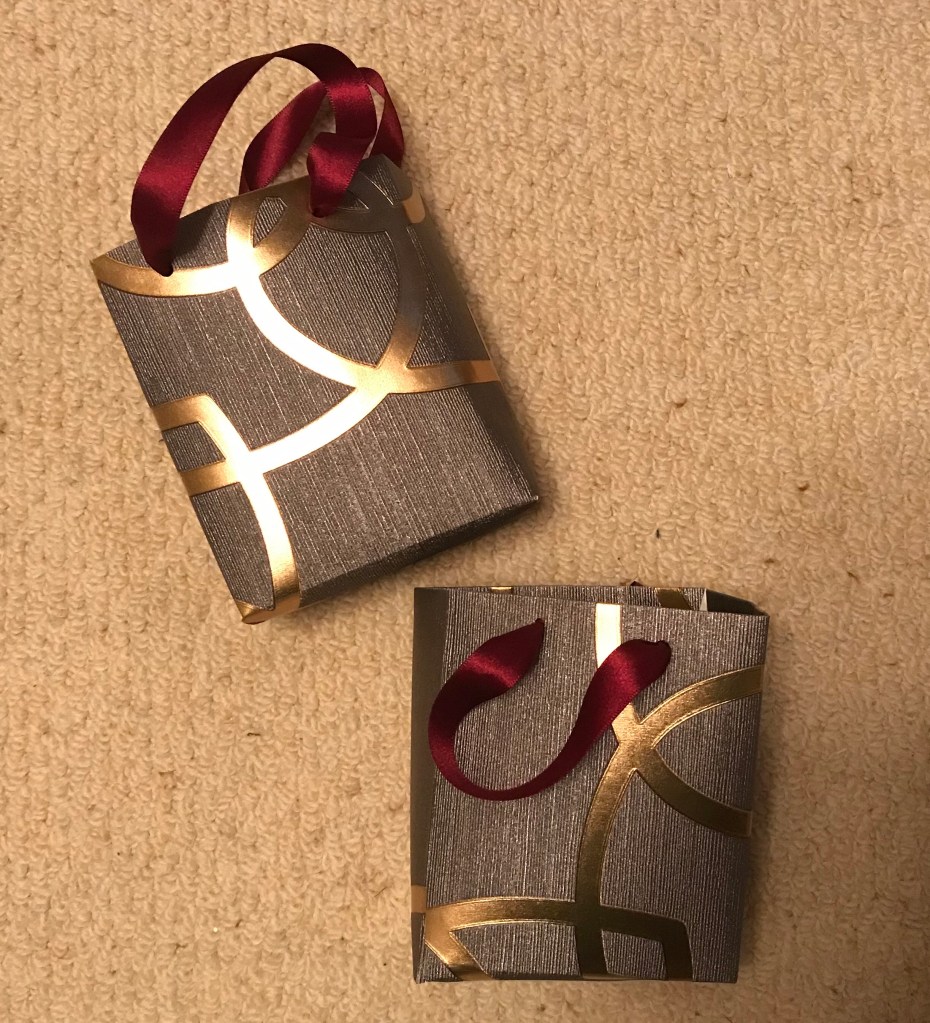
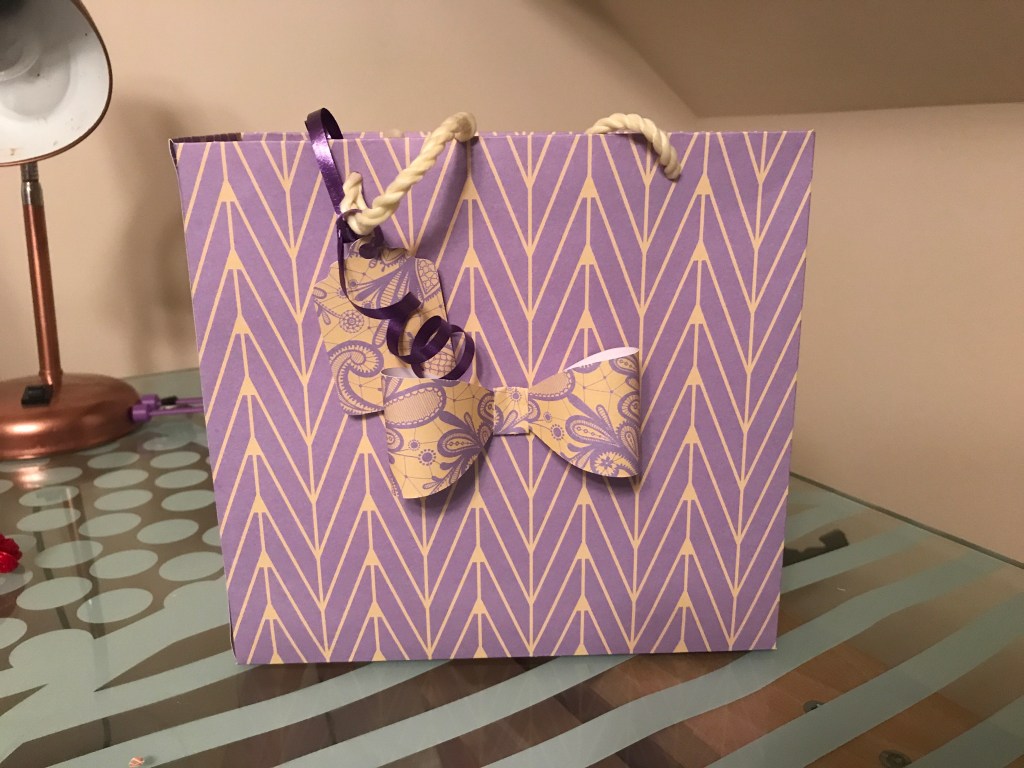
Whoops! I seem to have ordered lots of 12 x 12 paper pads before using up my considerable supplies, so spent a couple of afternoons making gift bags.
Pictured are some I made from a roll of remnant wallpaper which is also demanding to be used.
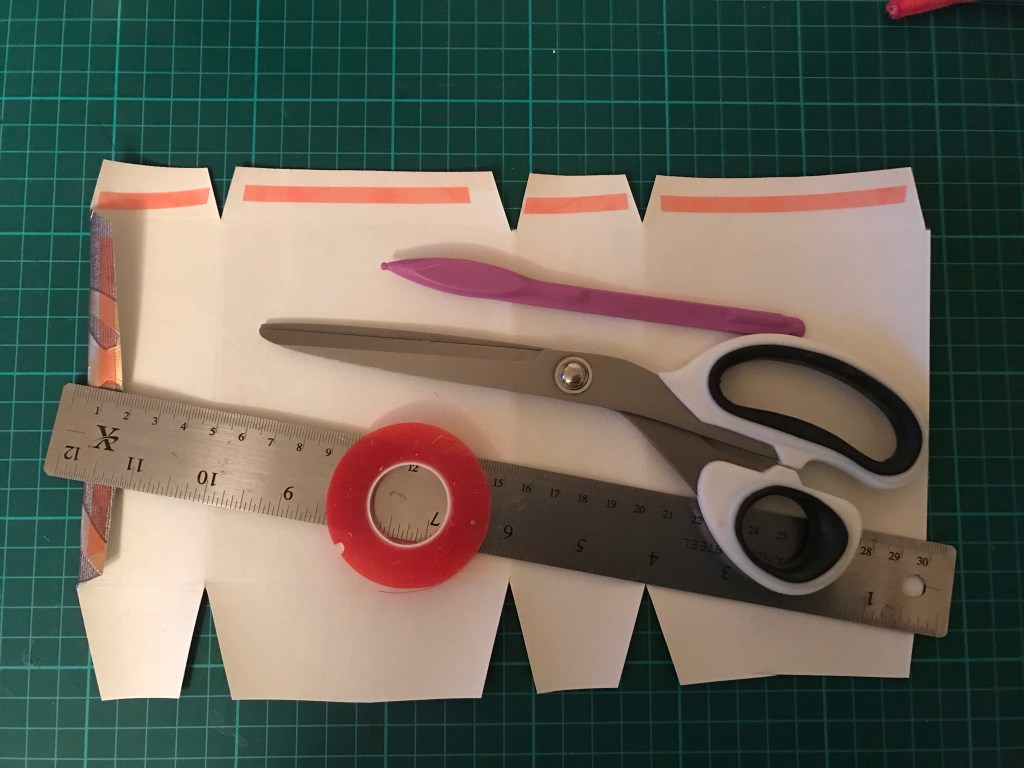
A simple formula: trim paper to 12” wide by 7” high. Score along the 12” at 1/2”, 2 1/4”, 6 1/4” and 8” then turn the paper and score at 3/4” (for a top reinforcing fold) and 5” (for the bottom) Trim out the score lines and tape as shown. bottom tape not shown.
I used red liner tape for strength and popped in a piece of card to reinforce the bottom before punching holes to thread ribbon or cord for handles.
For the 12” by 12” sheets I used the trimmed spare to make labels and bows on the scan n cut.
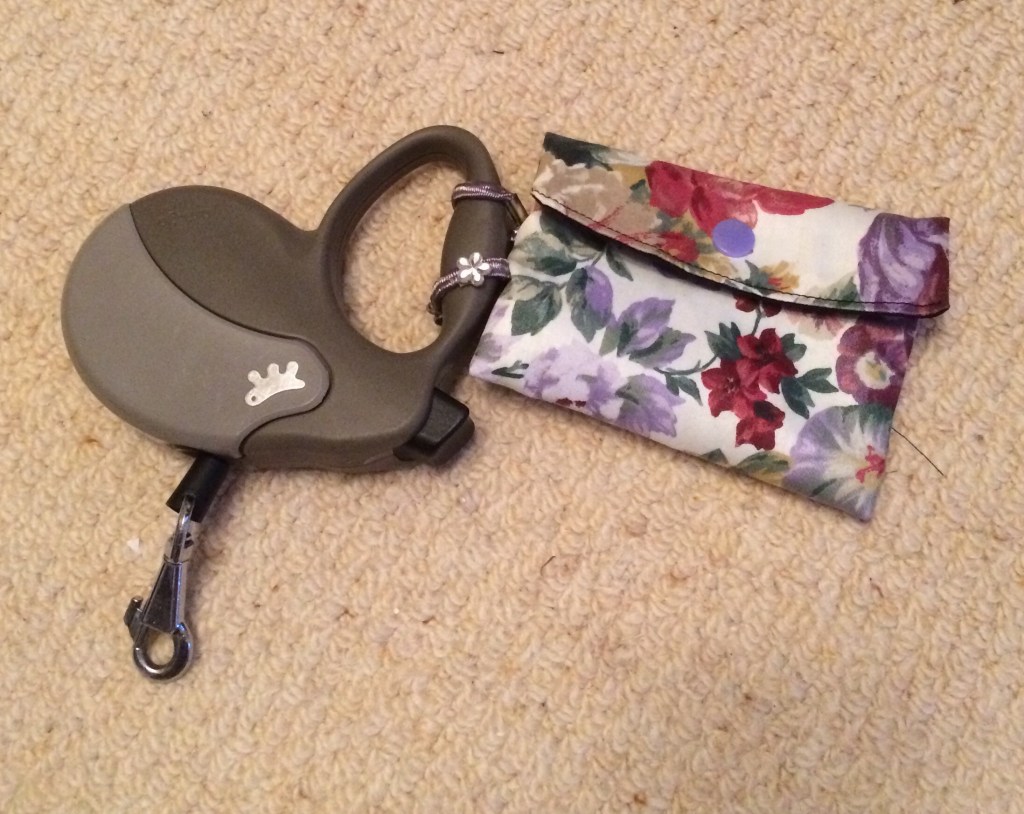
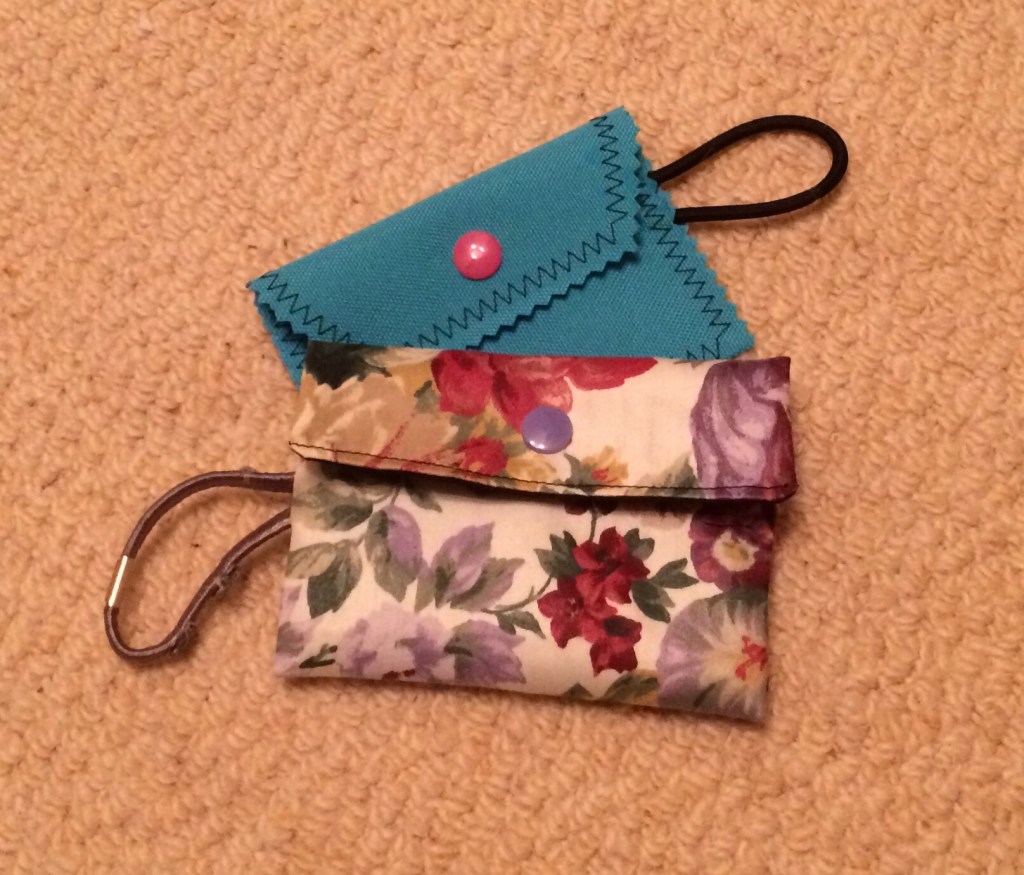
These lined pouches are made unusually following a crafts channel (Corinne Brad) tutorial. I used a pony tail band rather than the fabric loop suggested so I could stretch them around dog leashes and never forget pooh bags again.
To make sew the two short ends of lining and outer fabric rectangles together (wrong sides facing) then press over the flap to mark a crease. Sew from crease to top end on each side then manipulate fabric to fit the other seam into the crease and sew the remaining sides (leaving a turning gap in one lining side and tucking in the loop or band in one of the outer sides). This makes a weird three flapped object but when turned and pressed it is a tidy, quick clutch.
To finish I top stitched in places and put in a snap. At last, I am using my bargain bag of pony tail bands.
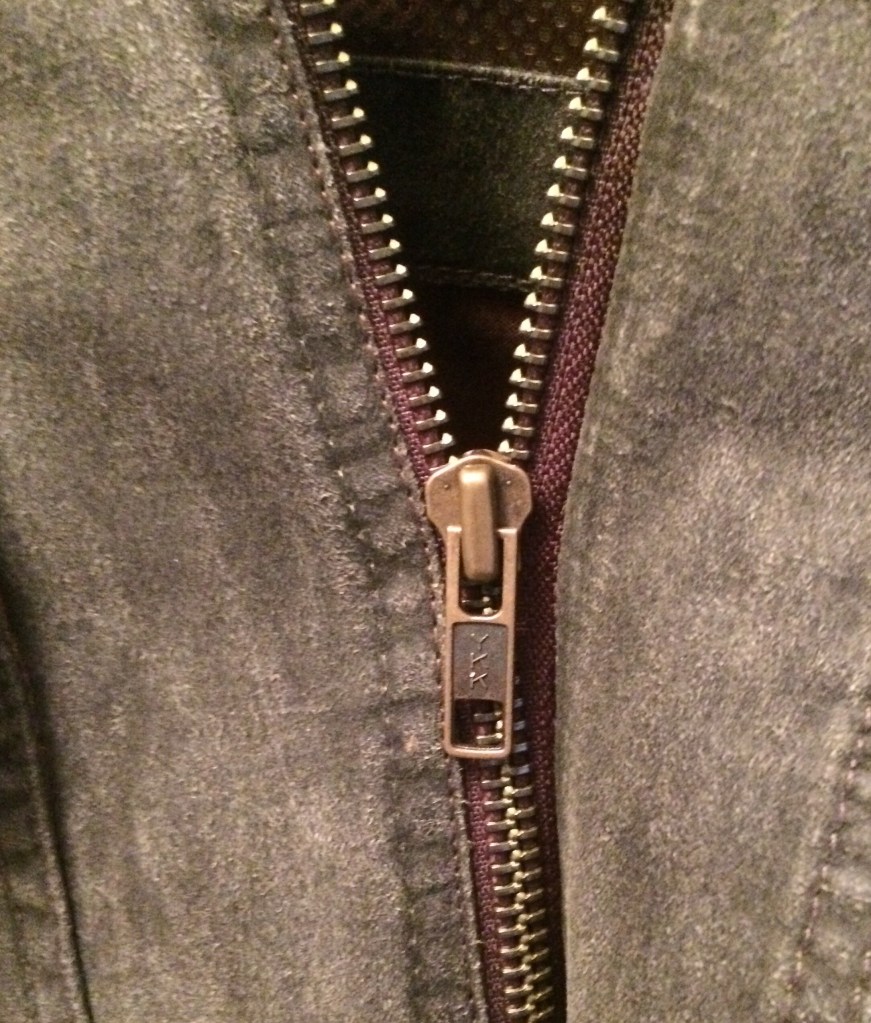
He bought this gilet when beyond my clothing surveillance. It is an old man’s jerkin and I dislike it immensely. However, when the zip broke, I took a deep breath and agreed to fix it.
I will concede it is a well put together piece of clothing (waxed, lined with lots of pockets) so I bought a heavy duty zip, removed the old zip and set about inserting it.
Two broken needles and a lot of swearing later it is done.

I set myself a task to use up lavender as part of my decluttering project. Trawling pinterest for ideas reminded me that I can stamp on fabric and that I have eyelets and buttons galore, so lots of little trimmings could be added to my fabric de-stashing effort.
But all the above only use small quantities of lavender, fabric and trim so the lavender tin, now replenished with the 2020 harvest, remains well stocked.
