custom pillow case

img_0861

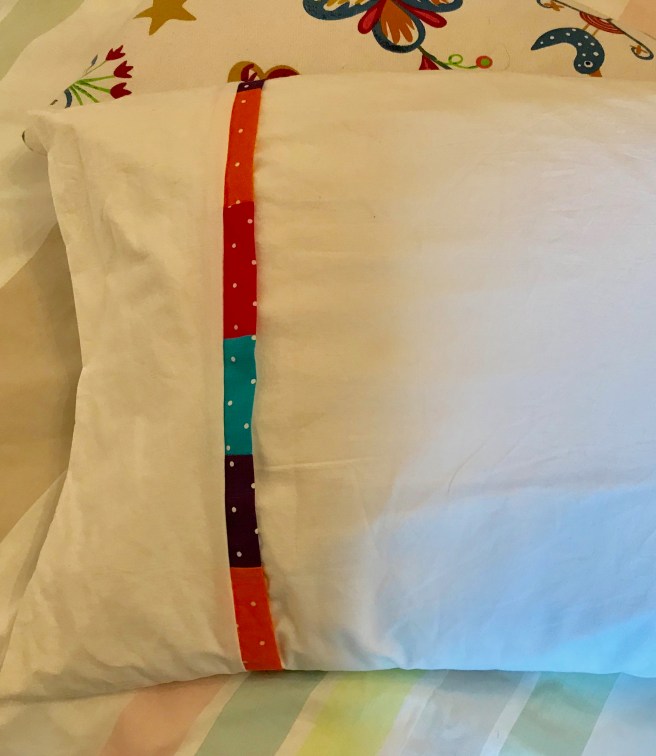
I am ridiculously proud of this make as it really is better than bought

I couldn’t find pillowcases to go with a bargain duvet cover As I had some dotty fat quarters that would complement my purchase I decided to make a trim for some custom pillowcases.

I recycled a retired duvet cover rather than buy sheeting as this was an experiment, gosh it worked out well as the duvet was good quality cotton. I made the trim by combining strips from fat quarters, the new blade in my Rotary cutter made short work of this stage.

I followed the magic pillowcase aka sausage pillow case aka burrito pillow case technique. This sandwiches a 24″ x 40″ panel and a 12″ x 40″ panel around the 2″ x 40″ trim and encloses all the seams to make it a really nice, clean make.

The folding seems ridiculous but it does work. I watched an old Crafty Gemini video as she explains the steps most clearly to me.


No measure gift bags

You tube easy gift bag how toimage 
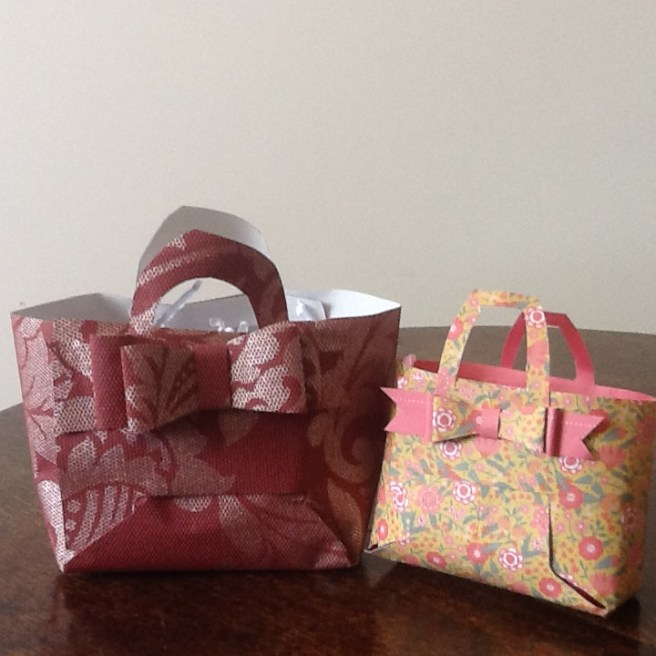
need a gift bag but no time to fuss?

just fold a rectangle of paper as below … or watch the video

place the paper face down and landscape (long sides north and south)

fold  a small border on the west edge of the paper, just wide enough to later run some tape or glue along, then fold the remaining width of paper in half and  in half again to create four equal panels. With the paper still folded in four, crease up from the south a panel that will  form the base of the bag. An optional last step is to open out the sheet then fold down a little collar along the top this is only needed if your paper is flimsy and you want to strengthen it a bit

cut – cut out the little rectangle at the south of the border fold then cut up the three bottom creases just as far as the first width crease – if you are being smart you can cut either side of the creases to make final assembly even easier

stick – if you have a collar  stick it down

then fold the little border over so a little bit of the pretty side of the paper is facing you, run tape or glue down the border and then fold the eastern side of your sheet over and on to the sticky border. once the glue is set wobble the paper to form a floppy box,  crease each of the panel folds to encourage the paper to set in the final shape

now fold each of the bottom panels up, you may need to crease them with your fingers to set the folds in the right direction, add some tape or glue on the plain side of the last two bottom pieces. You may need to put your hand inside the bag/box to ‘set’ the adhesive.

close and decorate with paper clips, pegs, stickers, brads, staples or ribbon threaded through punch holes