Seaglass trinket saucers

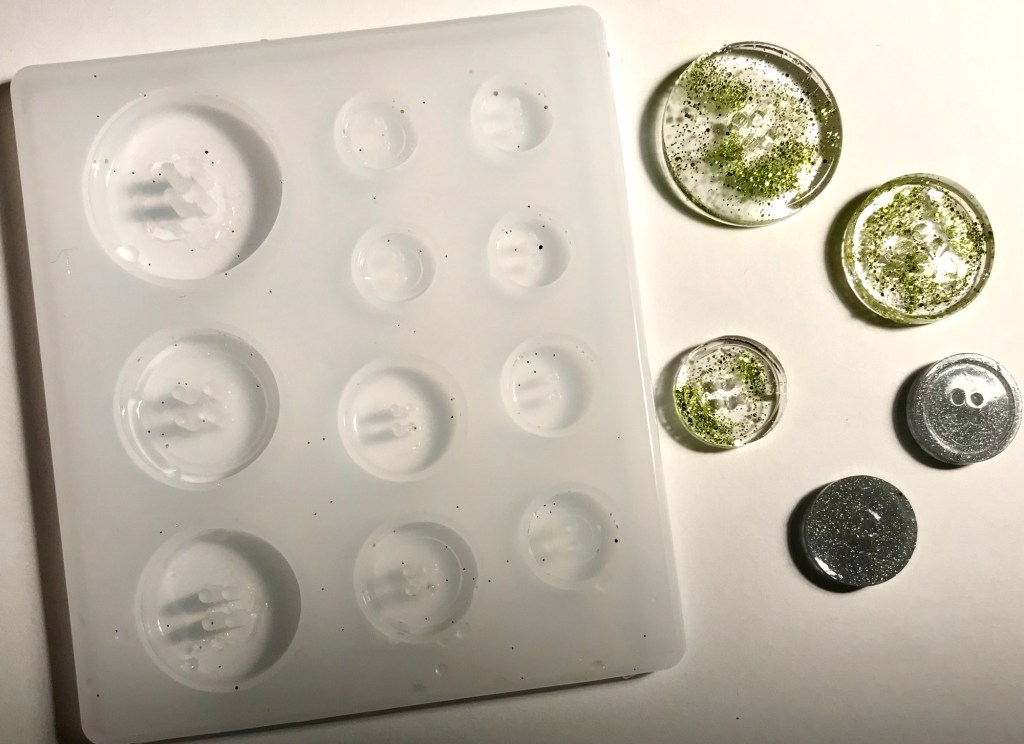
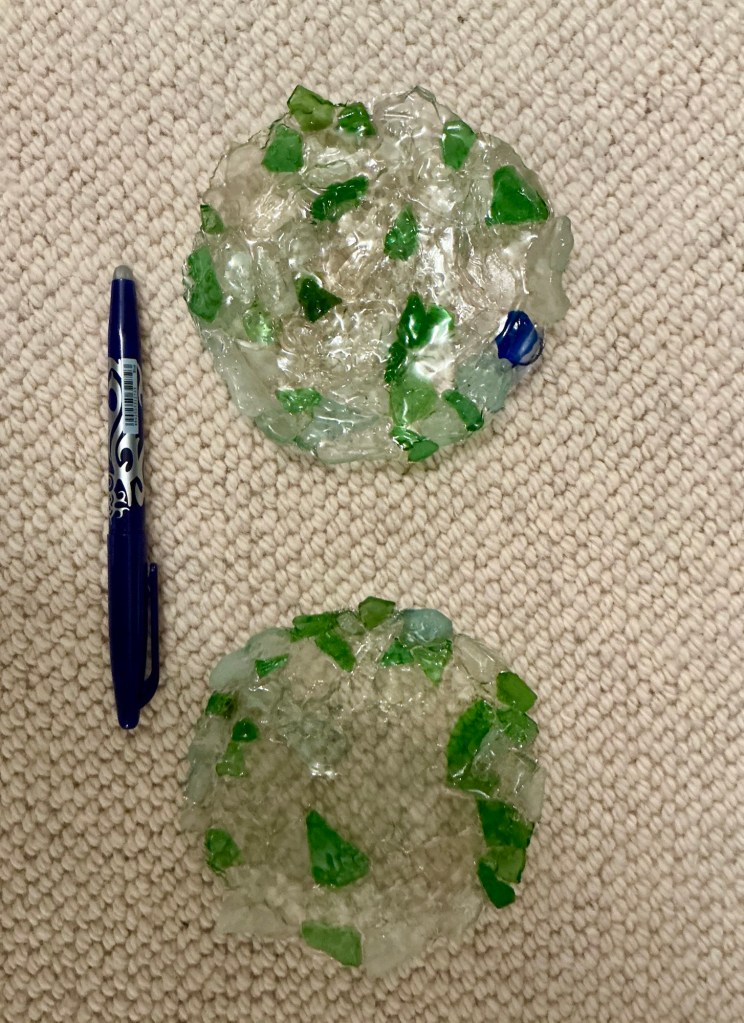
These little dishes were made by lining a saucer with cling film to make a mould, then mosaic-ing small, flat pieces of seaglass together in a sort of free style jigsaw leaving as few gaps as I could.

To stick it together I brushed uv resin over and set it before peeling the sea glass from the cling film (comes off quite cleanly) brushing more resin on the underside and setting that.

Final stages involve more thin layers of resin on both sides to smooth over dips and fill little gaps.

The first dish was thicker and had a more crinkly surface. For the second dish I used slimmer glass and less resin. Not sure which I like best.

These are both sturdy and stable as well as being useful. only took about an hour from start to finish.

Scandinavian Christmas

Simple to make and will hold a little gift whether made from felt as here or sturdy paper

On folded material (with fold at the bottom) cut two of the pattern below. I usually do two contrasting colours

And just inter weave the ‘fingers’ or lengths to create the pocket. Surprisingly solid when you finish.

I add a simple handle, glued or stitched depending on the intended use.

Advent day 1

Instead of opening a calendar I am doing/ making something festive for Advent.

Today I start with a clove studded orange. It scents the room with a gentle festive aroma.

I also used some brads to bling it up. Many more left in the box!

I usually hang these but this giant orange (from an Olio collection) would be too heavy so it now sits on the mantelpiece.

All buttoned up?

No craft spend January had a little blip, this resin button mould somehow arrived with the justification that it was practical not crafty.

First makes are glittery – as you can see from the photo. With silver Perlen pen (a version of Stickles or Nuvo drops) mixed into the clear UV resin to make an opaque pair.

Functional, personalised buttons. Of course they aren’t crafty at all! I just have to tackle my button stash now…

Vinyl signage

I over-ordered some exterior vinyl for 2021 Christmas projects so was pleased to use some on this lovely piece of wood we received at Christmas this year.

I used the scan n cut inbuilt font for the lettering. The font was stretched up to make it fit the wood fully.

After carefully applying the vinyl, resident DIYer drilled holes for the cord loop which he stained to tone it down.

Resin crafts

Resin that cures in uv light is super easy to play with and the ‘Let’s resin’ kit got me hooked.

Key rings, pendants, earrings and embellishments galore.

Boring safety stuff aside (gloves and mask essential) I love this. And walking round craft and jewellry stalls at local markets I realise how many other people do too.

Thank you Frugal Crafter for the suggestion

Upcycled bookmarks

I just couldn’t bin the 20 year old x-rays found in a clear out, so decided to turn some into bookmarks.

The sheets feel like heavyweight acetate. They cut and dry emboss well but there is a lot to use up.

This turned into a labour of love as I decided to paper piece die cuts on top of the embossed x-rays sheets. I used a bookshelf themed stamp, die and embossing folder set that came free with a crafty magazine years back, so all round thrifty crafting.

As you can see, I also made more conventional card bookmarks in a fun crafty morning.

Die cutting felt

Time to use some felt scraps. decided to make some badges to brighten winter coats to stuck the layered flowers on felt circles and then stuck on badge pins sandwiched with felt rectangles for stability.

This is a very frugal activity using up old badges and taking miniscule scraps of felt. So while I have supplies out I am going to make embellishments for lavender bags etc. And happily nearly all dies designed for paper seem to work on felt – including the bee and butterfly – although the stamens die does create very flimsy results.

While I used hot glue for these, a more refined approach would be embroidery to fix flowers to the backing. I have used a few French knots here but really enjoy how quickly these come together.

Now to go through my dies to see what other little felt shapes I can cut…