

a simple way to organize the sack of ribbon scraps…
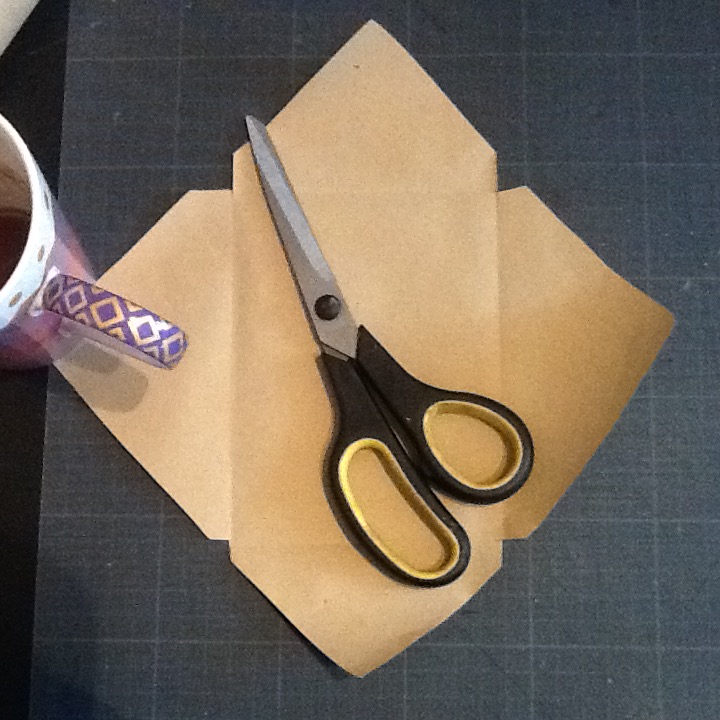
materials: 1 A4 sheet cardstock (I used craft card), scissors, strong tape or glue, hole punch Washi tape to close and decorate
method
score and fold card into toblerone shape – I scored at 6.5, 13 and 19cm then turned the card and scored at 4 cm from either side
i then cut up the 4cm score lines, trimmed and wedged the flaps created to make triangles as shown
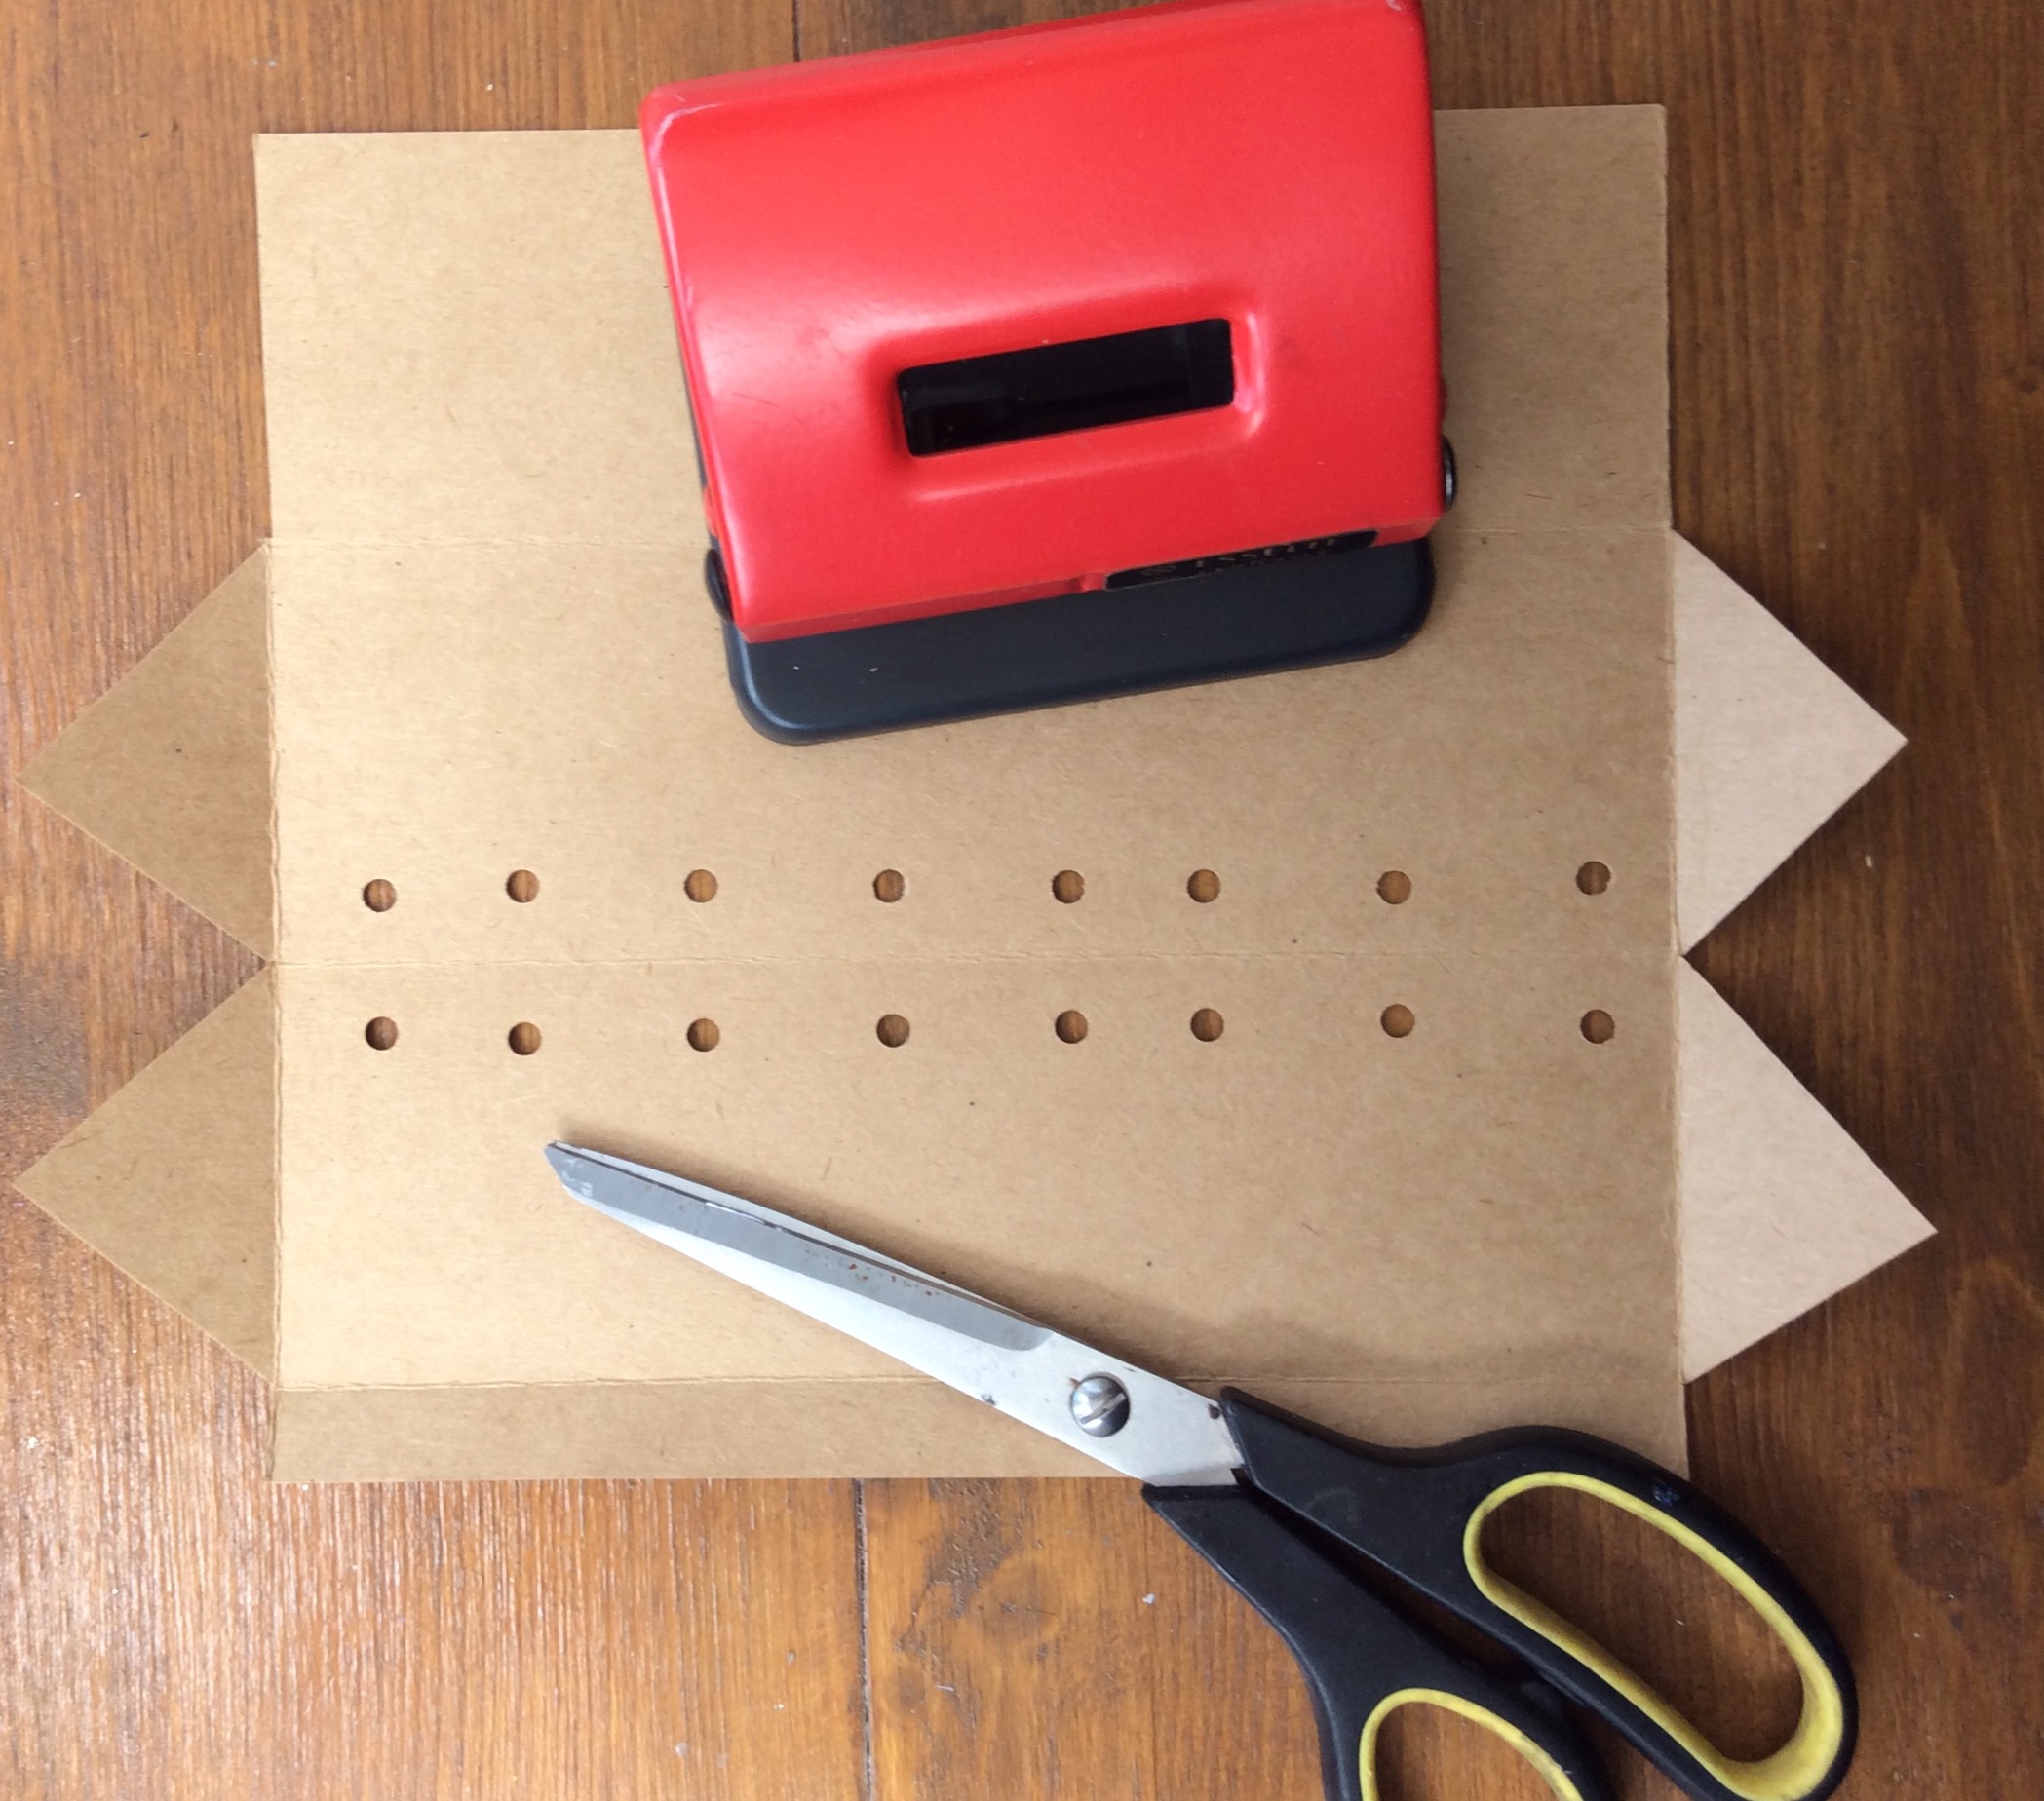
I then hole punched 14 holes (enough to squeeze in different scraps of ribbons, if it will wrap round an A6 card, I keep it). I only have an office ring binder punch so was limited to punch near a score line but the holes can be wherever you want). Then form the toblerone shape and stick the overlapping triangles together. I used red liner tape.
Poke ends of ribbon through the holes from inside to out, a crochet hook works well, and when your holder is full secure it closed with washi tape so you can top it up some time in the future without destroying the box
just a few more to make before I get the ribbon stash under control!
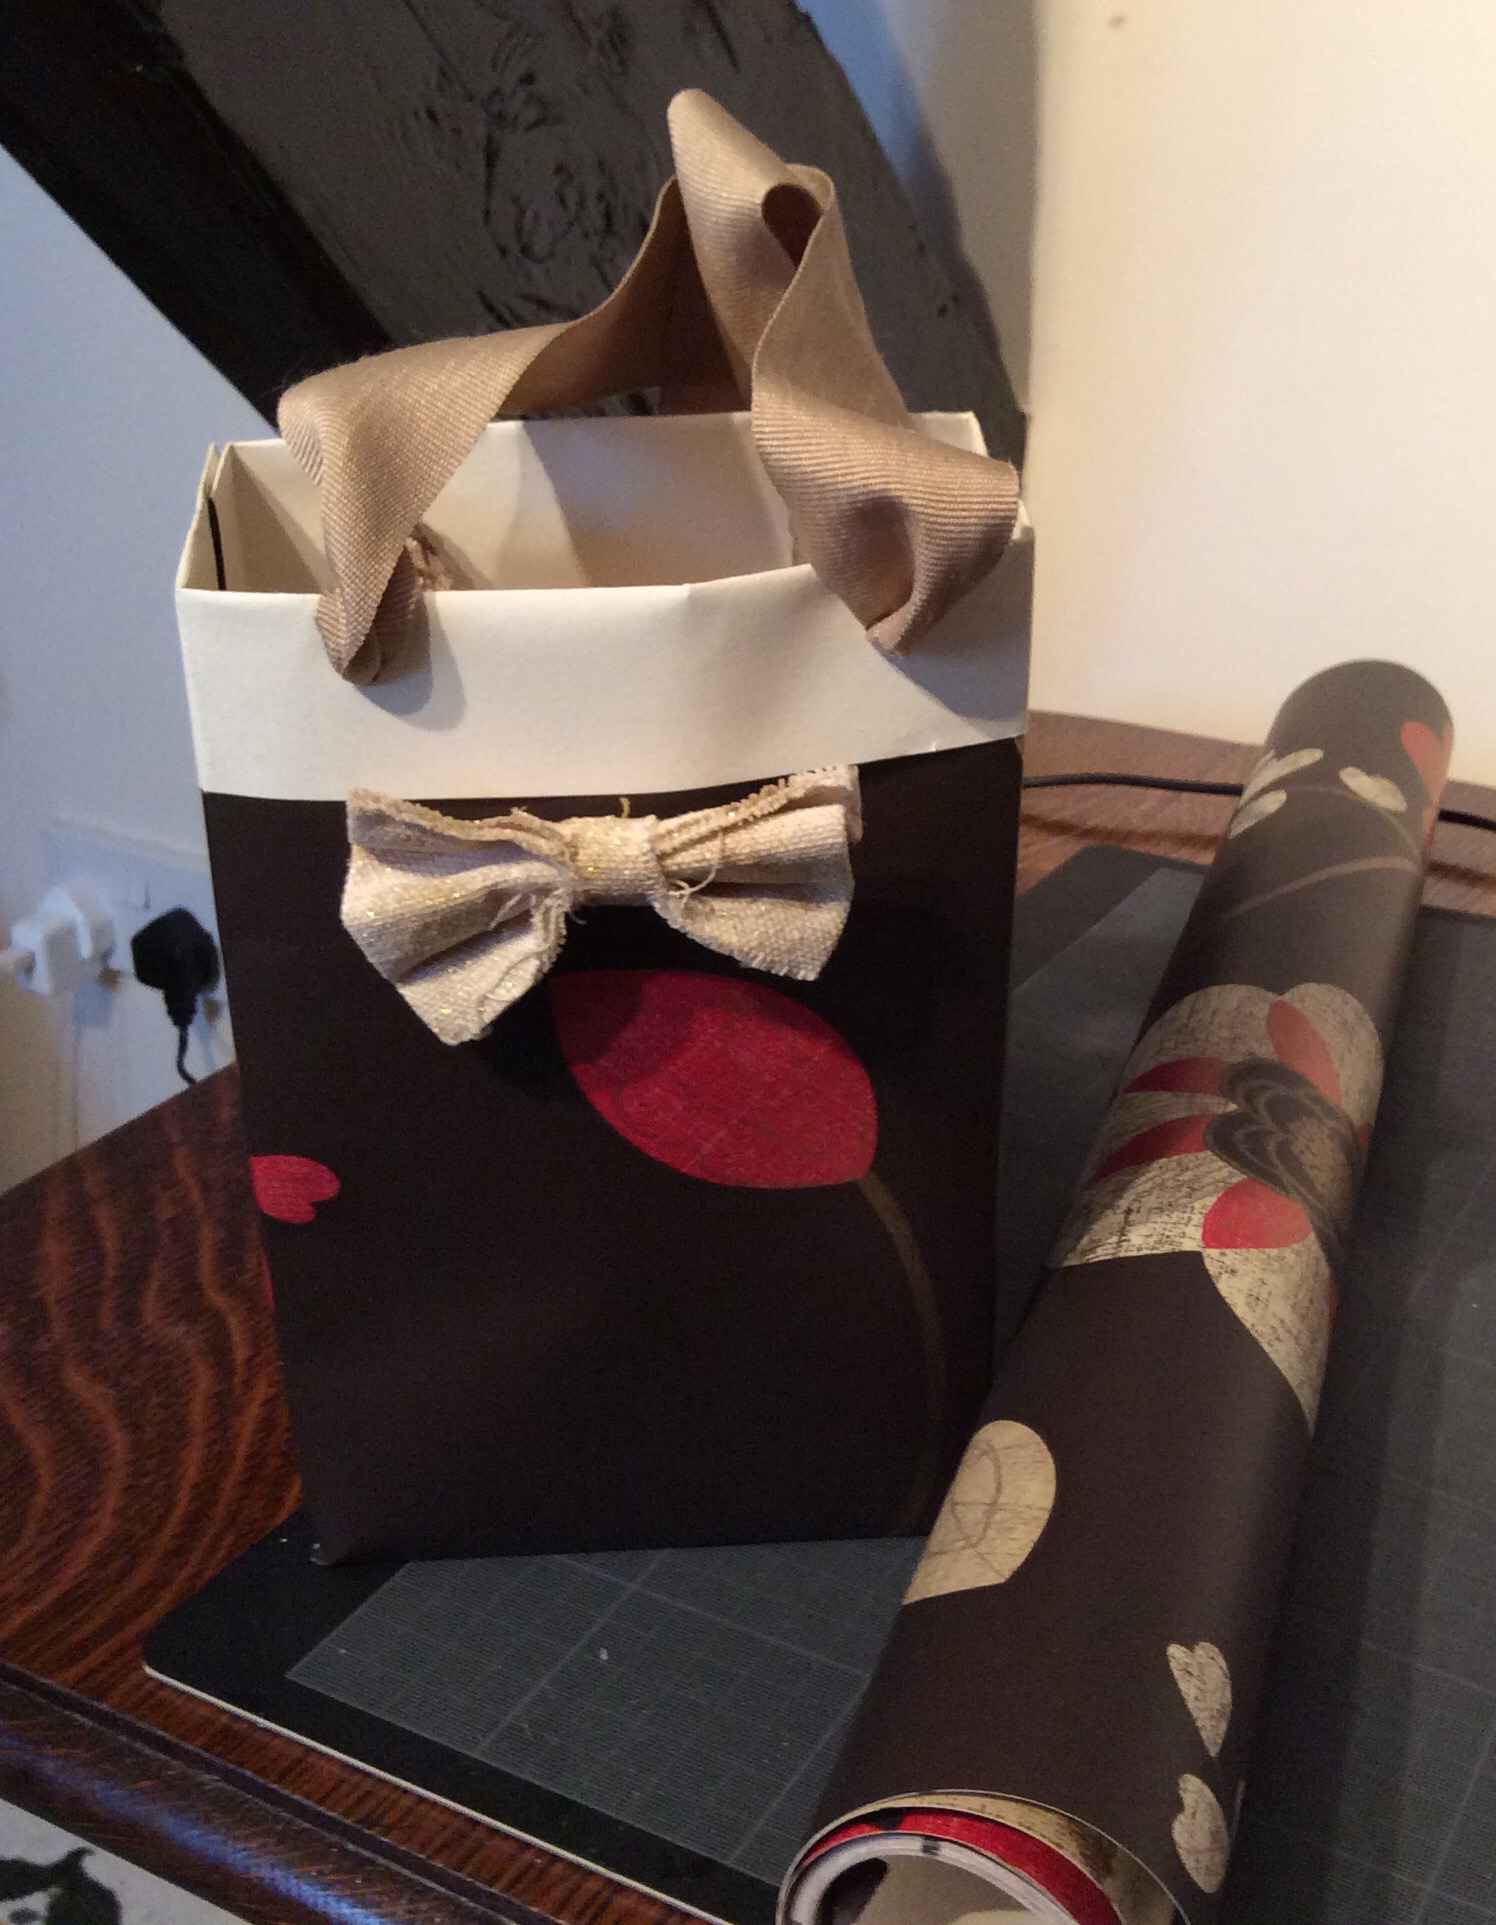
if decorated this would make a nice little gift for a crafty friend…


