Jeans to … sewing challenge

Take one pair of jeans and too many hours on Pinterest and let us see what we can make….

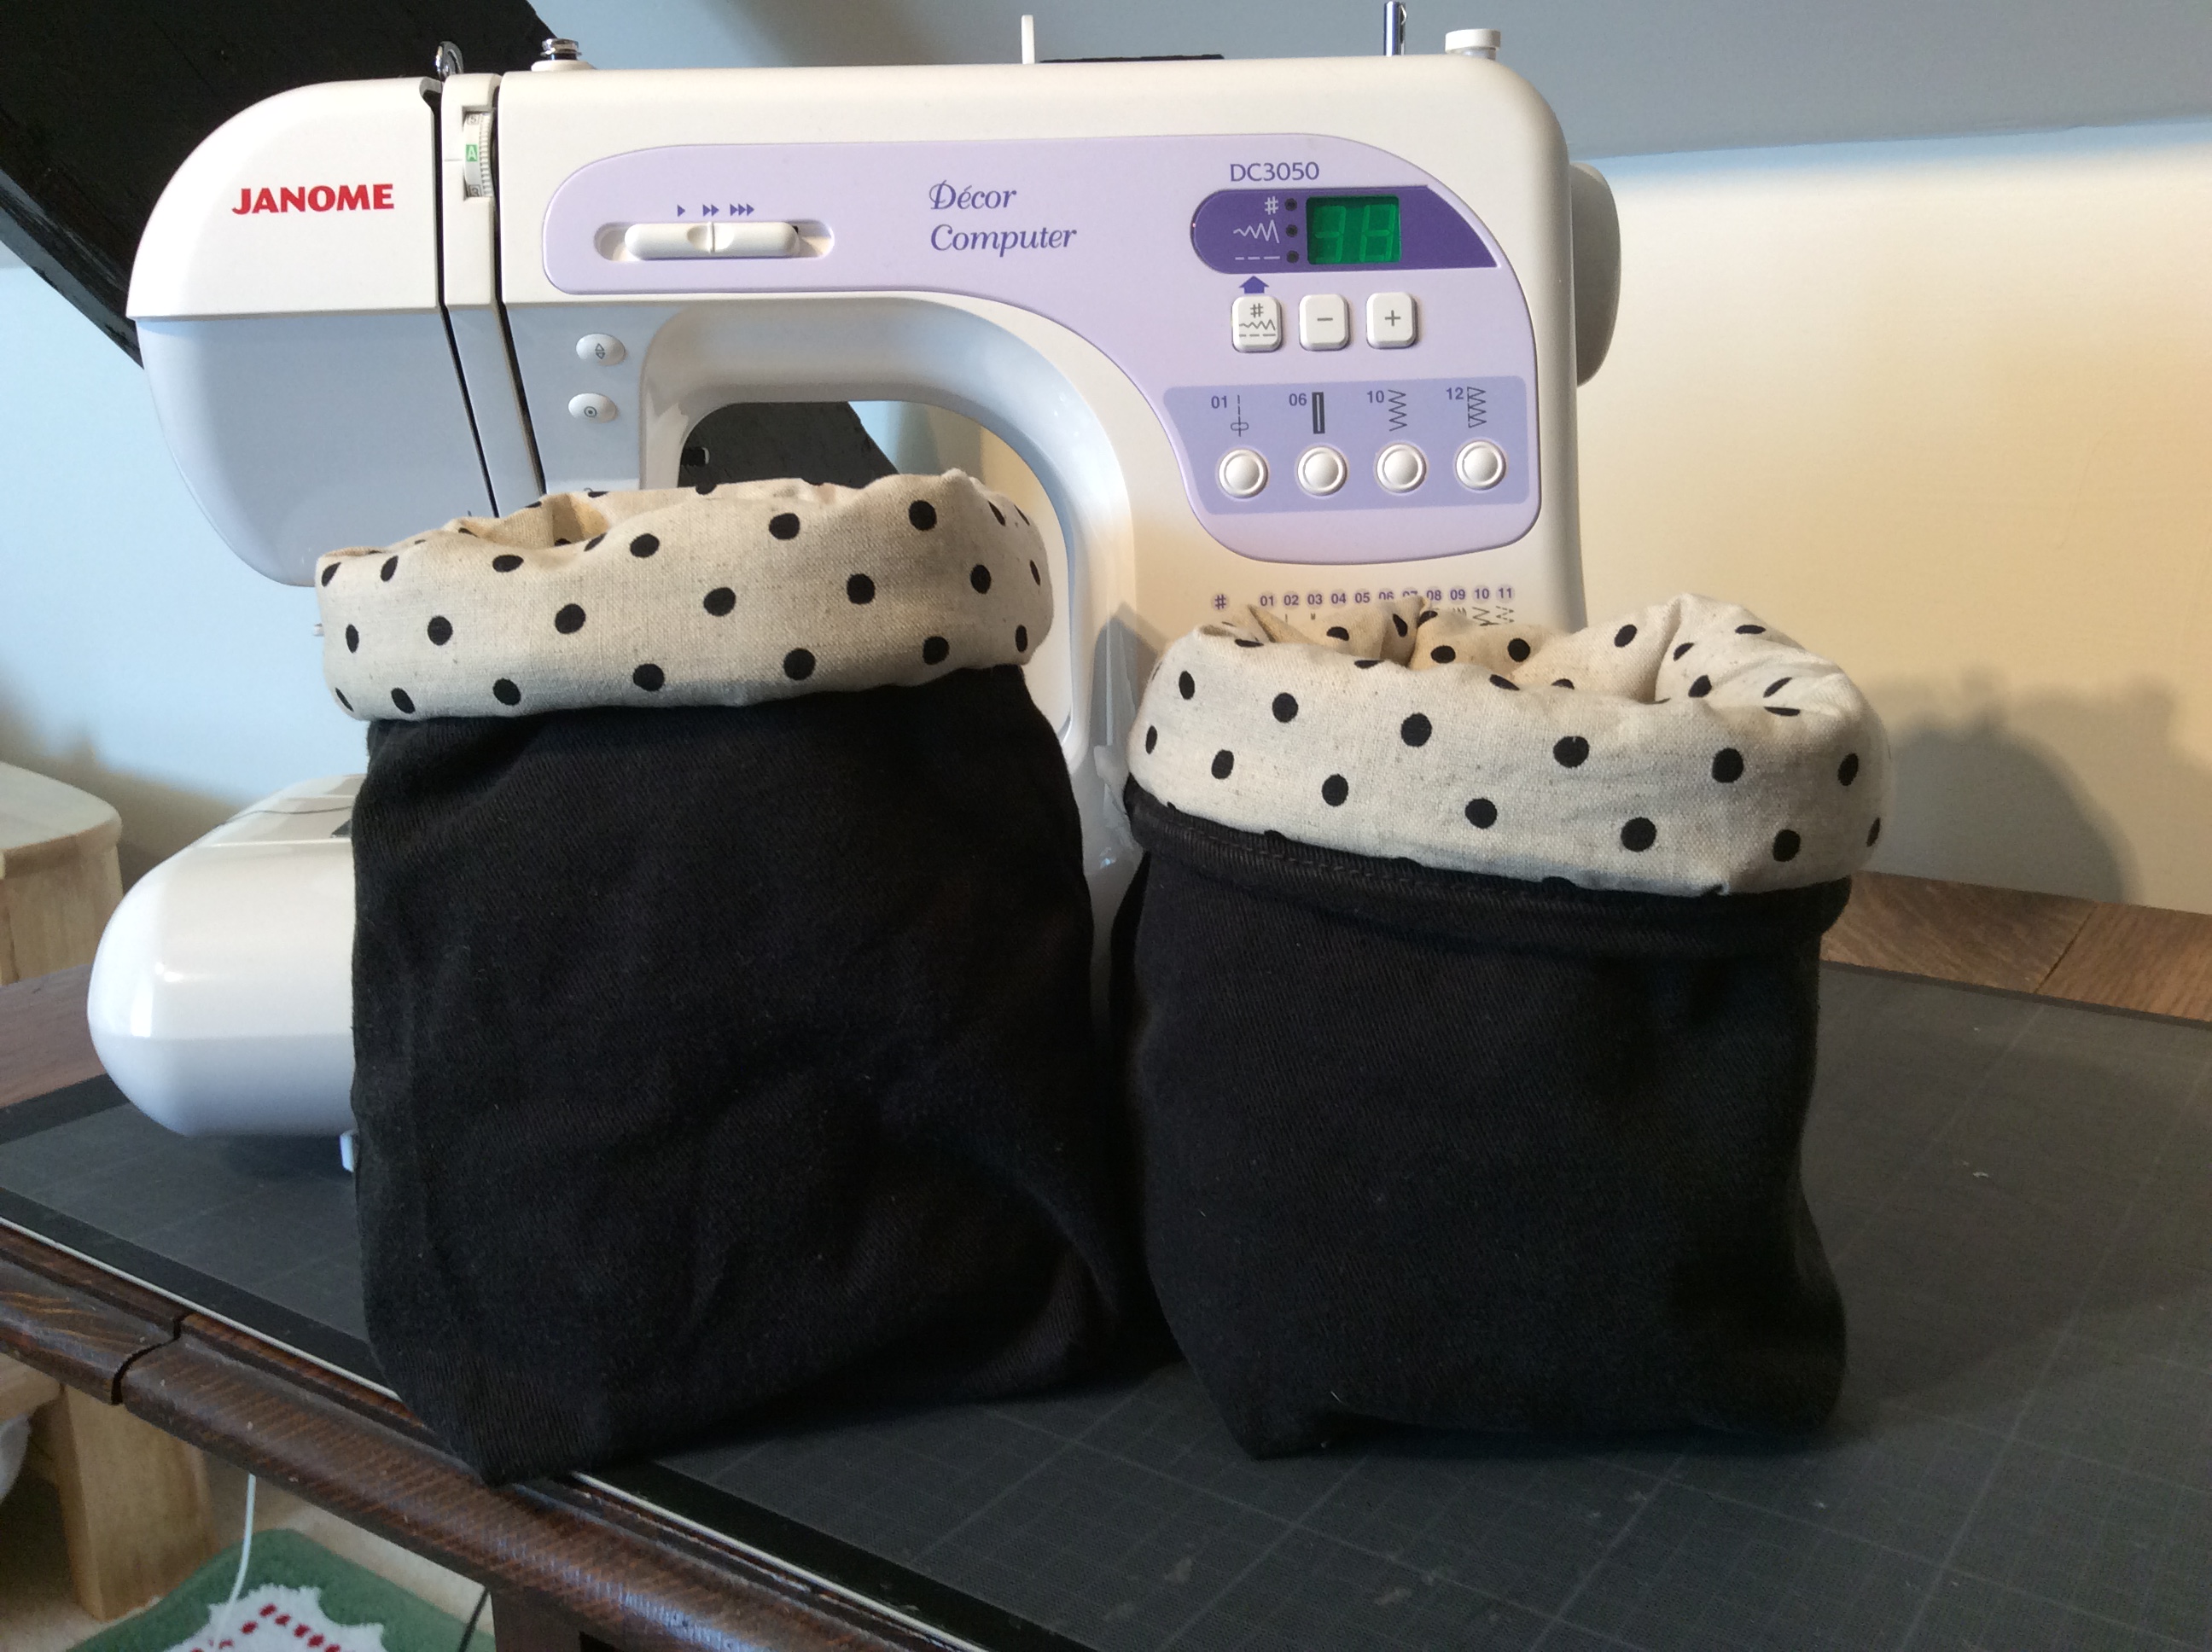
so far the bottom of the legs have been chopped off and made into two simple storage pots.

I boxed the bottoms (the tops really to preserve the hems) and lined with some dotty fabric and some wadding. One leg had a longer lining piece to create a bigger contrast cuff

These will be used to store ready readers and sunglasses.

If I made them again and had enough firm form interface I would use that to make the sides more rigid but these will do the soft storage job

Now back to Pinterest to see what else to try … I have ppreviously made a garden apron/belt, some  oven gloves and mitts -see earlier posts-  so want to expand my jeans recycling repertoire

Washi tape cards

Oh dear, I was Trying to use up supplies as the cupboards are full, but a sale in paperchase undid my efforts

bAck homeI made two quick cards, just lining up the range of tapes direct on to cream linen effect card bases.

For the first I stamped in the gap, taking care to line it up.l I then realized if I put the greeting on first I could easily line the tape along it so for the second I stuck on a greeting (my handwriting scanned into scan n cut, cut three times on card and layered to create dimension) before taping around it

in both cases the tape is glamorous enough (Paperchase  peacock collection, only four pounds for 8 rolls) to leave off embellishment but some gems on one and black stickles on the other just finished it if

now back to my resolution about not adding to the craft hoard!

Drawing with scan n cut (save money on stamps)

I want my handmade cards to be personalized and usually light-hearted so stamping a message isn’t the answer for those special cards. The scan n cut draw function with the universal pen holder means my gold gel pen can deliver a professional greeting, even direct on to this kanban linen look note card.

To add dimension I used the cat die from the crafts beautiful free gift this month and foam mounted it .

confession, although the card looked fab, clean and classy without, I had to add scan n cut ric rac border of gold top and bottom to hide a glue splodge

I also used the draw function to write ‘thanks’ inside.  By keeping all the elements to gold this card looks understated and grown up. Love it

.

PS a dog version might be contemplated if I can work out the greeting !

Serious cards

Beautiful papers from Craftwork Cards Antiqued and Chinoiserie pads were used to make some serious cards for ‘thinking of you’ messages

I used the scan n cut to create a decoupage effect with the water lilies (very impressed with the direct cut feature now I have tried it) and the trellis strip (a border from the pattern library) Continue reading

DIY envelopes

 A simple way to make envelopes, particularly useful for large items or flat presents

measure the item you want to insert diagonally from one corner to another, say six inches.  Then cut a square (always a square even if the insert is rectangular) of paper one inch bigger ie 7 inches square.

place the insert on the paper and fold each corner of the paper loosely over the insert towards the centre,  crease the folds and then put the insert to one side

where the four creases intersect at the edges, cut out the triangle overlaps as shown

stick double sided tape along both sides of one corner (in this case the westerly corner with my mug on it) and stick the adjacent flaps to it to form an open envelope

round the shoulders and tip of the remaining corner for neatness and seal as you choose (stickers can be usefully used up here)

Wallpaper gift bags

I wanted to present some of my mountain of hand made cards so I made gift bags using a roll of wallpaper (I buy 50p remnant rolls of the more ornate papers when I see them). This is sturdier and more pliable than paper or card.

method: cut a rectangle of paper about 34cm wide by 20 high ie just bigger than A4, this will hold 8 ish A6 cards and envelopes

fold about 3 cm down and towards you to make a cuff with the reverse of the paper showing, then score down over the cuff at 3 cm, 16 cm, 19 cm, 32 cm  – all the way to the bottom

then fold under about all the way across about 3 cm from the bottom to make your base

cut up the score lines from the bottom to that last across score line to make the bottom flaps and cut out the tiny rectangle bottom right

fold the score lines to form the bag shape

stick double sided tape on the right hand down strip and bottom flaps to fix bag

punch matching pairs of holes in the cuff front and back, I used an office hole punch which fit inside the bag neatly. Thread ribbon or cord through the holes and tie knots inside the bag to fasten

if needed cut a piece of card to fit inside the bottom to reinforce the base, wallpaper seems strong enough for a light package though

You can pinch the side panels to give the impression of a side gusset and embellish or label as well..


Quick photo stands


Want to display some photographs or cards but don’t have any frames spare? Head for the recycling box and use old cardboard for a quick fix.

I covered my card with pretty paper before cutting. I used my scan n cut to get a neat shape but scissors would work.

I then creased the shape against  a ruler to get the fold

adapt for your photos but aim For a width much wider than the photo so, once the support is creased, the photo can lean backwards rather than be too upright


Wall hanging note pads

img_0206

A craftwork cards Leisure kit contained the greyboard apron shaped cut outs so I have covered them with paper and die cuts from the kit, made pockets as pen holders and attached post it note pads with red liner tape

on one I took part of a memo block and covered it in paper to make a note pad

to finish I stuck ribbon scraps to make the handles and found some mini pegs to clip on the sides as receipt holders

little Mothering Sunday gifts, done!

Mens’ cards – solved?

img_0205

Men! They would rather a bottle of wine than a lovingly hand made gift and card toppers are so often fuddy fuddy that I nearly BOUGHT funny cards for the current group of male birthdays.

However tintin saved me… I found a downloadable cartoon which I tweaked with my Pages software and printed on photo paper. The right size for my card bases.

Then for each recipient a personalized caption was also printed on photo paper. The backing is some Tyre print effect paper so i feel comfortable that these are acceptable…