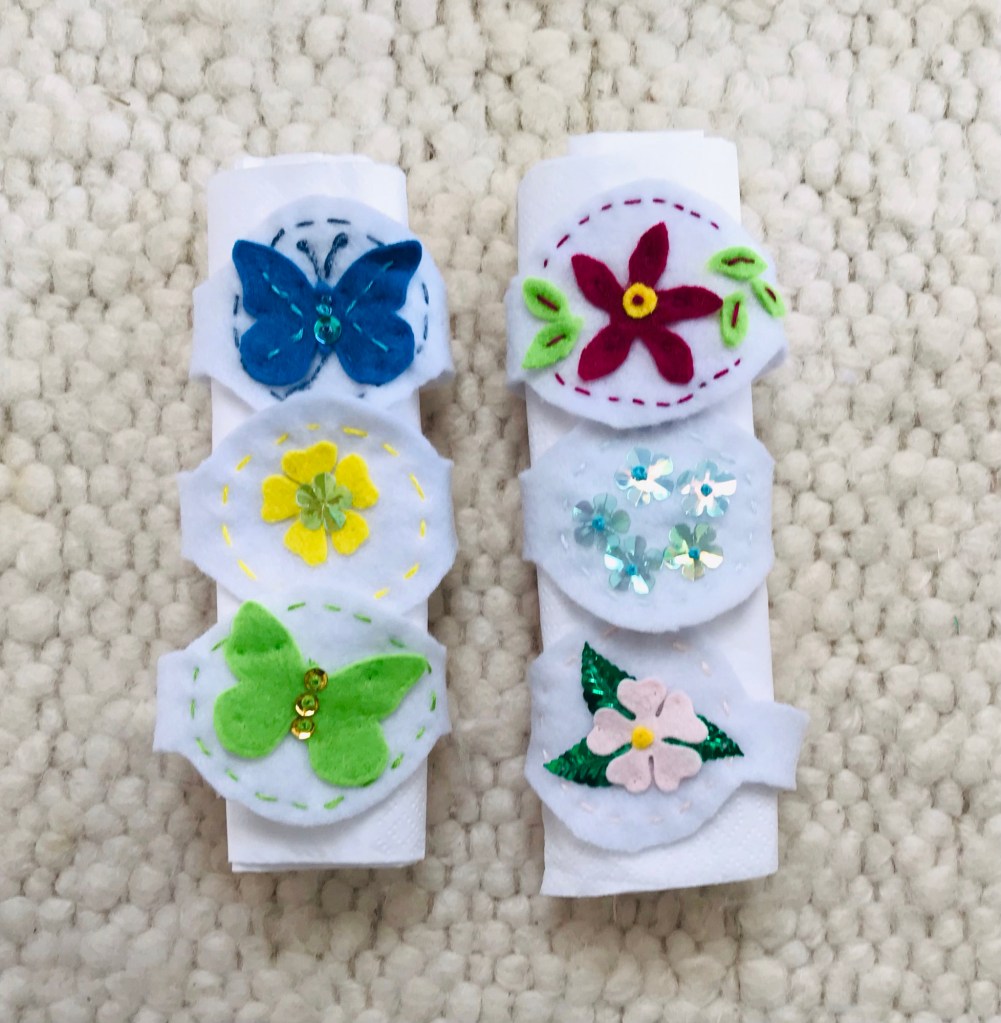
These sweet little napkin rings were quick makes from felt scraps.
The strap is about 7cm long and the central round is about 3 cm diameter.
I fixed mine with Velcro dots but they can be stitched closed or have button holes.
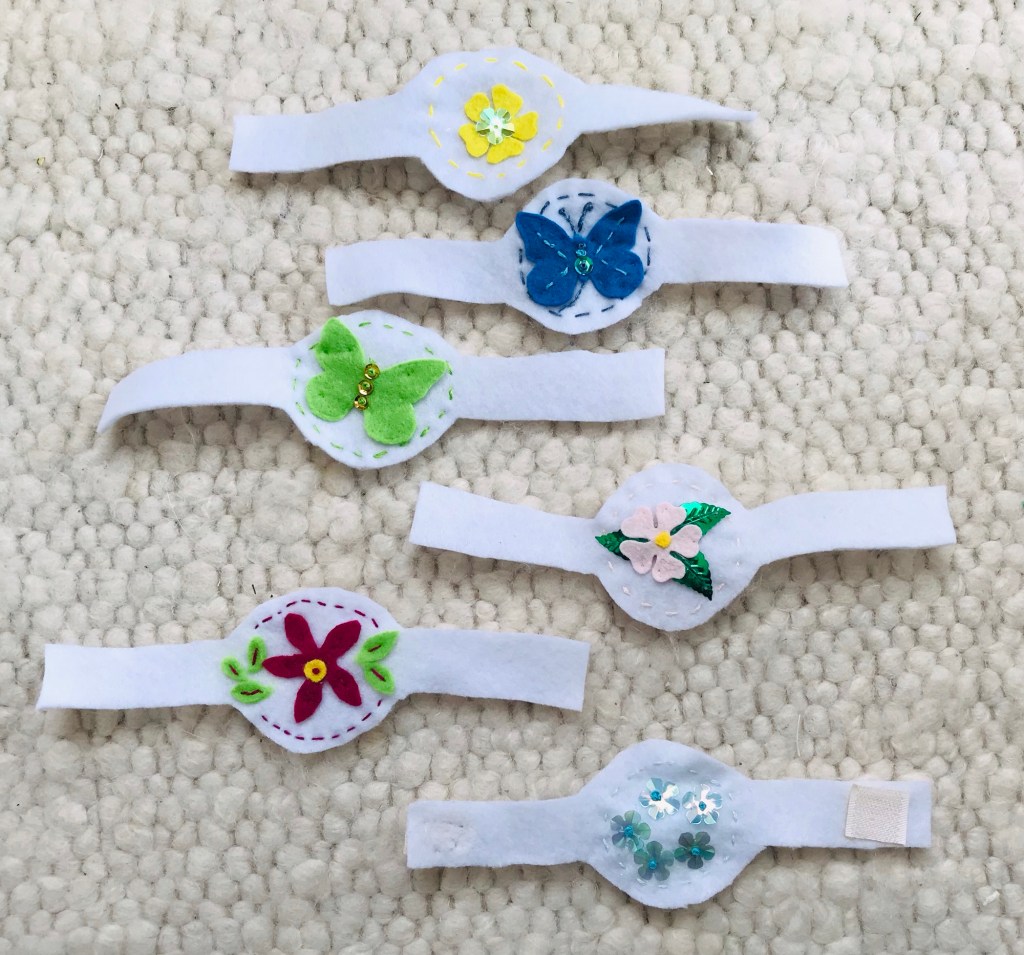
Some had simple die cut shapes stitched on with invisible thread. Some had sequins and some more complicated stitching with embroidery thread. to harmonise them as a set, I straight stitched a circle around each design in a contrast colour.
Some had felt circles backing the thread work so they don’t unravel too quickly but they are delicate and definitely won’t survive red wine spills or washing.