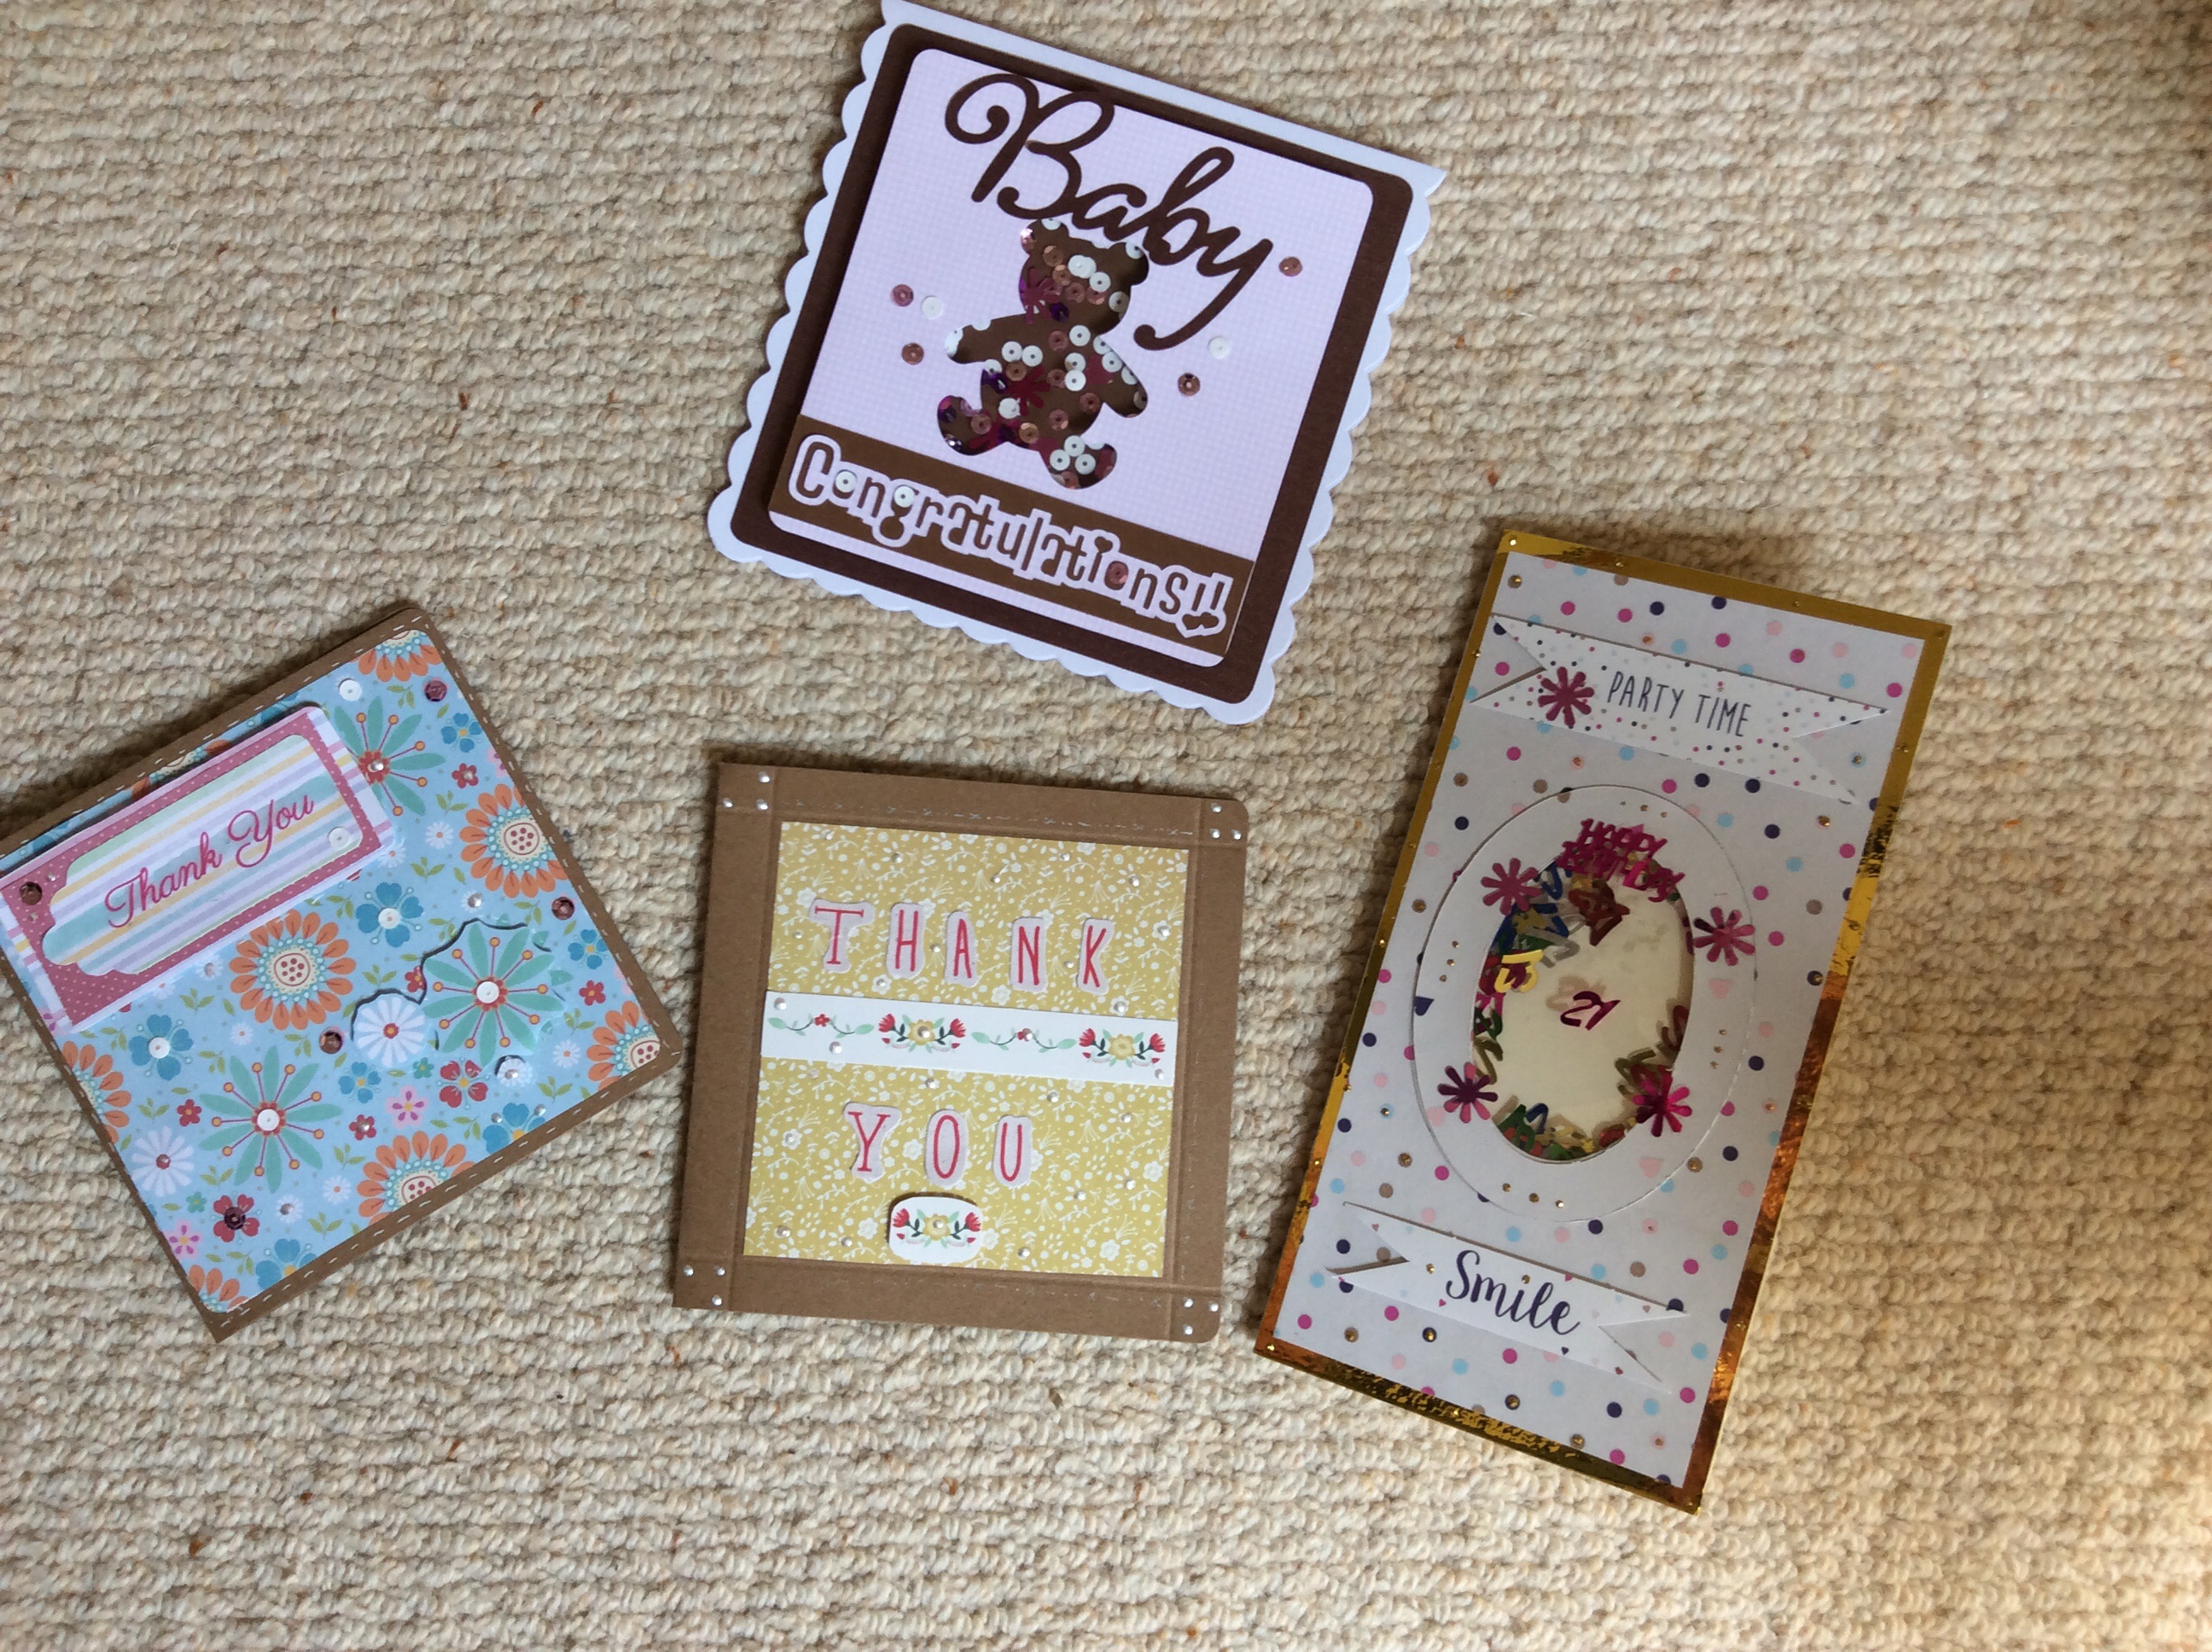
Sequins and shine. Now I have some glossy accents I can add them to my cards. Here shaker cards using saved table confetti and matt papers lifted with strategic sparkles, including lots of liquid pearls.

Sequins and shine. Now I have some glossy accents I can add them to my cards. Here shaker cards using saved table confetti and matt papers lifted with strategic sparkles, including lots of liquid pearls.
As recommended, when I got my Janome decor doc 3050, I made a stitch sampler. But rather than have a useless but decorative piece hanging around – I decided to make it into a bag to hold the presses feet and accessories.
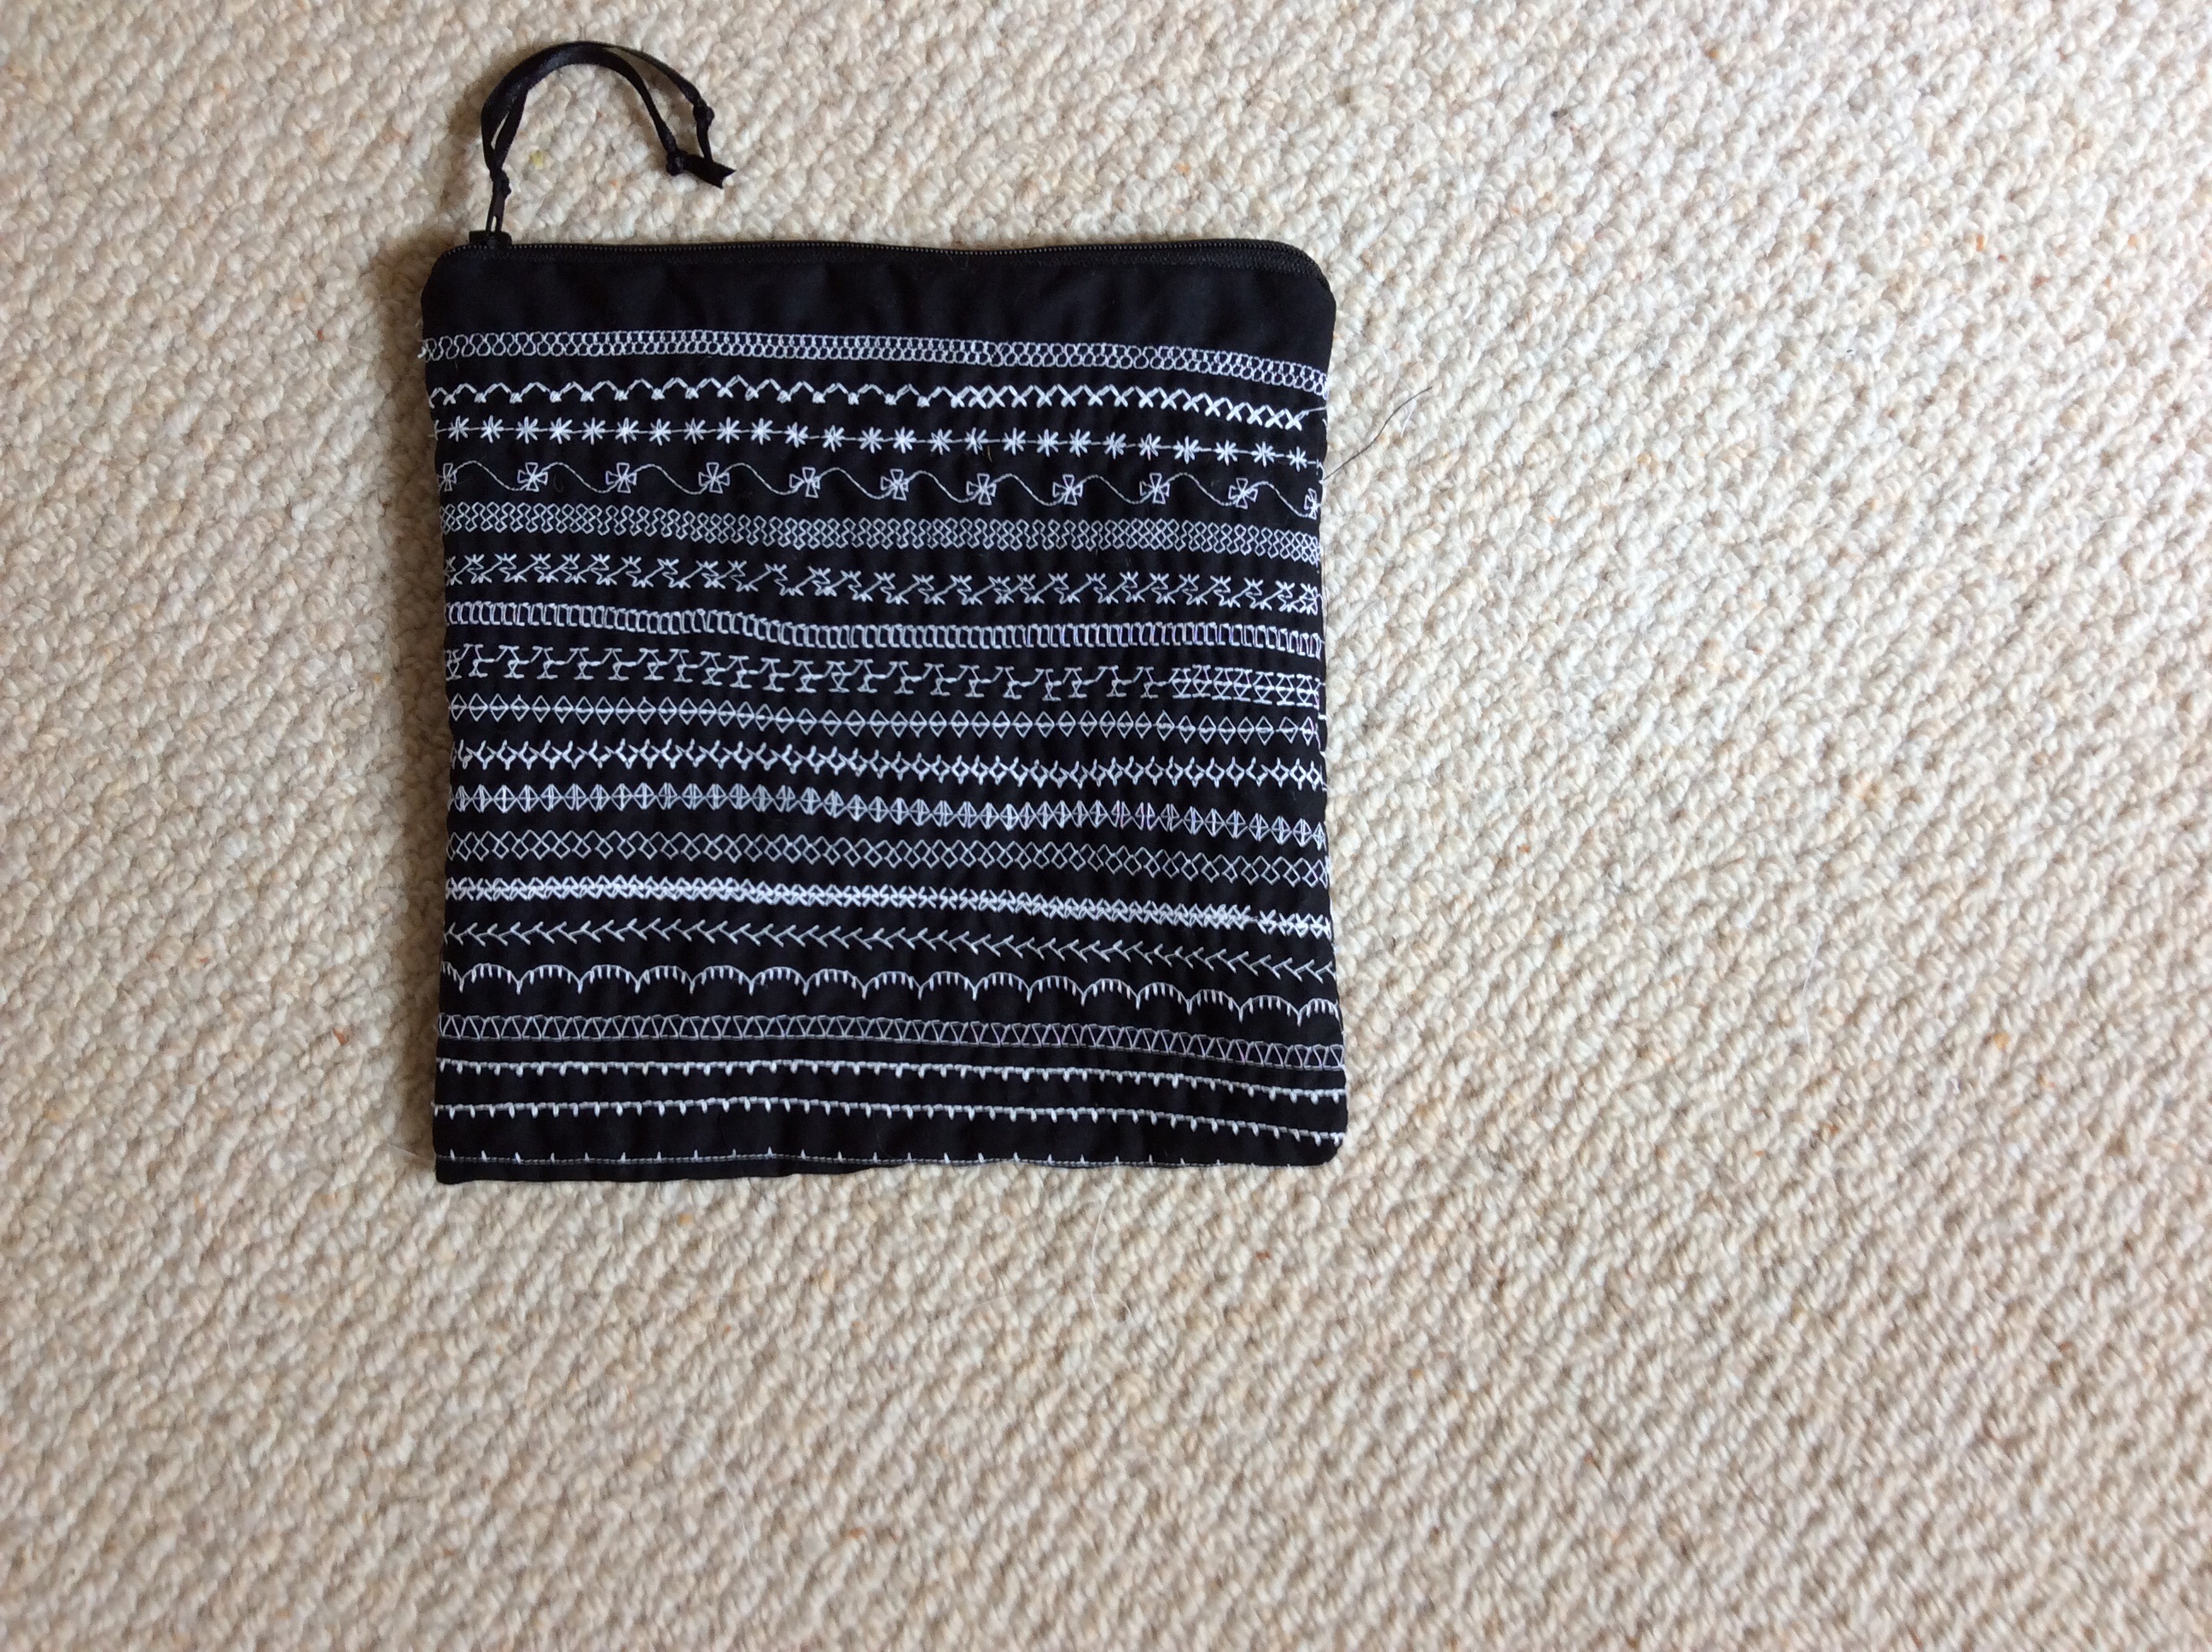
main challenge for this was putting the continuous zipper together, I find threading the zip on tough despite following YouTube videos carefully. Nevertheless continuous zips make financial sense and are worth the fiddle. Maybe I will be organized and thread all the bits together before I need them ?
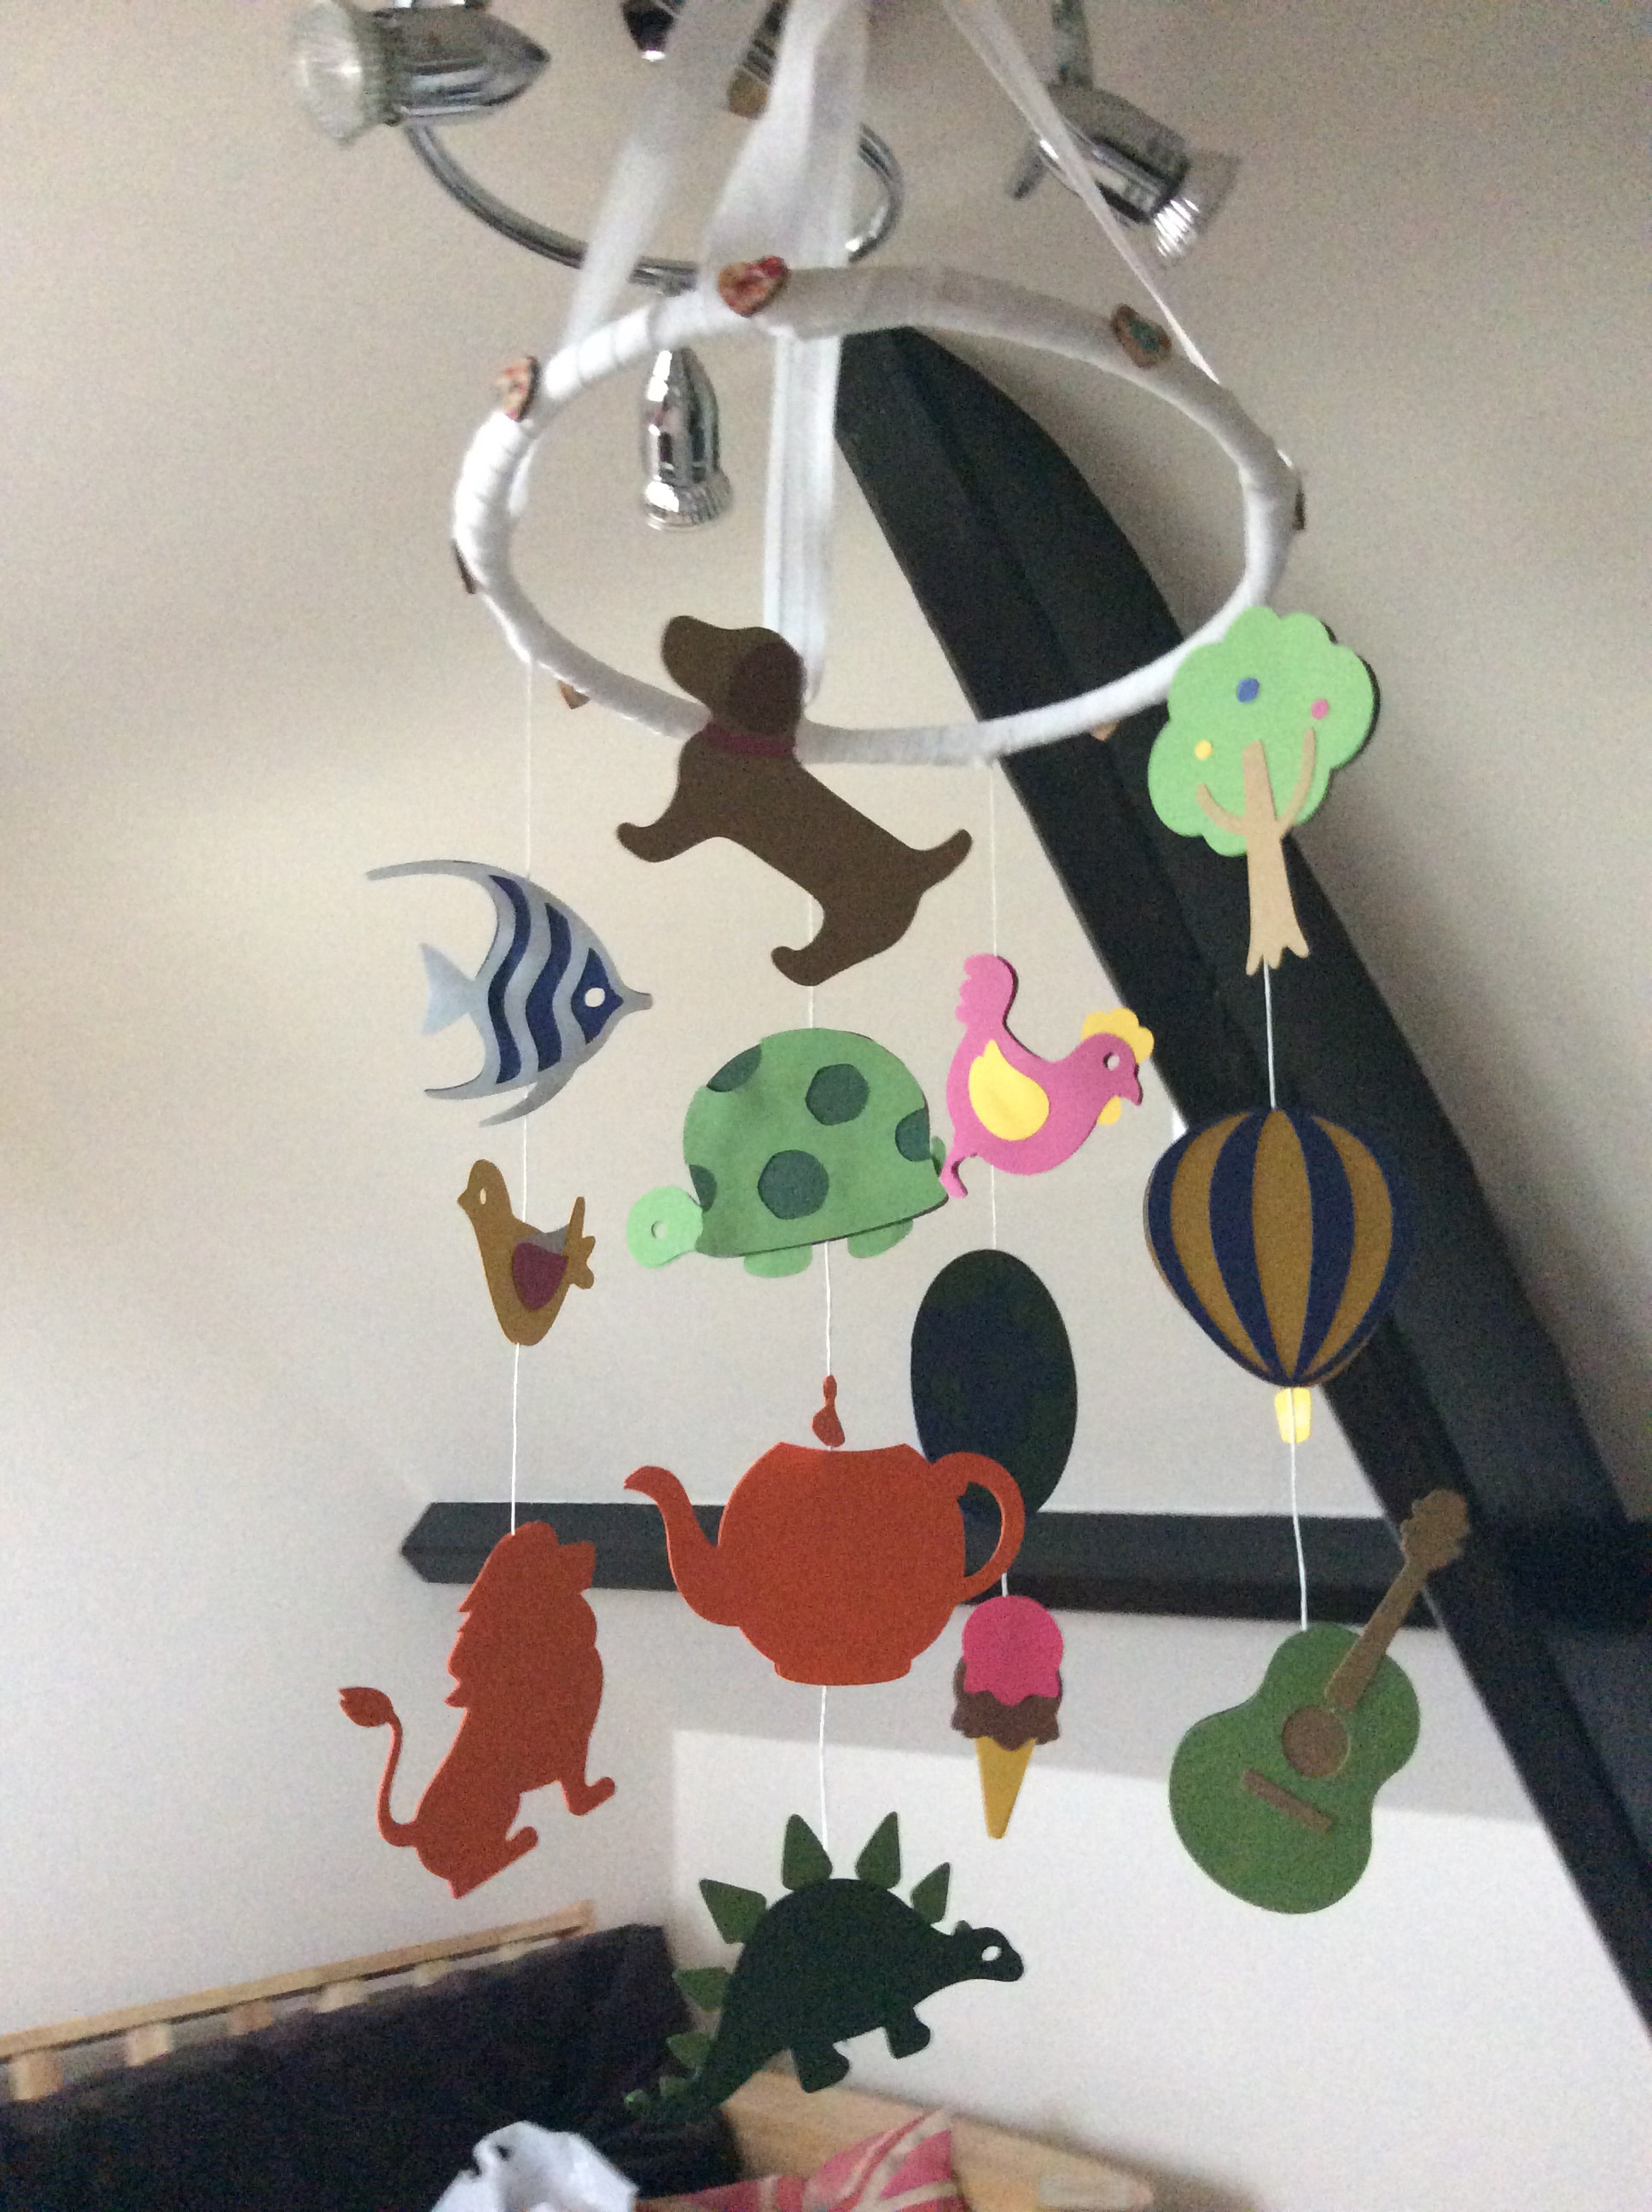
Half of an embroidery hoop covered in bias binding – I didn’t have enough white ribbon to cover the hoop – then 16 scan n cut library shapes cut, each one twice, and sandwiched round some twine which was tied to the hoop. All fixed with hot glue and some buttons glued on to finish the hoop off.
next time I will use two dowels instead and some bakers twine instead. Loads of great circus shapes on the scan n cut canvas projects site to use or even a Christmas version with snowflakes etc.
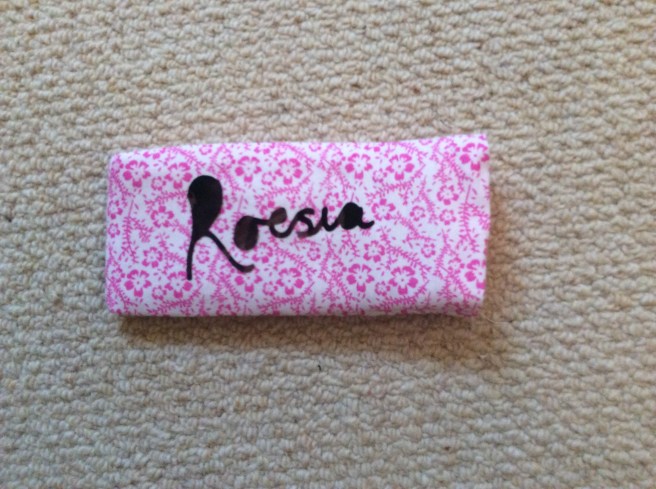
Niece signed her name in marker. Aunt scanned it in and cut it out on heat n bond backed fabric. We made a v simple padded sunglasses case and then ironed her name on. Easy Peasy.
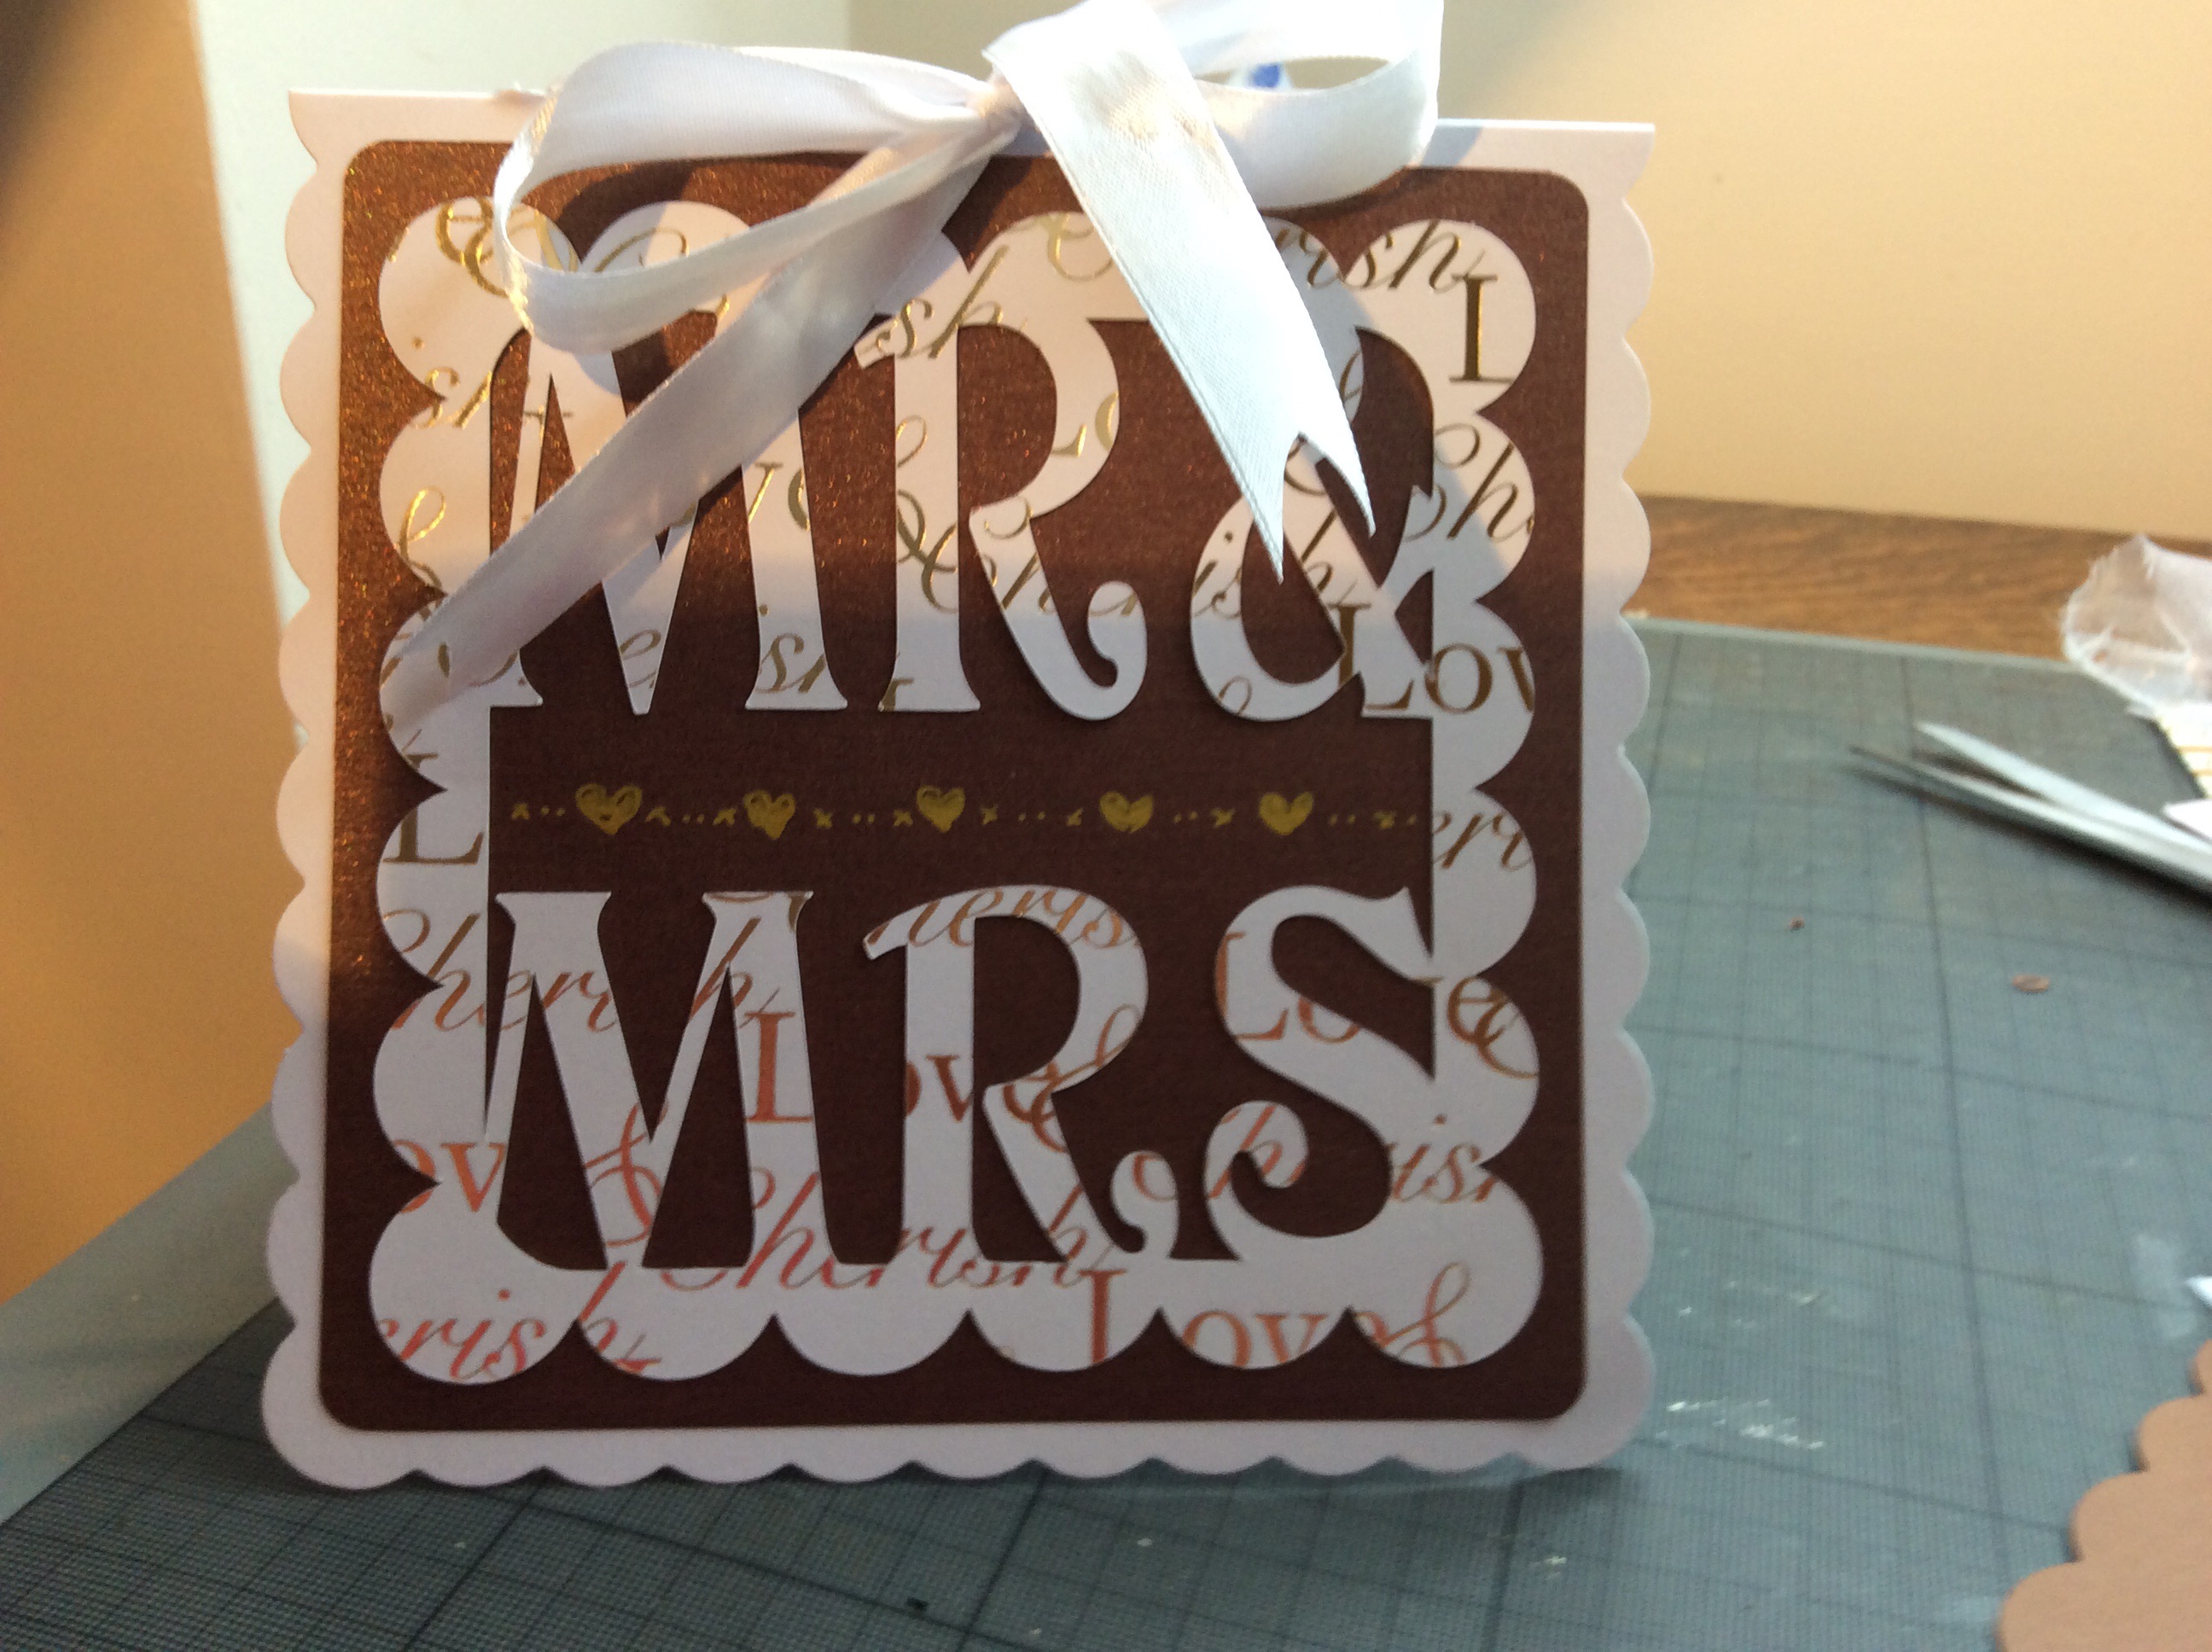
Welding letters into a library shape made for an elegant card using up some glitzy foiled card from my stash.
I chose a scalloped square to echo the (bought) card base but forgot to use the new ScanNCut for my brown mat and those little hearts. I could also have used the machine to make the card base and cut the slits for the ribbon if I had thought of it!
However, a super easy and impressive card to make, more like this in the pipeline …
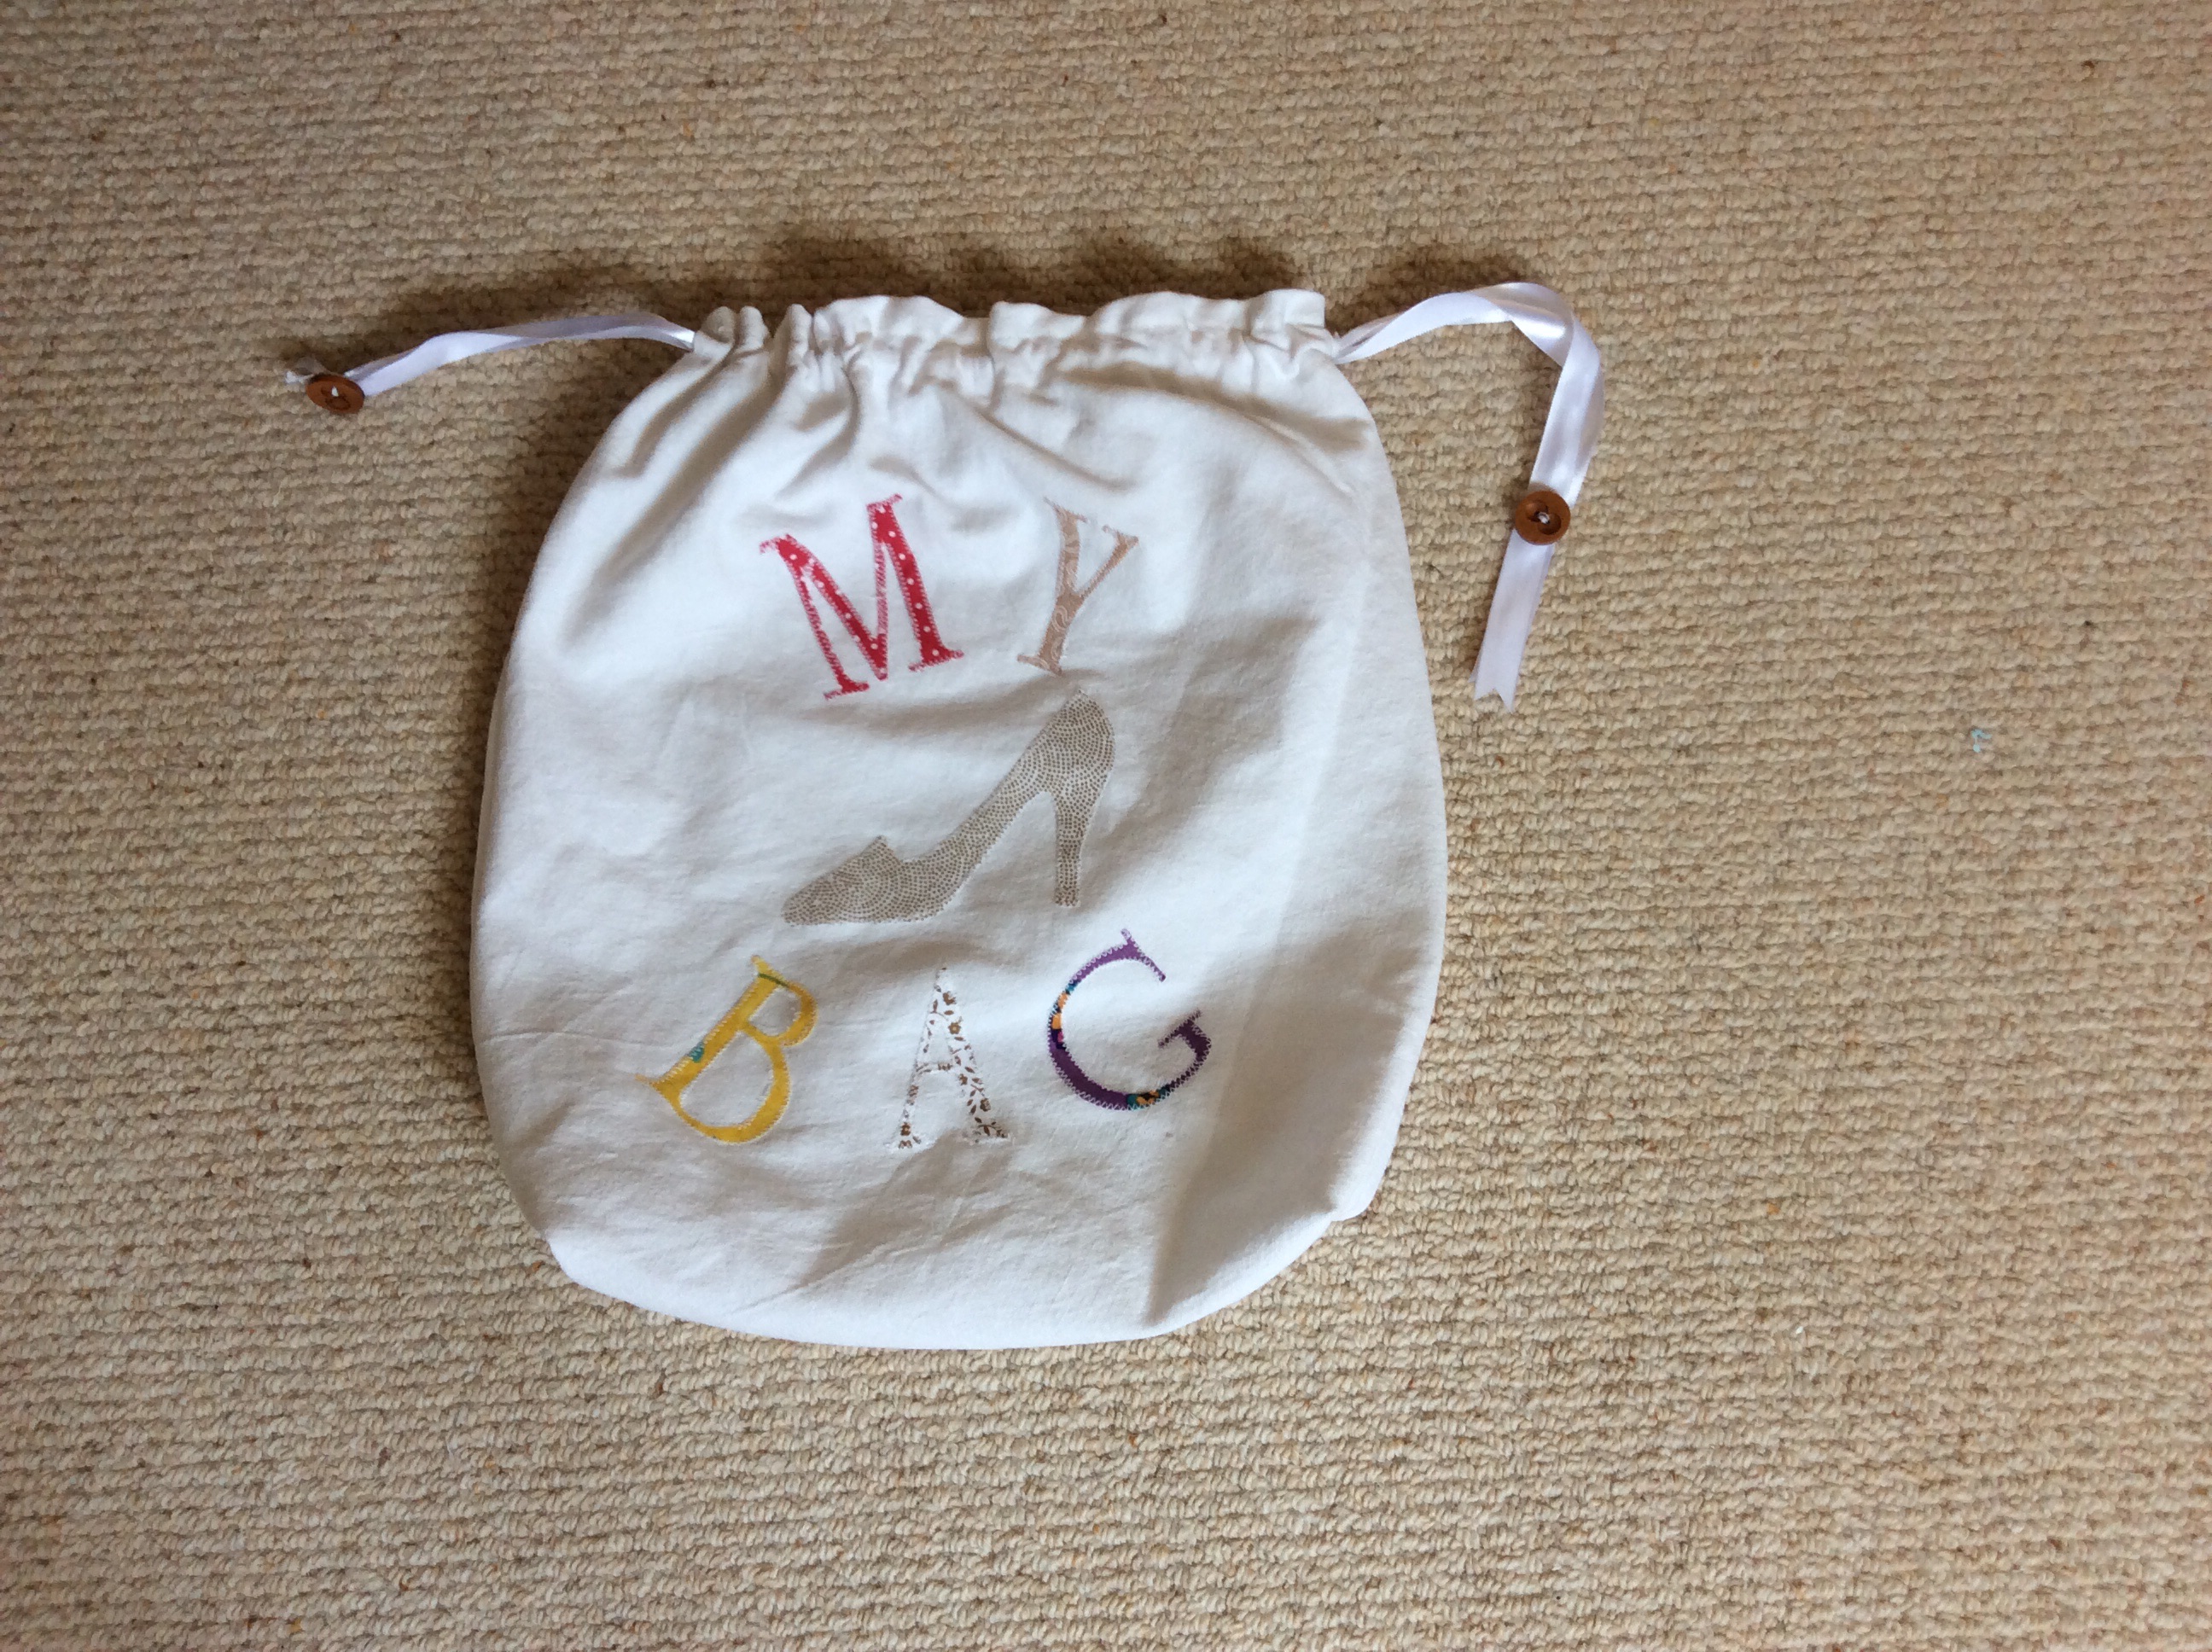
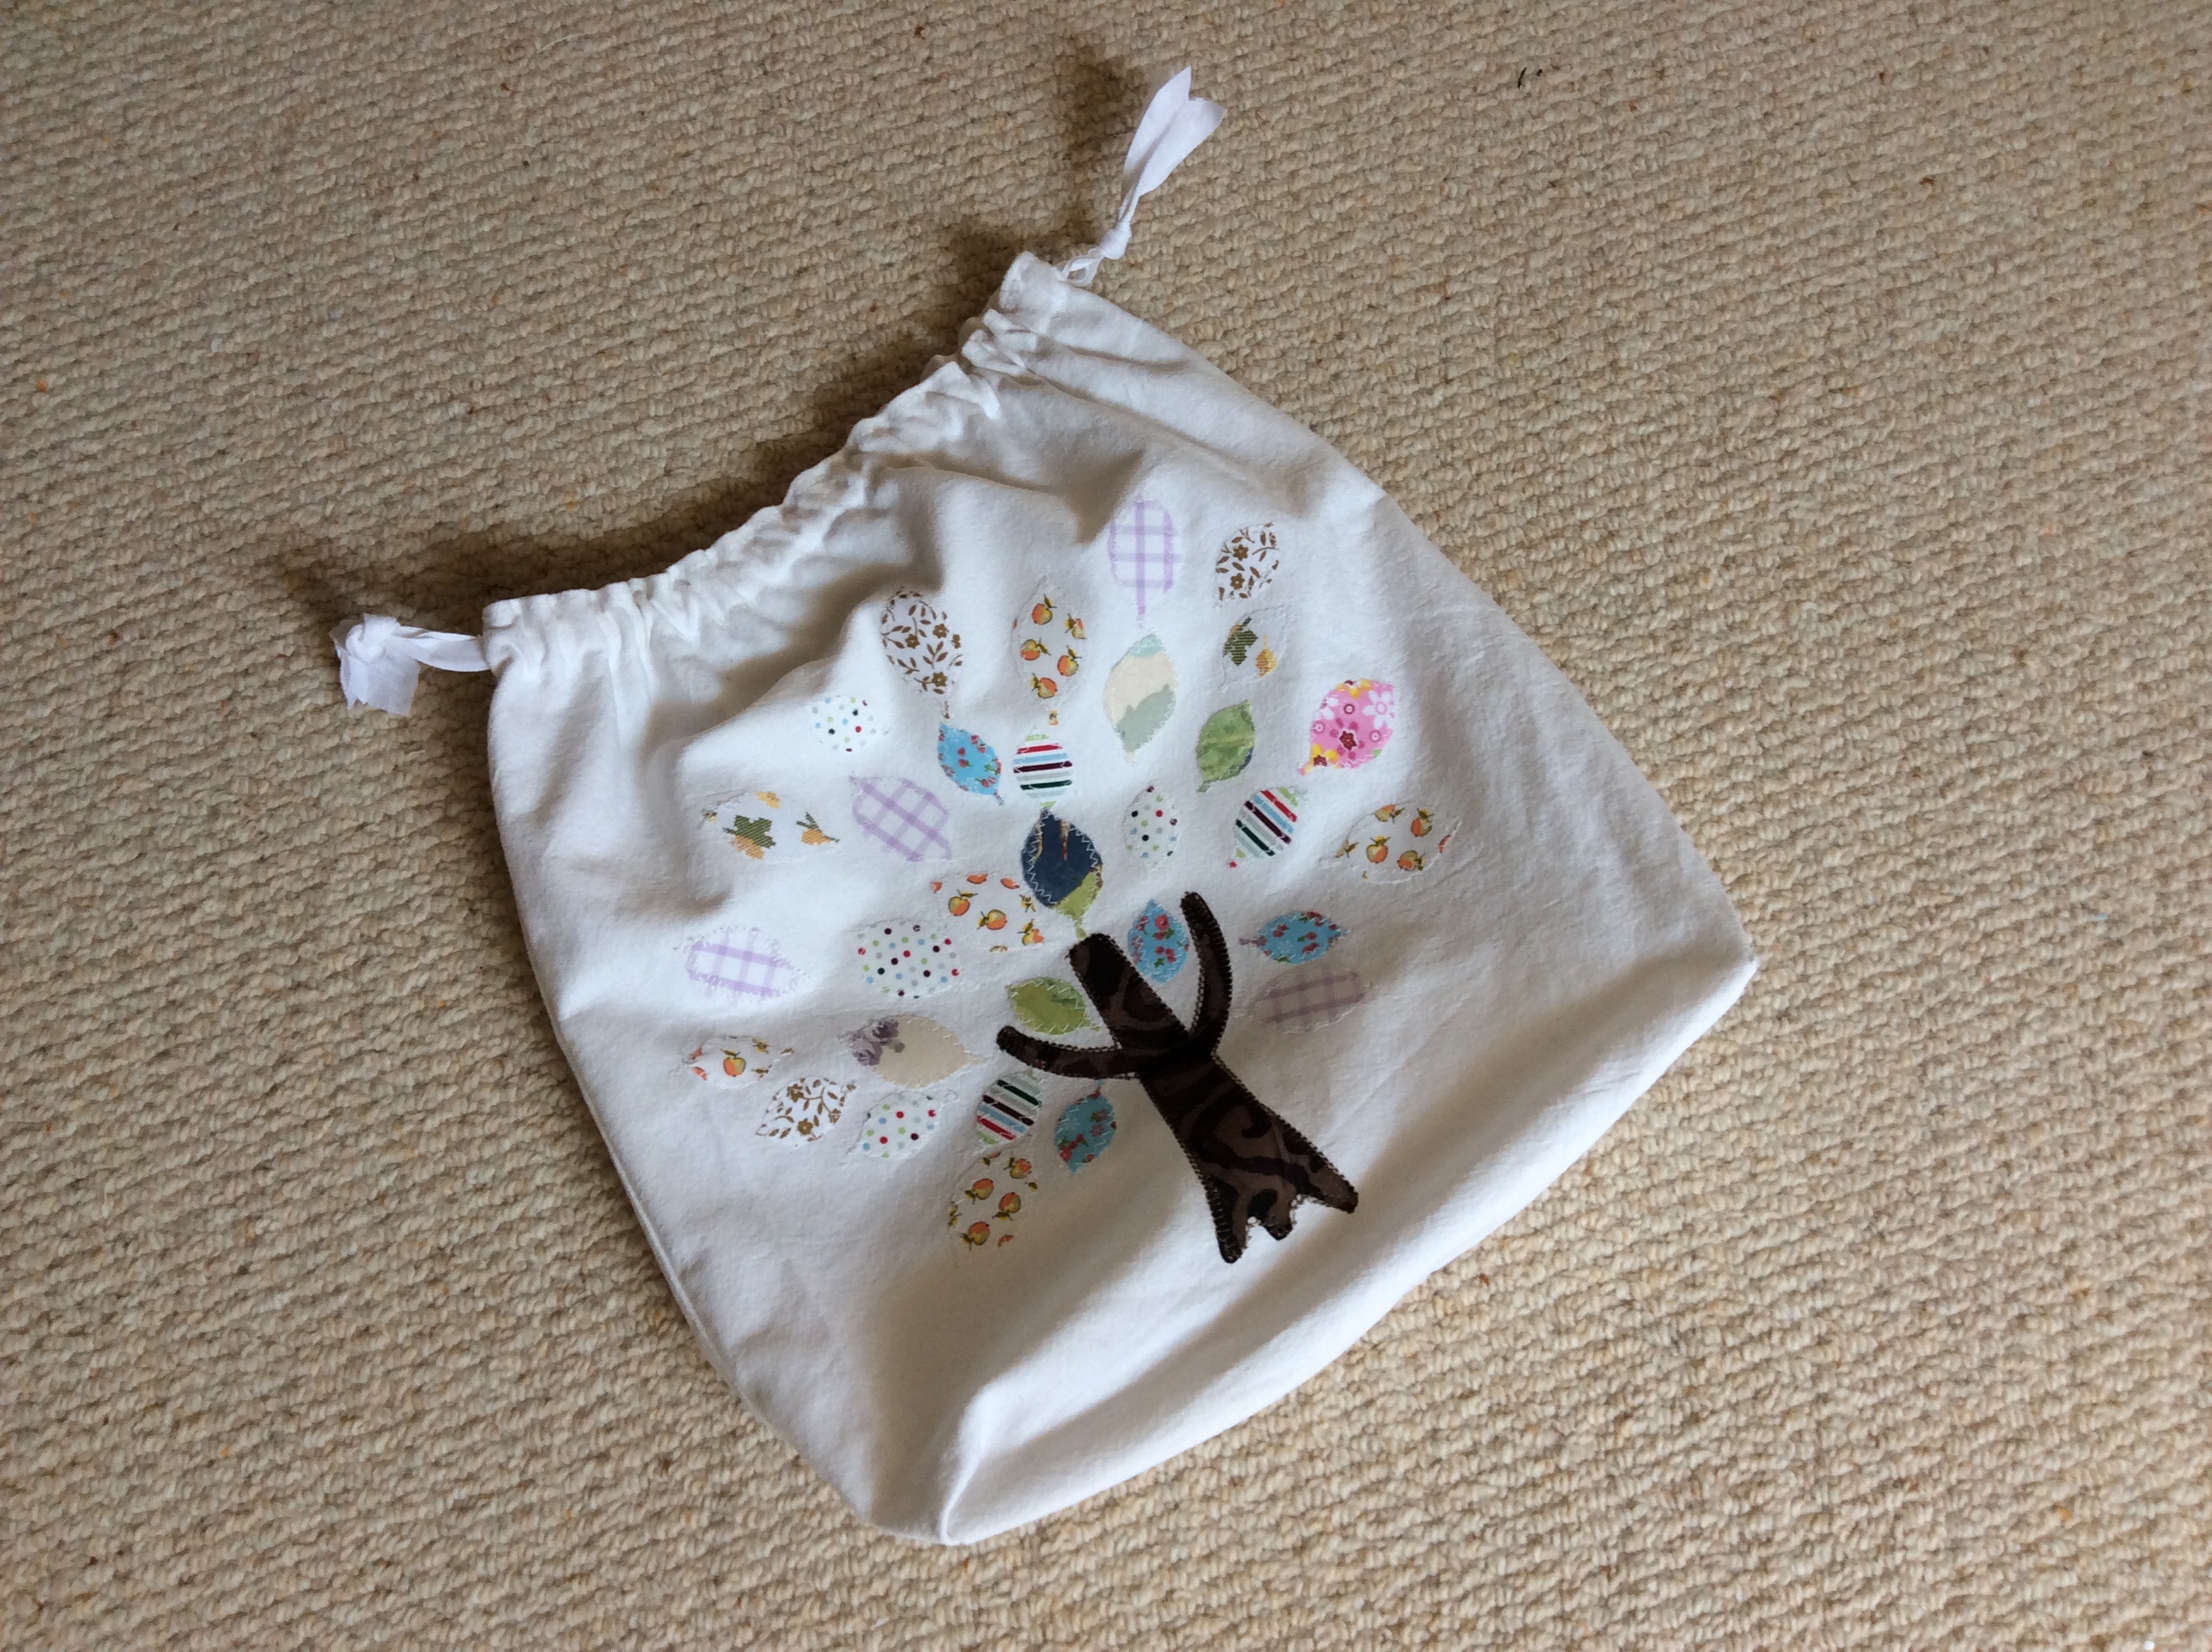
An old tablecloth up cycled into a shoe bag and a something else drawstring bag with appliqué decoration.
i used my new ScanNCut to transform scraps into appliqué shapes. Heat and bond lite gives lightweight cotton enough support for the machine to cut fine lines.
after ironing the shapes into position on the bag front panels I used zig zag to stitch them down.
Then I cut a matching back panel and pinned the panels top sides facing. I marked a gap for the drawstring channel between 2 and 5 cm from the top of each side and sewed around the rest of the sides and bottom. I boxed the corners to give a bit more shape to the bag as well.
rather than lining this heavy fabric I just ironed a 0.5 hem at the top and used a length of 4 cm bias binding to form the drawstring casing as well as fix the hem down. I zig zagged each side of the bias binding in place to make sure it was firmly attached.
I folded two more lengths of the same binding for each bag as I didn’t have any ribbon long enough for the drawstrings. These were pinned to a safety pin and threaded through the gaps in the seams and around the casing, one from each side seam. Finally each length of binding was knotted to secure it, on one I sewed some buttons to make the knot even firmer.
what to do when you aren’t 100 percent? Craft of course!


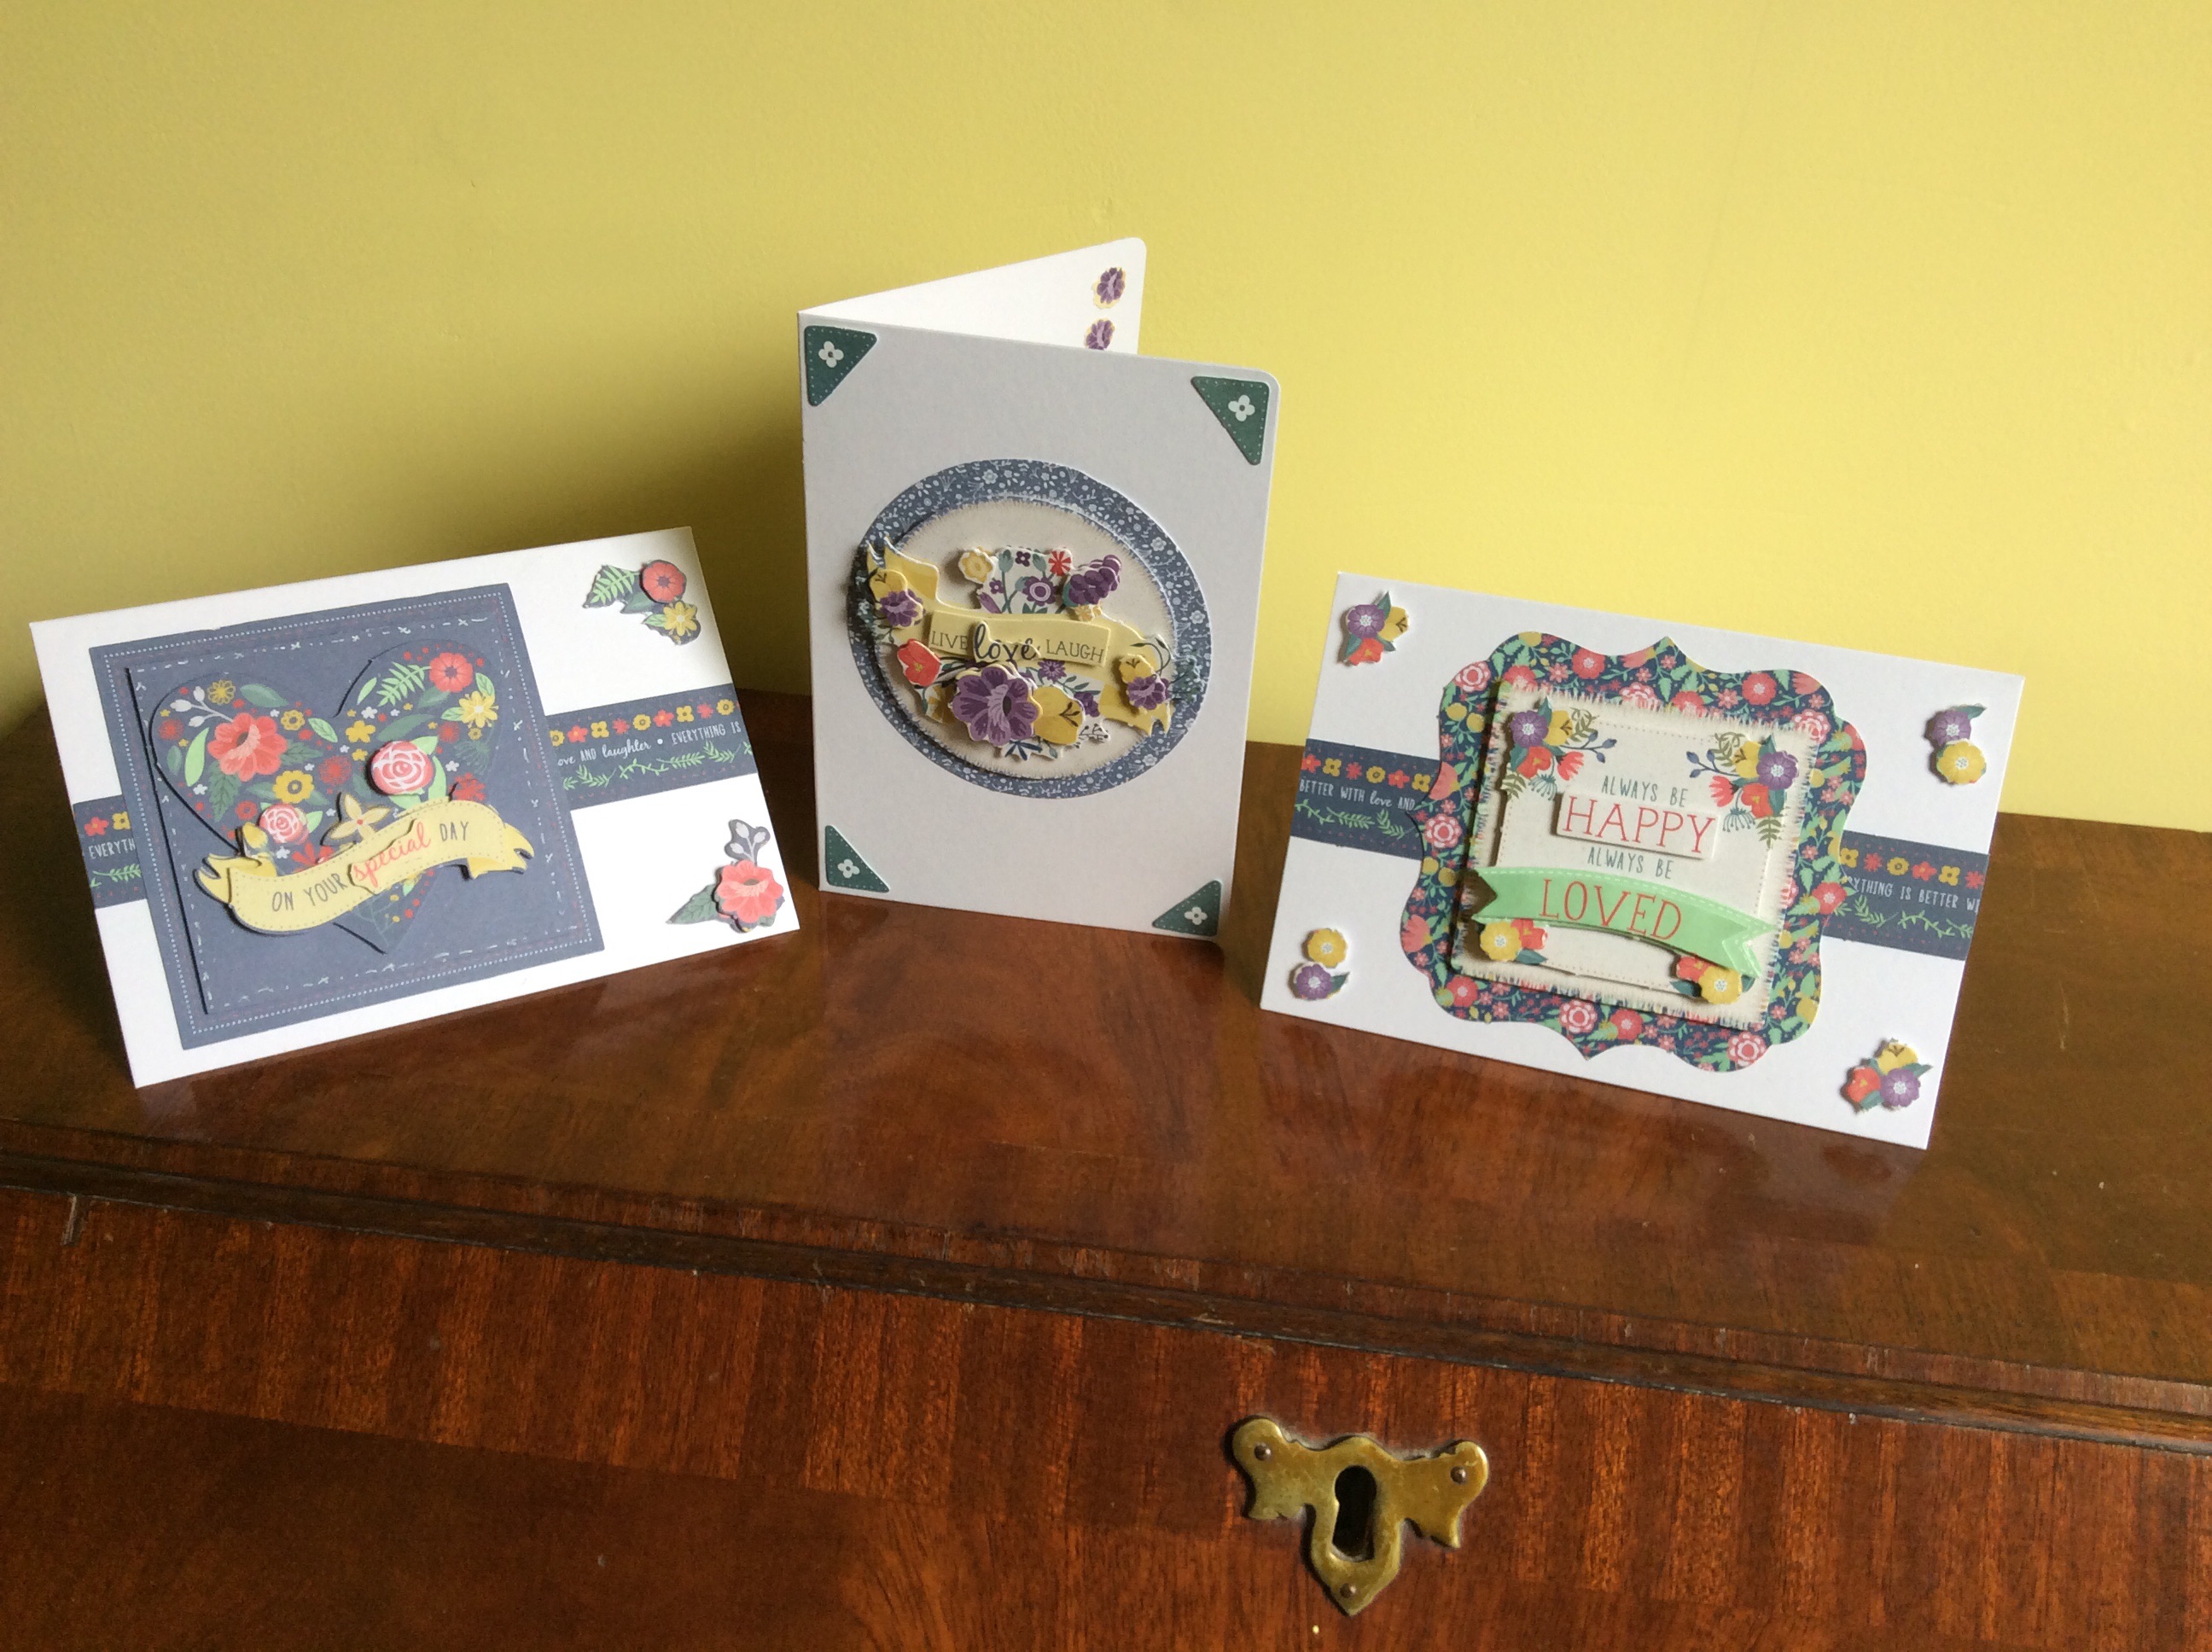
Here is a selection of the cards made from kits. Now that my scan n cut is here, the next batch will be something else.
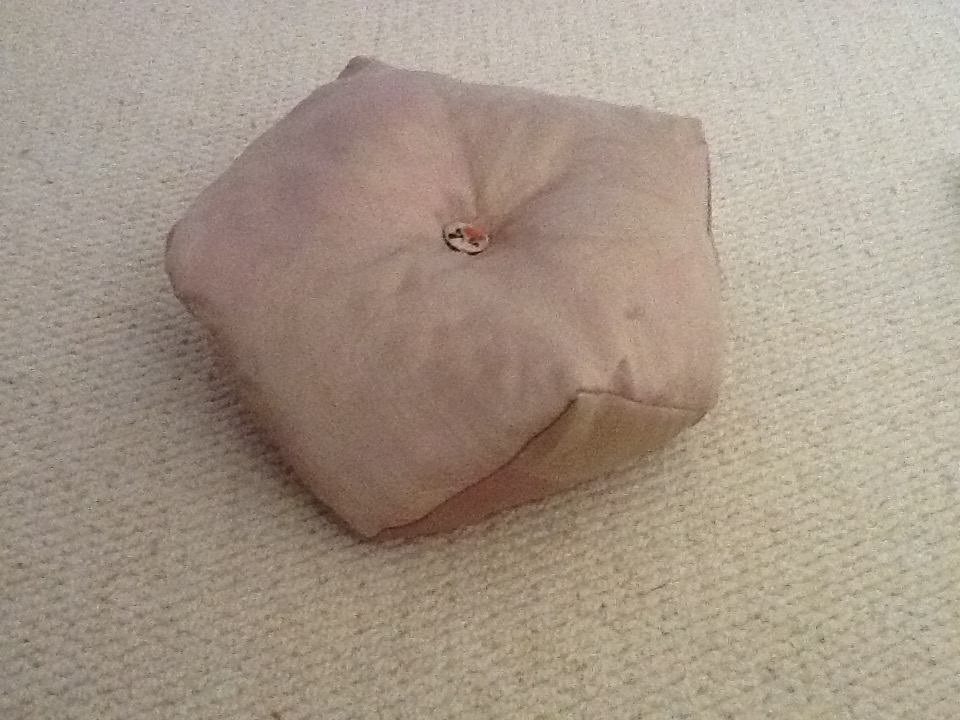
A quirky little cushion to use some of my upholstery samples pile. Easy to sew but best with less silken fabrics so the corners are more pointed and the hand stitched gap less visible. I used two patterns of the same colour way for a subtle contrast between top and bottom. Works well with clashing colours too – if your sewing is neat. A frill or piping would be even snazzier.
method: ontwo identical sized squares mark centre points of each side with erasable pen. With wrong sides together clip a corner to a mid point and seam towards the next corner. Stop at the same distance as your seam allowance is wide. Adjust the fabric and clip the next mid point to the next corner and seam. Continue around seven and a half of these edges then turn through the gap you have left.
stuff then hand stitch closed the gap. I think sewing a button centrally top and bottom improves the finished look.
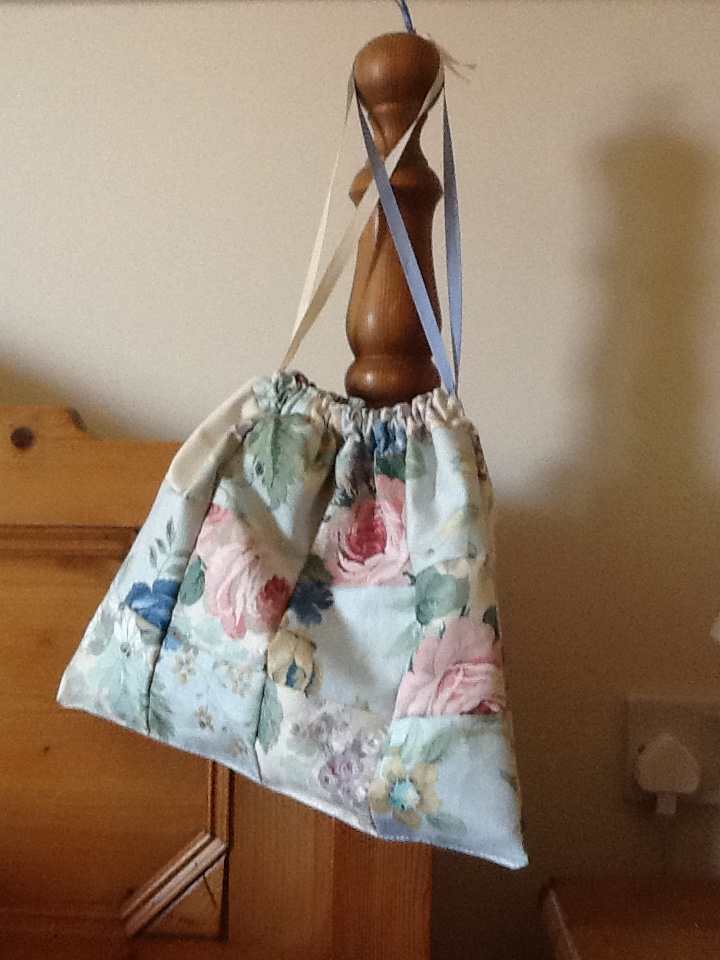
A frugal project to make an elegant bag for wet stuff, toiletries or …
three sheets from a pattern book donated, lining from a shower curtain, ribbon from my stash
cut fabric into equal shares and patch together to size required for front and back. Sew around leaving gap for drawstring channel about 3 inches from top on either side seam . Cut lining three inches shorter than outer then seam round leaving gap in bottom for turning. Slip outer inside lining, right sides facing, and match seams with clips. Sew around all the top. Turn through gap in lining then top stitch gap closed. Push lining down so that the top of the (taller) outer folds over and top stitch above and below the channel gaps to create a ‘tube’ through to thread ribbon from either side. When ribbon has gone all the way round, knot the ends and you are done
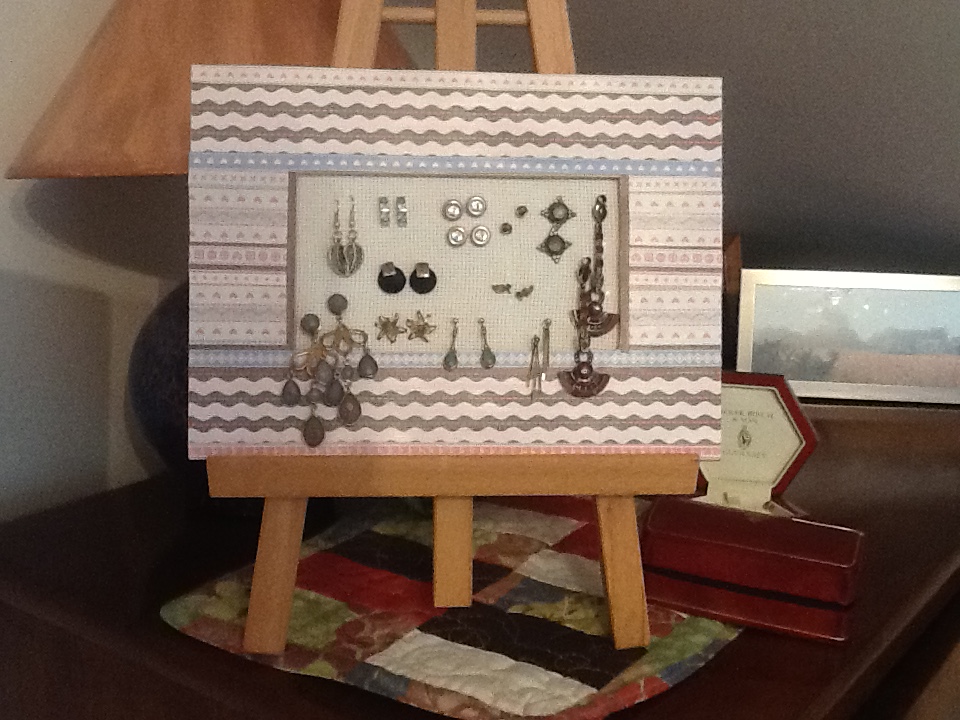 A companion for the framed burlap holder I use for hoop earrings. This works for studs or earrings with butterfly backs. If only rarely to be used (how many earrings do I own?!) could be wall hung but for ease of access to the back this sits on an easel. I used strips of docrafts craft paper sealed with modpodge to pretty up my old frame.

method: remove glass and backing from frame. If necessary decorate the front of the frame with papers or ribbons or paint or … Cut a piece of aida cross stitch canvas a bit bigger than the aperture of your frame . Stick to the back of the frame pulling the fabric taut as you go. If gifting cover the back of the frame to cover your work. Job done,
