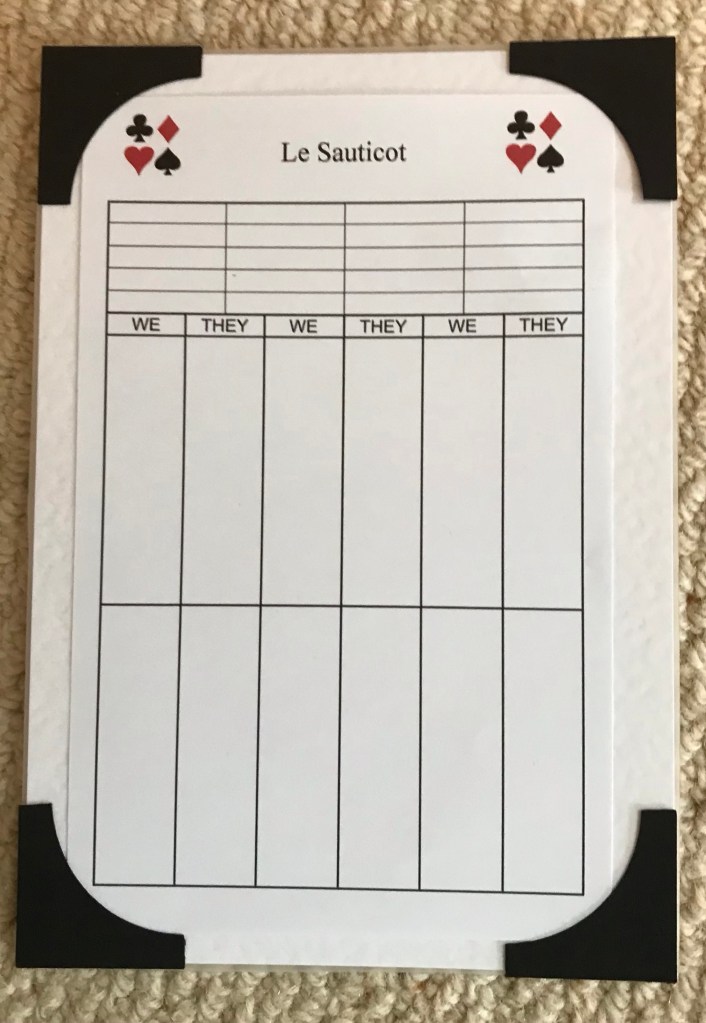
Why buy when you can make? A set of bridge score cards made in Pages and some holders that are just matt laminated card with scan n cut photo corners stuck with red liner tape.
Now to work on my bidding so I can record some good scores on these!

Why buy when you can make? A set of bridge score cards made in Pages and some holders that are just matt laminated card with scan n cut photo corners stuck with red liner tape.
Now to work on my bidding so I can record some good scores on these!
I over-ordered some exterior vinyl for 2021 Christmas projects so was pleased to use some on this lovely piece of wood we received at Christmas this year.
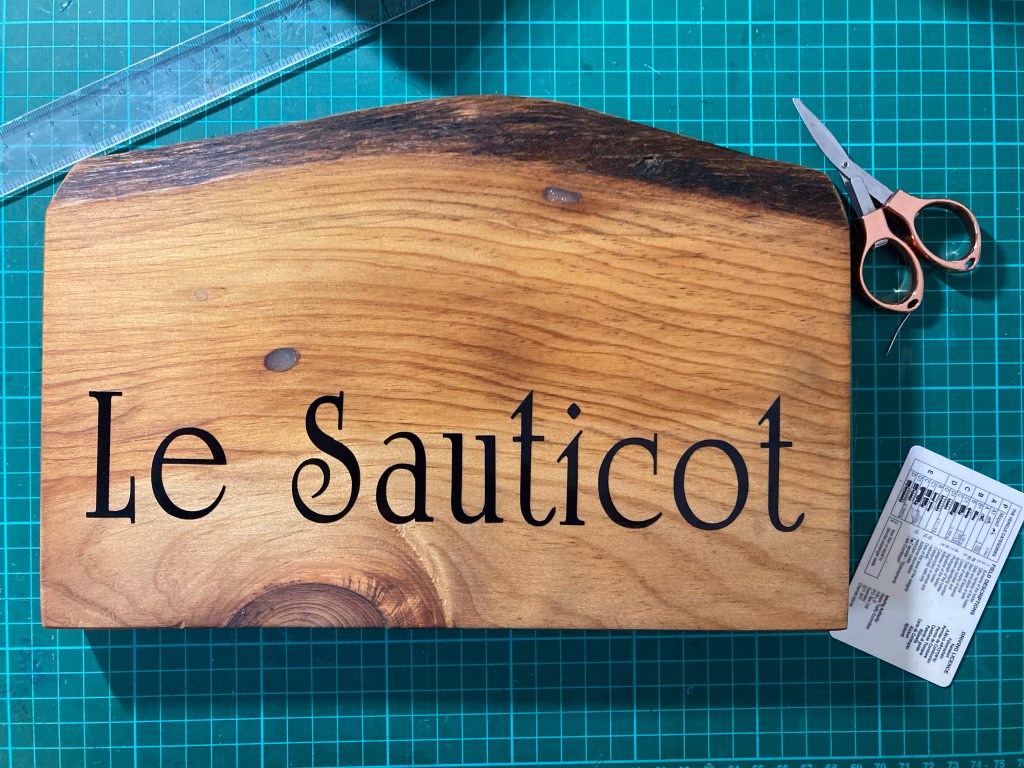
I used the scan n cut inbuilt font for the lettering. The font was stretched up to make it fit the wood fully.
After carefully applying the vinyl, resident DIYer drilled holes for the cord loop which he stained to tone it down.
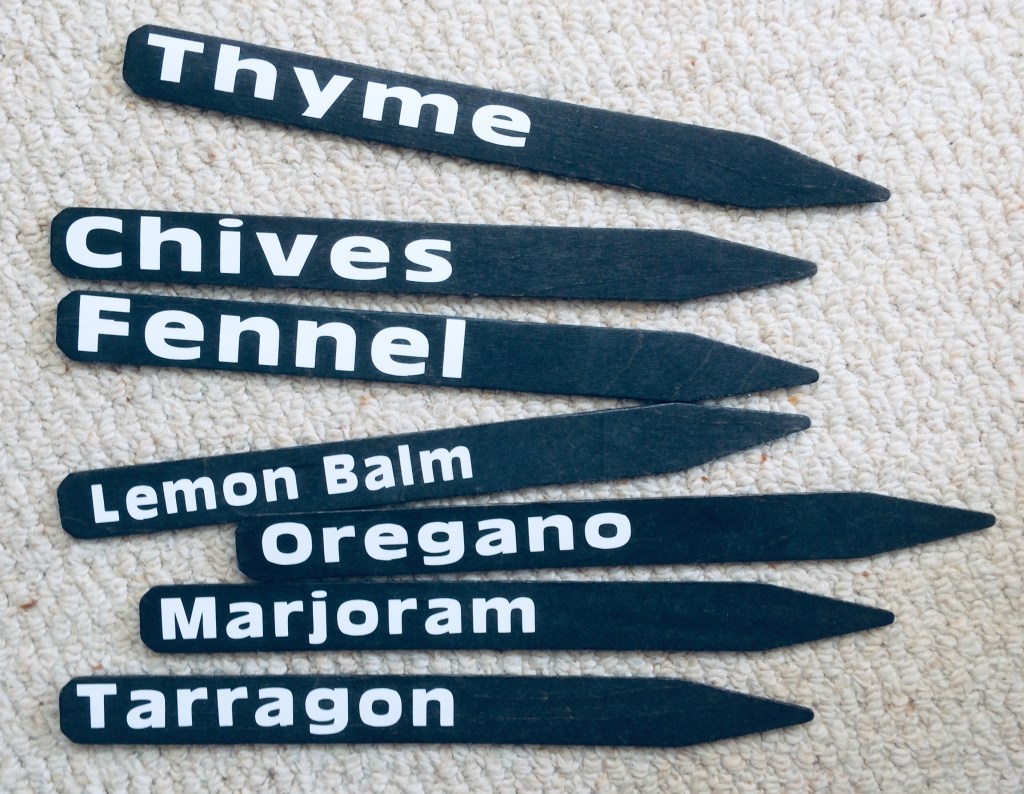
Using some of the outdoor vinyl I bought … we found some plant markers in the shed so I made some smart new plant labels. Scan n cut comes in to its own for this and transfer tape makes for neat positioning.
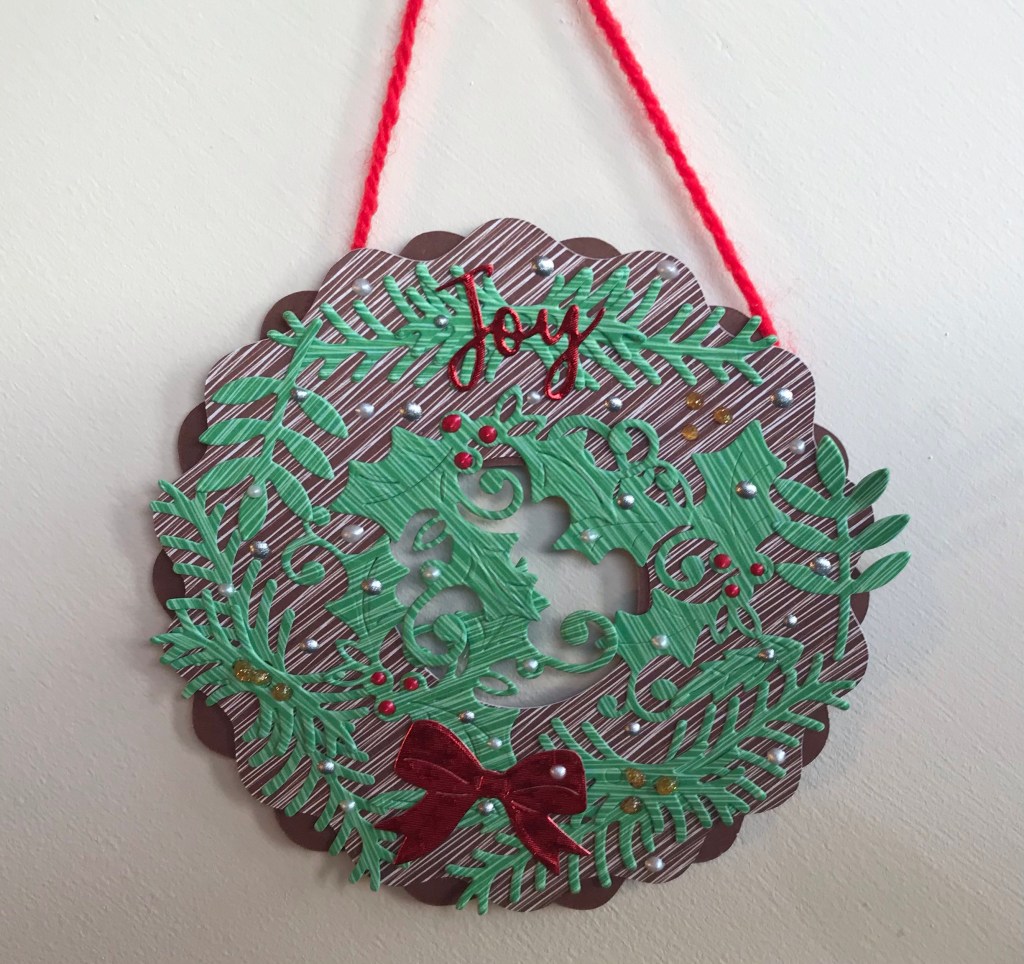
These 5” wreaths were made with scan n cut template cut from card and covered with Christmas holly, frond and leaf die cuts then finished with stickles.
Two wreaths sandwiched a piece of wool for hanging to make a little indoor welcome.
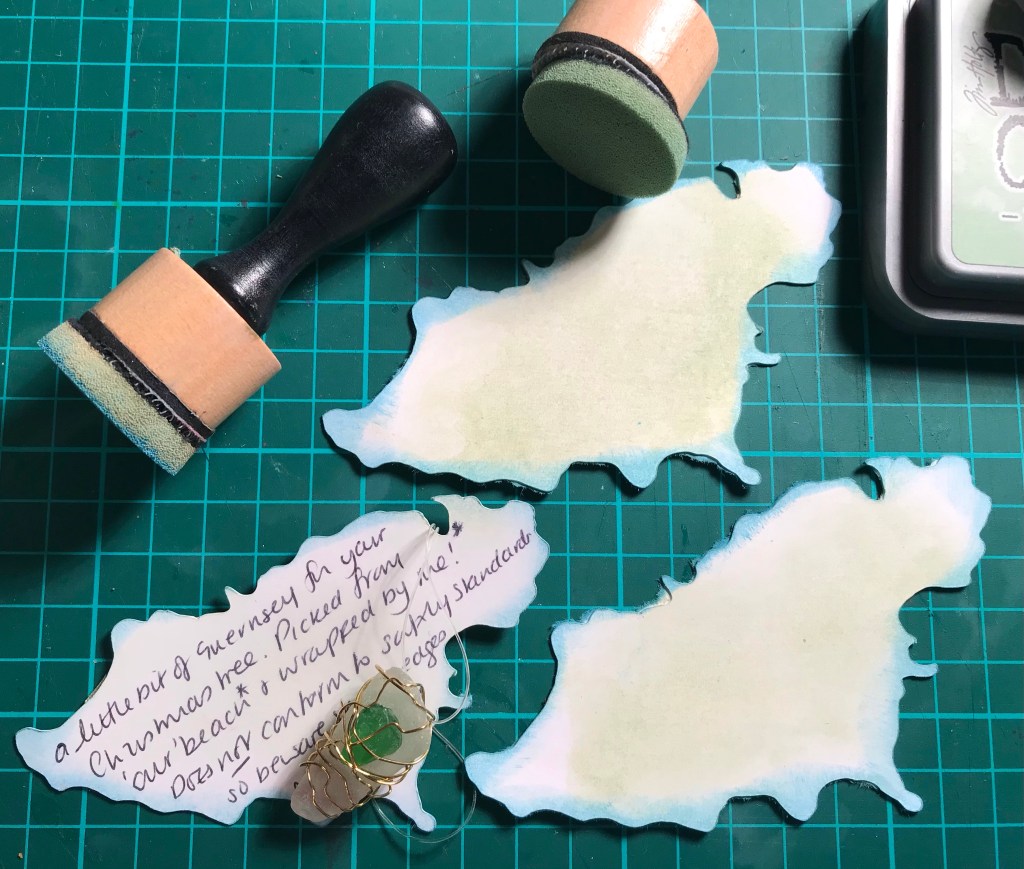
I have been wire wrapping sea glass found on a nearby beach and wanted to present them nicely, so turned to the scan n cut.
I drew an outline of where we live and scanned it in to the machine’s memory. I then resized it to hold some of my decorations and cut out just enough from sturdy white card. Before writing my message, I inked up the coastline in blue and faintly inked the land in green.
I can, in the future do tiny versions or go up to 12” wide versions for any home made crafts. It has taken me three years of playing with this machine to do what I should have thought of on day one!
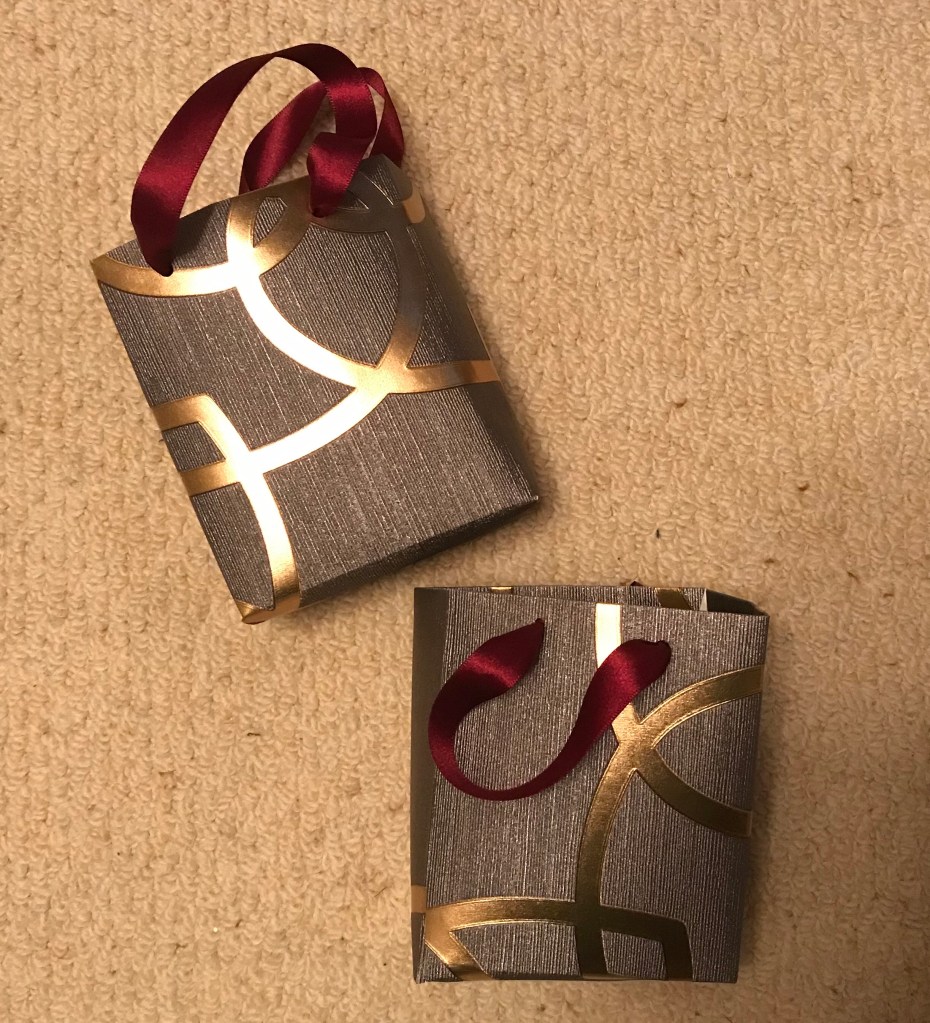
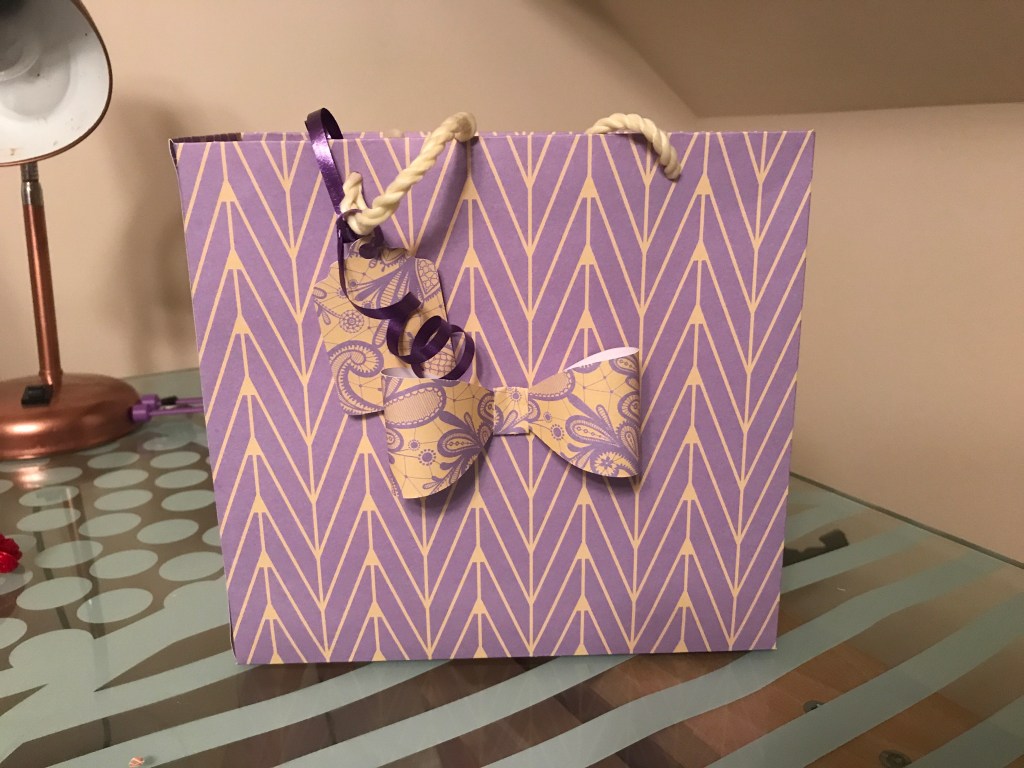
Whoops! I seem to have ordered lots of 12 x 12 paper pads before using up my considerable supplies, so spent a couple of afternoons making gift bags.
Pictured are some I made from a roll of remnant wallpaper which is also demanding to be used.
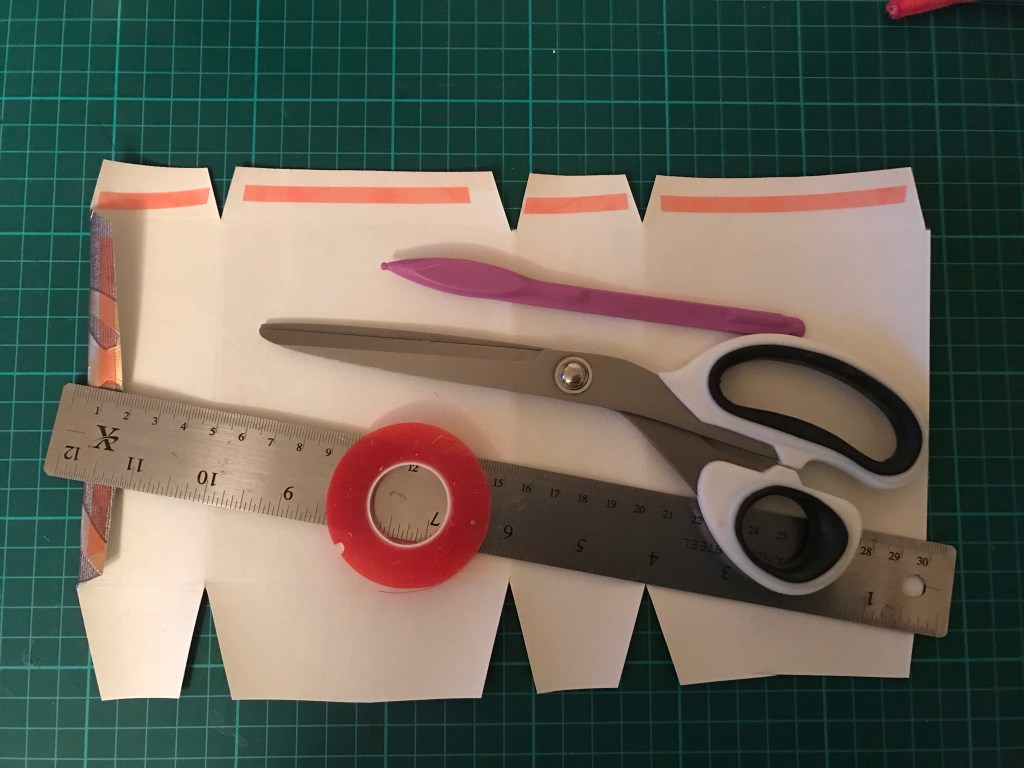
A simple formula: trim paper to 12” wide by 7” high. Score along the 12” at 1/2”, 2 1/4”, 6 1/4” and 8” then turn the paper and score at 3/4” (for a top reinforcing fold) and 5” (for the bottom) Trim out the score lines and tape as shown. bottom tape not shown.
I used red liner tape for strength and popped in a piece of card to reinforce the bottom before punching holes to thread ribbon or cord for handles.
For the 12” by 12” sheets I used the trimmed spare to make labels and bows on the scan n cut.
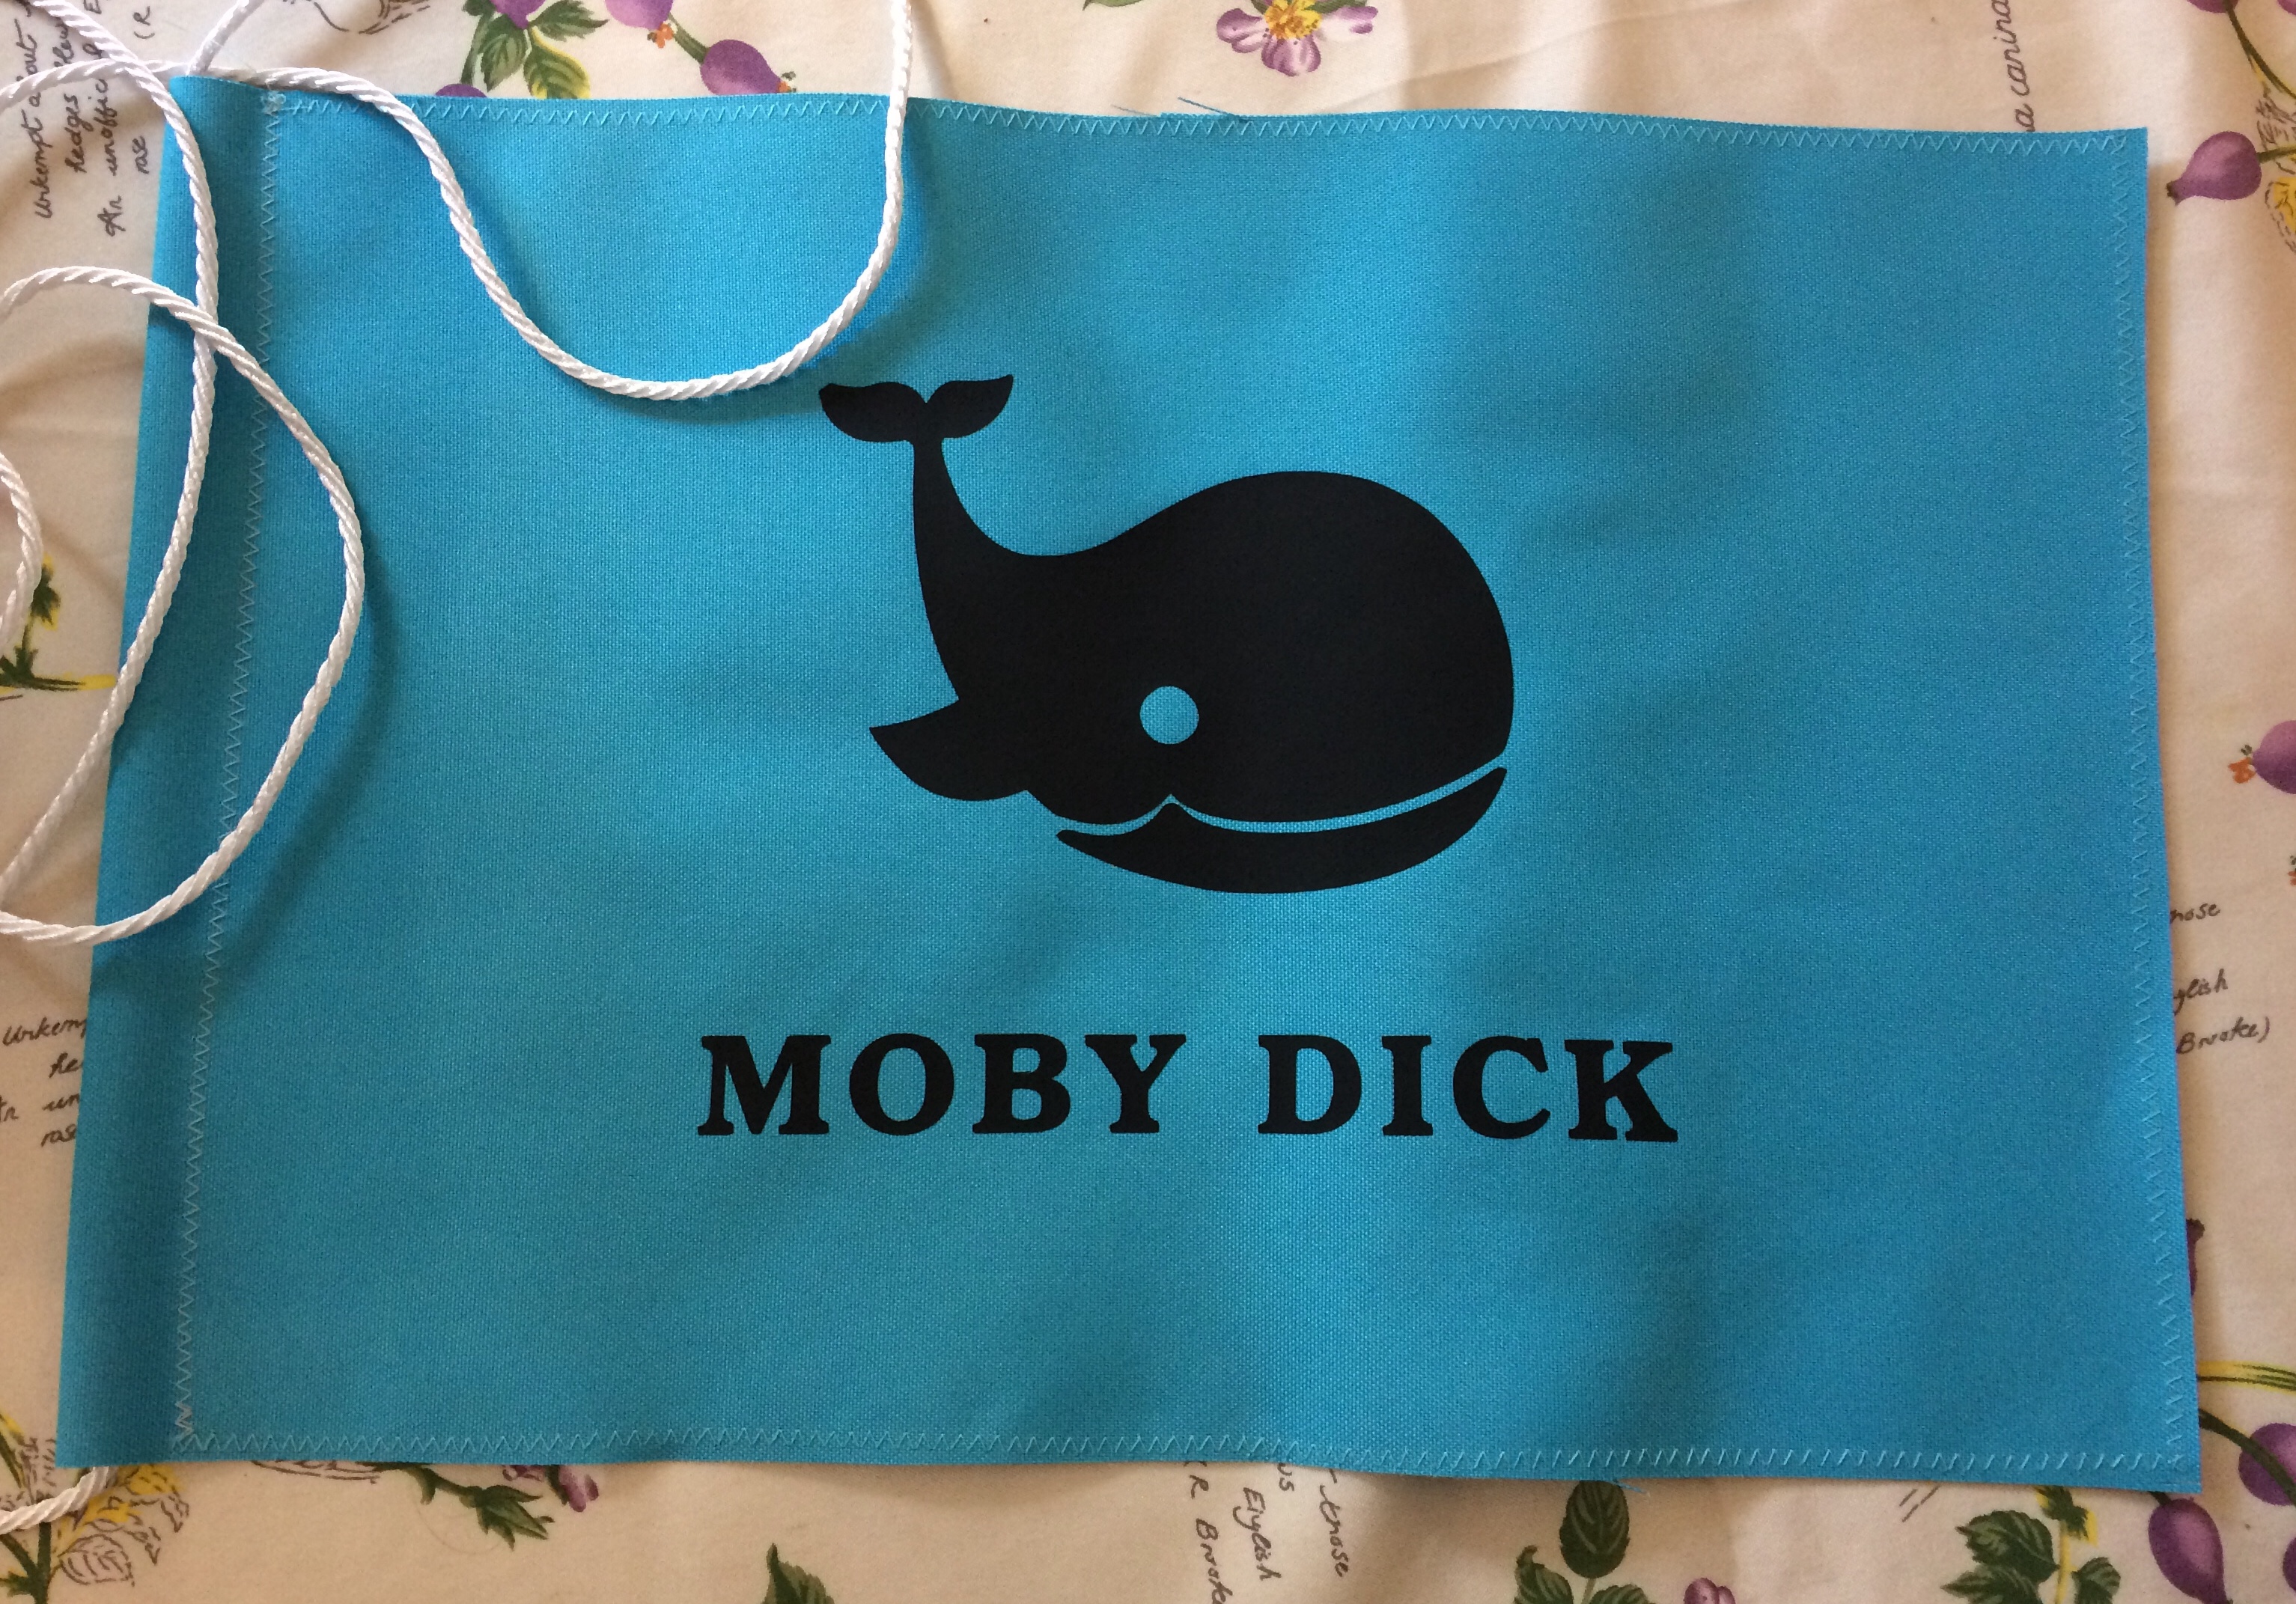
This premium vinyl is much better than the economy version I have used before and I am surprised how well it melds into the canvas fabric. Let us see how the boat flag survives its outdoor life.
The other projects created from this crafty session with the trusty scan n cut (the whale is a standard supplied svg) will remain a Christmas surprise for the lucky few!
 Rescue an old t shirt, make a fancy dress effort with minimal expenditure, make gifts a bit special or just personalise your stuff. I love htv ( makes me sound professional using the acronym doesn’t it?).
I bought a sampler pack on amazon which has more than enough useful colours (black and white most used) and lots of brights I might use up one day…
The cutting machine is vital though, so -for this project for a themed party – I found some squiggles on lovesvg.com and used a scan n cut font to make my statement.
Because htv comes with its own carrier sheet for when you are ironing, make sure to reverse any text image before you cut. I also do a test cut to make sure I am cutting on the right side as it can be hard to spot with the naked eye. And pressure is usually -2 on my machine.
Once cut, weed off the vinyl you don’t want, place vinyl side down on your garment and iron on. I use a towel inside the shirt and a pressing cloth ie a bit of cotton between hot, dry iron and carrier sheet. Let the vinyl cool before you try and peel off the carrier sheet, if there is resistance iron some more. That is all.
 A quick cut project using the scan n cut based on Applelover53 berry basket (free from her blog cut files).
Ready for Easter or biscuits or to present home made goodies when filled with crumpled tissue paper. I used red liner tape to fix the two top ‘holding strips’ to the sides and the handle to the basket but it won’t be weight bearing. I also added a little felt tag tied to the handle as I have a pile of them to use up somehow …
I guess you could devised your own pattern and hand cut – pieces shown below – but I am grateful to find the file ready to use. For this version I used some Kanban light card which has a two tone pattern on one side and is plain on the other.

