Decoration fail!

imageribbon strips sewed on to felt cut in the shape of bells …

I sandwiched a loop of elastic between two pieces of felt (scan n cut not happy about cutting felt in a freezer paper sandwich)

i glued one pair of bells together then hot glued lengths of ribbon across the front and back of the shape, to cover the edge some ric rac was glued around the side

Not happy with that I tried sewing rather than gluing, still not looking good enough for use, oh well, an experiment!

Plastic bag holder

image
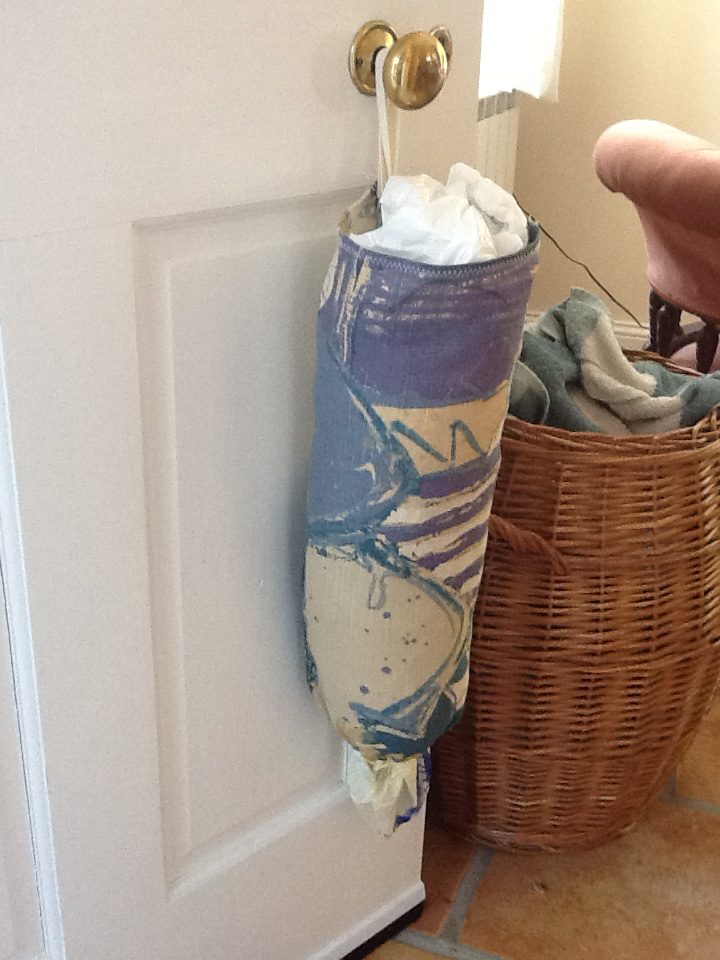
a quick sew to tidy up all those stray bags that still come back from shopping expeditions

a fat quarter or 18x 22 inch rectangle of material

8 inches of elastic , 1/2 inch wide is fine

8 inches of tape or ribbon

fold over 1 inch on a short end of the rectangle, which we will now call the bottom, and fold it over again then press and straight stitch at least 1/2 inch away from the top fold so you have made a casing for the elastic

fold over 1/2 inch once on the top edge of the fabric, fold again and press then stitch that so you have a neat hem at the open top where you will add bags in

fix a large safety pin to one end of the elastic and thread it through the casing, when it emerges pin the ends of the elastic together to form a circle

with right side of the fabric on the inside, fold the sides are together and seam from top to bottom to make a tube. While doing the seam make sure you sew the elastic ends  together maybe back stitching over the elastic for security

Fold the tape in half and stitch in place near the top of the side seam to make a loop for hanging

trim loose threads and excess seam maybe using pinking shears for neatness, turn right sides out and stuff with all those loose bags
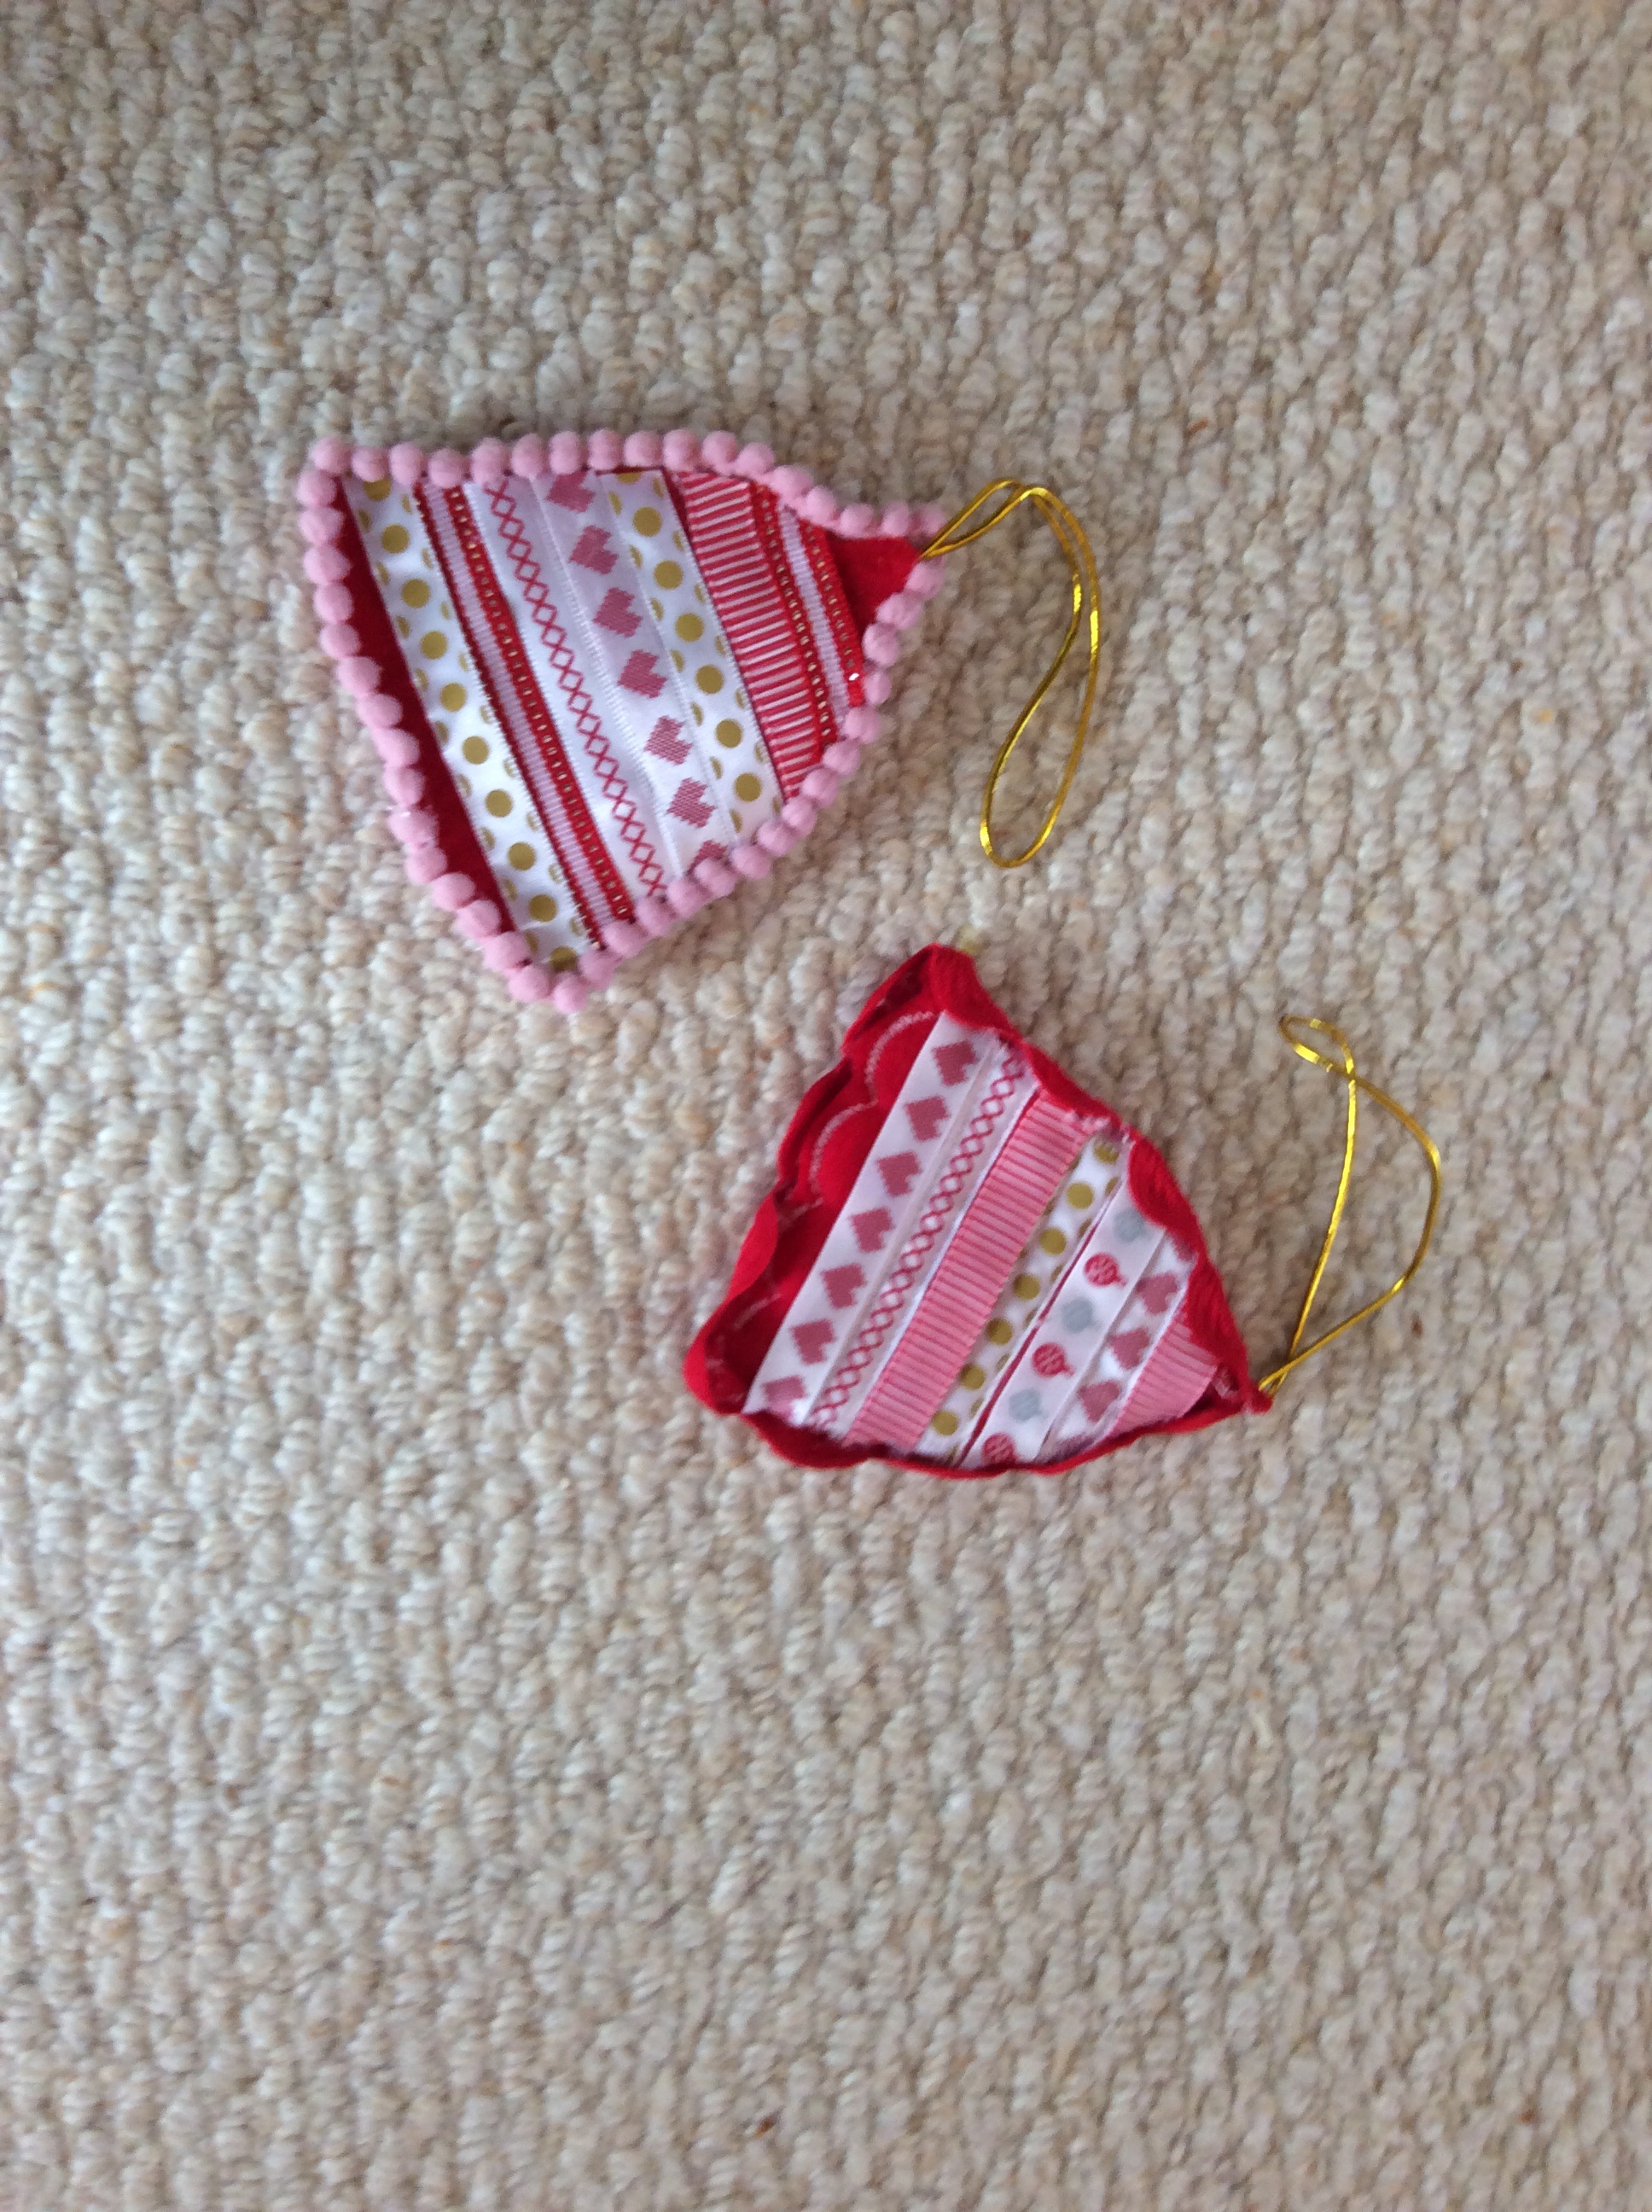


Bookmark bonanza

imageMethod one:  I cut  a length of tape slightly longer than a hardback book, fixed on a ribbon clamp at either end with jewellry pliers and decorated one end with  home made tassels made from embroidery thread.

I dug out some charms from the jewellry ‘bits box’  which I attached to the other clamps with jump rings. Made 3!

method 2: A simple ribbon book mark will be less robust but just as easy using clamps and tassels at both ends.

Method 3: two matching pieces of fabric were ironed to heat and bond then to the middle of the hessian piece. I sewed a decorative stitch around the fabric to halt the hessian fraying too much, then frayed the bottom up to the stitching to make a fringe.  A ribbon clamp and cord tassel at the top finished this. However the back isn’t so pretty so this isn’t a success.

Christmas pennant wreath

img_0175

A hoop ( I used the inner of a 9 inch plastic embroidery hoop), six and a half sheets of paper from the Papermania ‘At Christmas’ pack, a trimmer and scissors, paper glue and hot glue, 24 inches of cord to hang the finished article, some embellishments and it is done. Takes an hour of so with trimming and snipping.

Trim the paper into 1.5 inch strips the length of the page so you end up with 30 strips. fold each strip in half around the frame with the ends matching and glue firmly all the way from end to the hoop. when dry cut fish tails in each strip.

Tie the cord in a loop and hot glue it to form a hanger and line for a central message,

Cut strips of paper (1 inch x 4 inches) and fold and stick the same way to make mini pennants to bear a message or pictures in the centre. I stuck on letters to make ‘merry’.

Embellish with ornaments of your choice,

So easy but I made a  video tutorial …

Sparkly shoes

image image

A commission! Well a favour actually. And it has renewed my enthusiasm in blinging up everything. A bit nerve wracking to wave the hot fix tool so closely over new shoes but nothing burnt this time.. Plus I had to double triple check the L and R were on the correct shoes!

Tea bag holder

image
the jumble of teas was a mess so a set of boxes to tidy them up was needed

i ordered some fill your own tea bags to sort the loose leaf teas and made and labelled the tags with paper scraps.

image

For the holder

1 sheet  craft card plus 11cm square craft card

2 sheets 8×8 inch scrapbook paper, I used Bohemian dreams from craftwork cards

scalpel, glue and roll of red liner tape

lay the sheet landscape in front of you and score at 7, 14, 21 and 28 cm down then 4 cm across. Cut out the tiddly corner and cut up the bottoms as shown to create the base flaps. Place the tape roll on one of the panels at the bottom crease and scalpel inside it to create the opening

image

on the square card score around at 2 cm and cut one side of each of the corners as shown. I find it tidier to cut a tiny wedge out of these snips to make folding neater.

image


tape the boxes with red liner to keep them secure, tape the half moon flap to the base for extra stability and cover the outside panels with paper that is just a bit smaller  to create a mat effect

image

Book cover

image image

take a quality corporate notebook and personalise it with a piece of beginner’s applique that I didn’t want to throw away…

cut applique and lining fabric one inch bigger on each side of the fully opened book. Cut two panels of pocket fabric the same height as the other pieces and double the width of the pocket you want. Fold each pocket piece and sandwich between lining face up and cover face down with raw edges to side so they will get caught in the seam.

hem all the way round leaving a gap for turning, a walking foot is useful here. Turn out and flip pockets to inside. Iron well. Fit book inside to see how much wriggle room you have. Tighten up the wriggle room with a decorative top stitch around the edge. I just did top and bottom, this also closes the turning gap..

so much fun I did another one with crazy quilting but this time made it wider than the book and just 1 inch taller, hemmed the edges all sides then folded back the two sides to make the pockets before blanket stitching them in place and turning right sides out. Ironed an applique on to use it up

image

image