Themed treat box

02F12E8E-24A5-4732-A97D-C646E5BA27B7
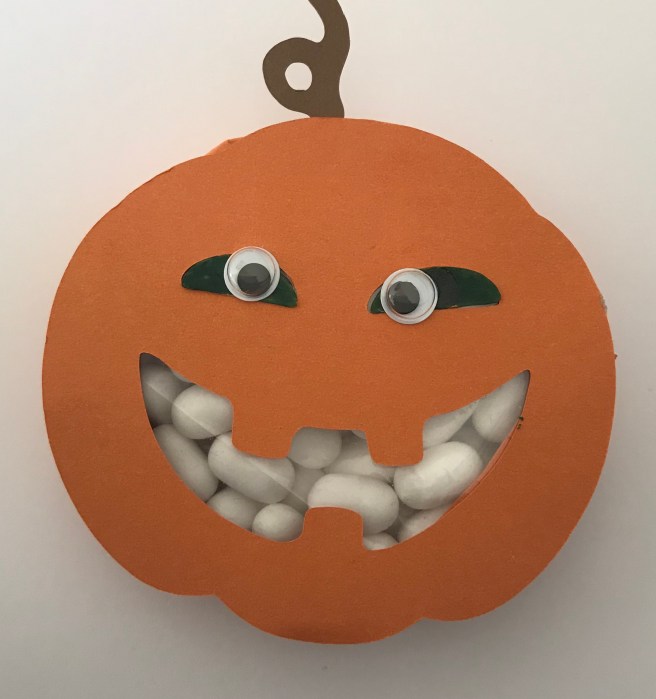
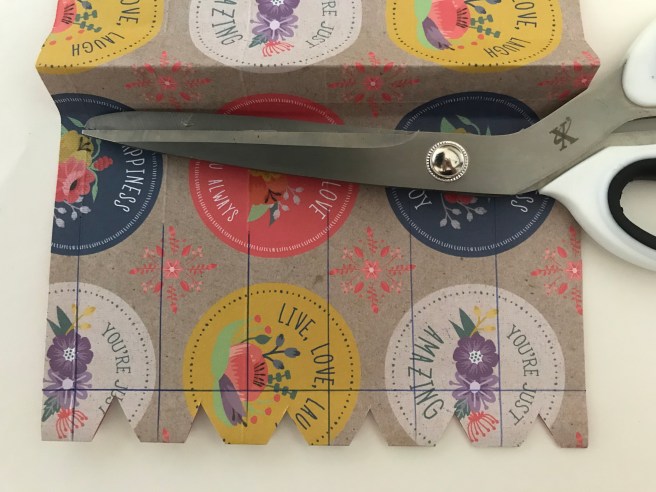
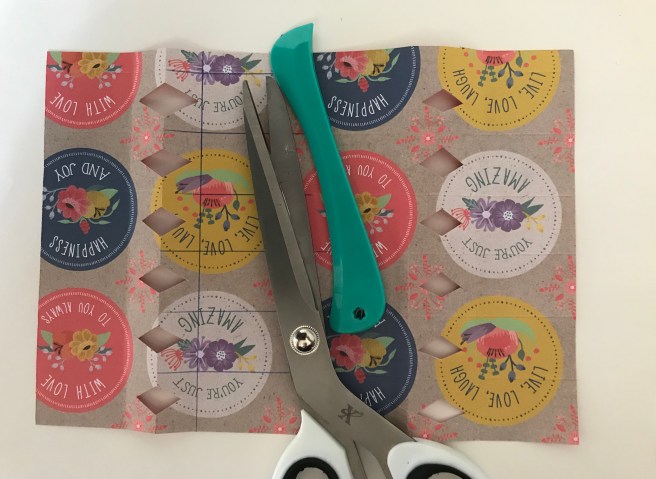
A treat box or table gift ready to hand out which uses up some mini mint sachets…

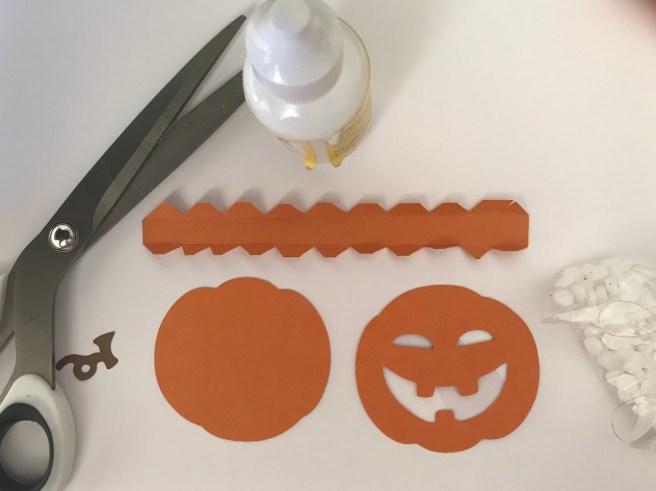
It is basically a sandwich of matching shapes for front and back with a strip of scored card around the diameter to hold the contents inside.

image.jpg

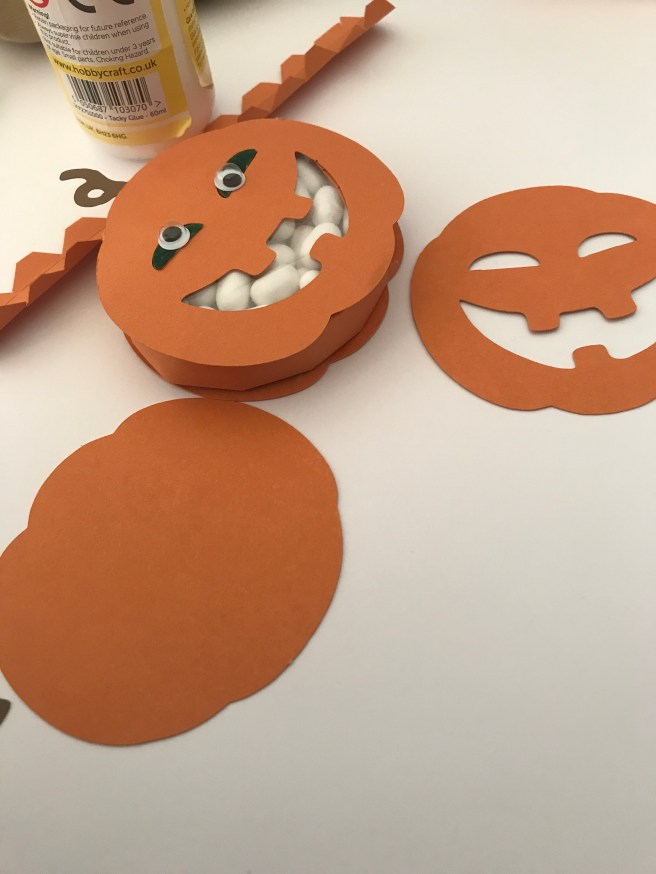
For this one  I cut a 3 inch pumpkin on the scan and cut, put acetate behind the apertures and fixed front to back with an improvised strip of card cut and scored as shown. To decorate I coloured, with a marker, the eye hole negatives put them back in place and then stuck on googly eyes and the little tendril to finish it off.

Now to make cars with windows, boats and other animals from the scan and cut. Easy project, good fun.

68FDD218-5250-42D4-9EED-5B90E649B39F

Washi Wednesday … part 3

5F96B15E-EEF9-4003-9433-D976EA9A7B55


We had a diy beauty products day and filled lots of pots and jars with creations, then decided to prettify the containers – with washi tape, of course.

My favourite is the hobbycraft bunting tape, the white background is translucent and ‘disappeared’ on the plastic pots.

We sealed the surfaces with mod podge to try and keep the washi in place until the next refill.

Magnetic wristband

6439824B-416C-4B62-B868-C3C6504B21BF
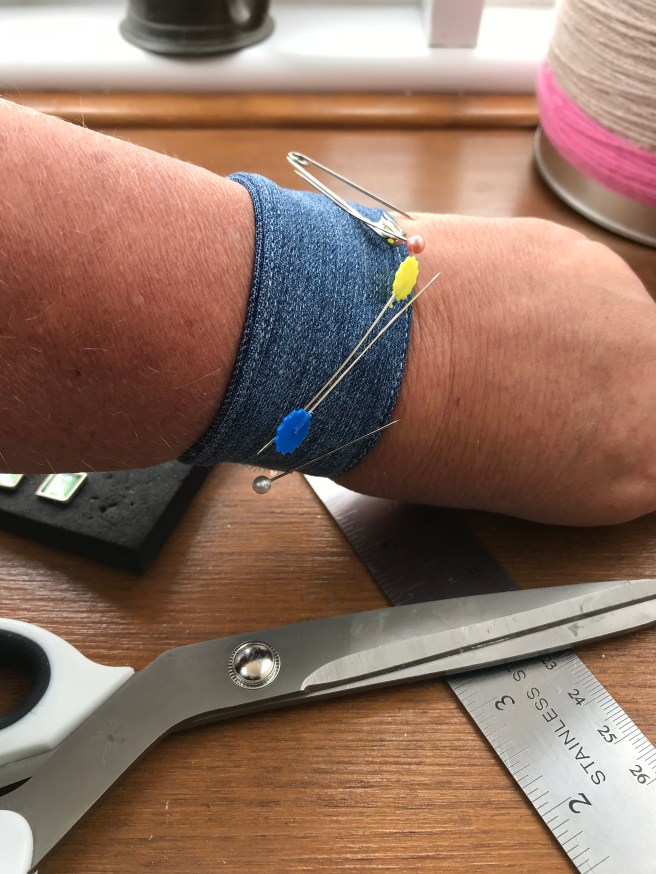
Great for sewing or diy. No more dangerous pins between the teeth or dropped screws with this quick stitch wristband.

Materials

fabric about 11 by 2.5 inches for a woman’s wrist – light denim ok, cotton better

velcro, 7 mini magnets, 6x 0.5 inch strip of magnetic sheet from craft shop, glue, needle and thread

Method

Fix Velcro towards opposite corners of the fabric i.e. top right and bottom left so that when the fabric is folded the strip will fasten comfortably around the wrist, stitch Velcro in place

Fold the fabric in half, with right sides facing, to form a thin strip and stitch round the three open sides, leaving a turning gap about half way along the long side. Turn fabric right side out.

Stick mini magnets along the magnetic sheet, spacing them evenly. I used multi medium glue. When dry, slide the strip in to the fabric through the turning gap – make sure the magnets are facing up to what will be the top of your wrist band

Top stitch all around the edge and you are done.12A02BF1-0859-481A-9AF6-8A0D0859AA31

Washi Wednesday part 2…

F69B3112-3D60-4248-9DE8-0E1D39BBC5B2

A cheapo frame covered in washi tape is upgraded enough to display an old photo which came to light in a rummage through the albums.

Patterned washi is forgiving enough to allow for overlaps, so all the visible frame is covered and little creases can be smoothed out too. Long term I will coat this with mod podge to stop any lifting.

This green bird patterned washi came in a set from paperchase, lovely stuff. The mount is made from paper brought back from South Africa as a gift, I am told it was made principally of elephant dung!

Washi tape


32B12F90-6AF3-425D-A680-31AAFC38F2A1


Who doesn’t love washi tape? The challenge is to use it, particularly as I am now two thirds of the way through this year’s resolution to “use what you have”. So today is declared washi  Wednesday and I have been taping all sorts of objects in an attempt to use some of 50 (! How did that happen?) rolls of tape hanging in th craft room.

I have made fridge magnets from wooden pegs and magnetic sheets, and decorated more pegs that I use for clamping in the craft room. I covered corporate pencils and plastic coat hangers and also made the binder clips that I use for sewing very pretty.

(tip for covering pencils with minimal creases, run a strip of washi around the top and bottom of the pencil before spiralling around with the full length of washi )

I copied the bunting string from various pinterest posts and will use it to prettify a parcel

I have beautified spray bottles and tea lights but still haven’t made a dent in the stash, so  covering  journals and making cards is on the list for the next washi Wednesday.

Not being ambitious enough to do wall decor with washi, I would welcome suggestions for practical uses for the washi mountain. Polite suggestions only please,

Year Round Crackers

A 22cm x 16cm piece of heavy paper or light card is simply scored to become a classy table gift or place setting … I found this in papercrafter magazine and used it to try and stashbust a bit. Using assorted papers is fine as the washi edging unifies the group.

1. Score the paper along the 16cm length every 2.5cm leaving a 1cm tab at the end

2. Turn the paper and score at 4cm, 5.5cm and 7cm from either end of the 16cm sides
3. Flip the paper on to the reverse (unpretty side) and fold under each 5.5 cm score line

10D24E0D-723A-4EE3-8356-55C70A8D8320
4. Trim out triangles within each section as shown – the triangles don’t have to be equal, just within the scored boxes so they help the cracker fold at the end of the make. I drew over the score lines to show them more clearly

B52DDCAD-1080-4603-9E3A-AF8557627AC2
5. unfold so you have diamond shape cut outs and then flip the paper back to the pretty side then crease all the other score lines

6. fix double sided tape to the tab and form the paper into a tube

7. tie string or strong cotton at each 5.5cm line and pull the cord tight so it draws the cracker closed (pop in your gift before you tie the second time)

8. decorate with washi tape at the ends as shown. You can add embellishments or names or flowers or …

When using paper other than A4 try cutting 16cm by 23 cm for a bigger cracker body… You can scale this up to make full sized crackers from wrapping paper and/or pop in a snap and joke for a traditional Christmas ‘make’

Luggage tags

image
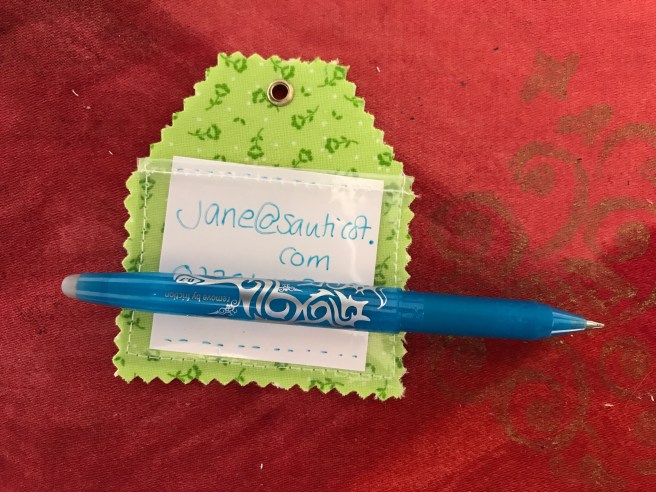
Easy peezy lemon squeezy tags that take minutes to make if you keep it simple…

1. fuse a piece of firm interfacing ( I used Pellon fuse-n-shape) between two scraps of material that are just bigger than the interfacing.

My interfacing was 3.5 inches by 4 – a scrap that I wanted to experiment on, my next versions will be a bit bigger if I decide to cut into my carefully hoarded interfacing.

2. Trim the fabric sandwich to a tag shape, rotary cutter works well but my favourite was  using pinking shears

3. Punch a hole and set an eyelet, I used my cropodile and was grateful to make a tiny dent in the eyelet stash (how did that get so big?)

4. Cut a piece of plastic packaging – the firmer the better- to a rectangle bigger than your tag and fold over a small ‘hem’. With a long straight stitch sew the hem down 44B7F43C-280A-4762-ACB5-76146994A8D9.jpeg

5. Position the plastic over the tag with the hem across the ‘shoulders’ of the tag and then sew the other three sides to the tag

6. Trim the plastic, I angled my scissors so I could trim it just smaller than the fabric

7. Insert card or paper with your details on

What a great little project. Inspired by Riley Blake designs.

If you embroidered or monogrammed or vinyled a design onto the fabric first,  these would make fab personalised tags


Plumbrillo

A plum bonanza! Found this recipe by Jane Hornby on Good Food Magazine and it worked well (eventually after hours – literally – of boiling down). Below is my recipe adapted, based on comments on her recipe and my experience.

Screen Shot 2018-08-03 at 13.43.26.png

How to;

Weigh and then halve the plums (no need to remove stones) and cover with water in a robust deep pan. Simmer for about 45 minutes until pulpy and deep red in colour.

Remove the stones and then whizz the pulp with a stick blender. Stir in half the weight of jam (preserving) sugar ie if 2 kilo of plums, add 1 kilo of sugar. Once dissolved heat on high for about 25 minutes  – be prepared for much longer if your plums are watery, it needs to be so thick that as you stir the spoon leaves a thick trail.  Take care not to let the mixture catch on the bottom of the pan so keep stirring as it thickens.

Decant into silicone moulds or ramekins and keep chilled until you next have a posh cheeseboard.

This was soooo much easier than membrillo made with quinces.


‘Use what you have’ lavender bags

D30CB97B-0C48-4ACC-A8C4-13785FDAB47B.jpeg
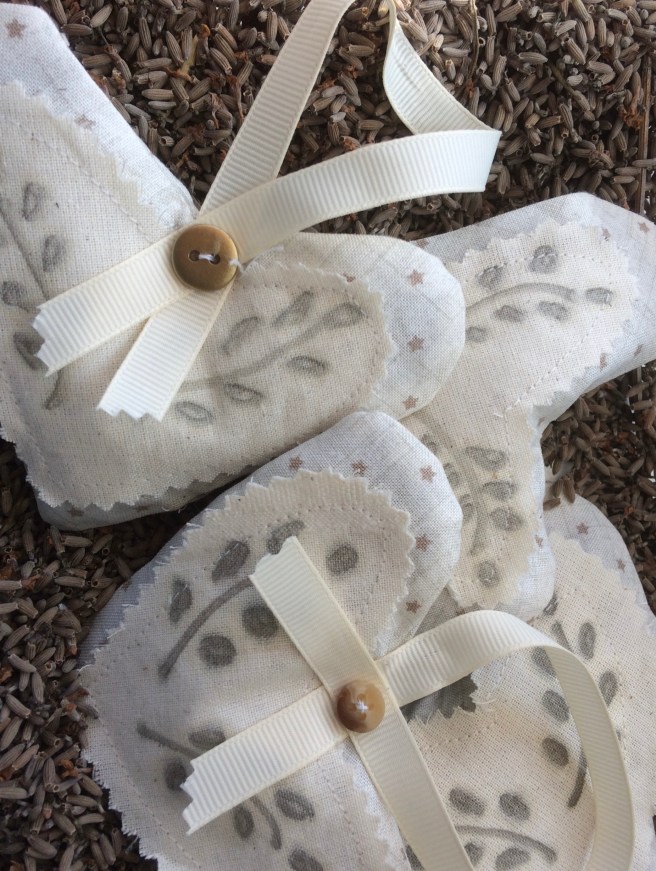
I am determined to use up some of the fabric heap. So lavender bags makes a little (very little) dent …

heart templates hand drawn as half heart on paper before pinning to plain (smaller heart) and patterned  fabric. I cut the smaller heart out with pinking shears and then sketched a design on with a gold sharpie before sewing it on a bigger heart

simple machine sewing of two large hearts right sides together before turning right side out, stuffing with dried lavender then hand stitching an odd button and some offcuts of ribbon on for hanging

CD335CAC-5996-46FB-BB1F-0CE9FB6E37D3.jpegwhen the lavender is finished I plan to make some in Christmas colours scented with cinnamon and cloves, well one day


Essential oil scenters

950AA4D2-D2DA-4009-86A5-960D8D9DB5BF

I ordered a bag of wool felted balls to try and expand my use of essential oils.

To make a car scenter that will clip on an air vent-  hot glue four 1cm balls on either side of a wooden clothes peg. Positioning as I did, leaving tip and base of the peg free, is the most practical.

Drip on essential oil or perfume and clip in place. Top up when you think the scent has dissipated.

To make a bracelet style scenter that will hook around the rear view mirror or clothes hangers in a wardrobe –

Take about 60cm or 24 inches of strong cotton and fold it in half. Double knot about 3cm or an inch in from the folded end to make a loop as shown on the left of the pictures above.

Thread both strands of cotton through your needle and then thread through the balls. I used 10 per bracelet. Finish by threading on a button and secure it well before cutting off  any spare tails of thread.

When ready to use drop on chosen essential oil and hook button through the loop.